Buying a Used Telescope: A Complete Inspection Checklist

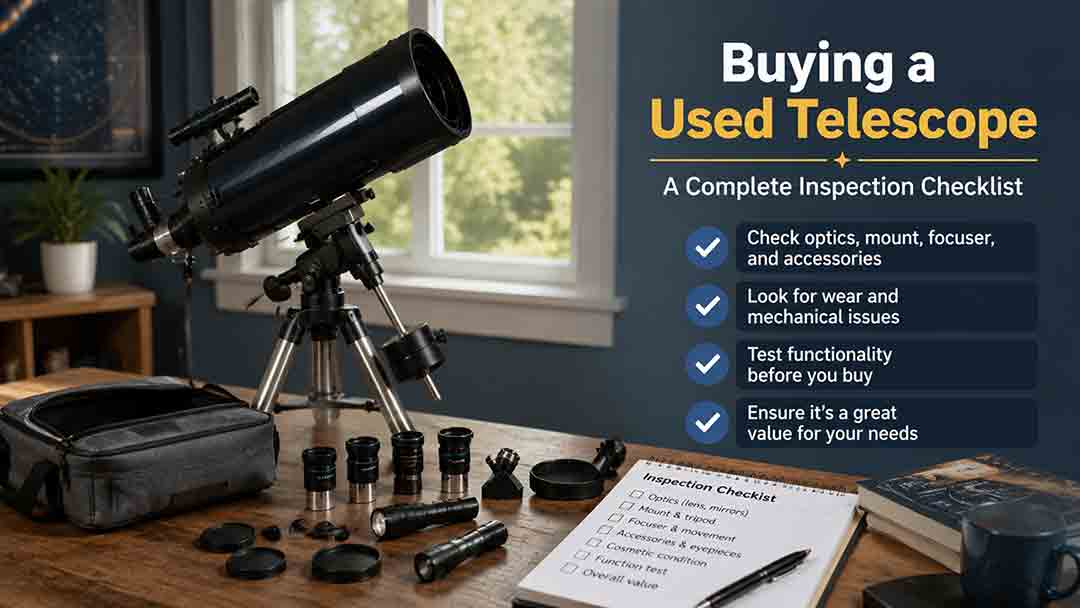
Buying a Used Telescope: A Complete Inspection Checklist
Before buying a used telescope, verify the exact model and included parts, inspect every optical surface without touching it, test the focuser and mount through their full motion, power and slew all electronics, and view a distant target or centered star through a known-good eyepiece. Walk away when ownership, coating condition, structural safety, or electronic function cannot be verified.
Key Takeaways
- Dust and minor cosmetic marks are usually less important than fungus, damaged coatings, bent hardware, water exposure, missing proprietary parts, or unreliable electronics.
- Test the complete system, not only the optical tube: a weak mount, damaged tripod, bad controller, or unavailable cable can make an apparently good telescope unusable.
- Use the exact model manual and current replacement cost when evaluating missing parts, compatibility, firmware, and repair risk.
- A night test is valuable, but poor seeing, thermal imbalance, or miscollimation can imitate an optical defect.
- Price the telescope from its verified condition and repair-adjusted value, not from the seller’s original purchase price.
This guide helps buyers prepare questions, inspect refractors, Newtonians, Schmidt-Cassegrains, Maksutovs, mounts, eyepieces, cameras, and electronic accessories, perform safe functional tests, identify deal-breaking problems, and calculate a defensible offer.
Editorial note: This guide is based on manufacturer manuals, consumer-protection guidance, authoritative astronomy resources, and practical inspection criteria rather than hands-on testing of a specific used telescope listing.
What Should You Check Before Buying a Used Telescope?
Use a seven-part inspection: identity, ownership, completeness, optical condition, mechanical operation, electronic function, and real-world image performance.
| Inspection area | What must be verified | Major red flag |
|---|---|---|
| Model identity | Exact model, aperture, focal length, revision, serial number | Seller cannot identify the telescope |
| Ownership | Plausible history and proof of purchase when available | Removed serial label or inconsistent ownership story |
| Completeness | Optical tube, mount, tripod or base, controller, cables, caps, weights | Missing proprietary or discontinued part |
| Optics | Coatings, fungus, chips, haze, separation, mirror condition | Flaking coating, internal fungus, cracked corrector |
| Mechanics | Focuser, bearings, clutches, threads, dovetail, tripod | Bent shaft, loose cell, swollen base, unsafe lock |
| Electronics | Power, both axes, controller, ports, battery compartment | Intermittent power, motor error, corrosion |
| Image test | Focus, collimation, tracking, star image, known-good eyepiece | Cannot reach focus or form a usable image |
A used telescope can be a strong value because many optical systems remain useful for decades when stored correctly. Age alone is not the deciding factor; condition, supportability, completeness, and safe function matter more.
Which Problems Are Cosmetic, Repairable, or Deal-Breaking?
Classify every finding before negotiating. Do not treat all visible wear as equivalent.
Usually cosmetic
These issues may justify a modest price adjustment but often do not affect performance:
- Scratches on the outside of the optical tube
- Worn paint on a tripod or Dobsonian base
- Faded labels
- Dust on an accessible optical surface
- A missing generic dust cap that has an available replacement
- Minor wear on a case
- Cosmetic marks on counterweights
- Normal wear on eyepiece barrels
Potentially repairable
Proceed only after confirming parts, cost, and skill requirements:
- Dirty but intact optics
- A stiff conventional focuser
- Worn Dobsonian bearing material
- Loose but undamaged tripod hardware
- Replaceable hand-controller cable
- Missing common-size diagonal
- Corroded external fasteners
- Old rechargeable battery pack
- Outdated but supported firmware
- Routine Newtonian or SCT collimation
High-risk or deal-breaking
Walk away or obtain a professional repair quote before paying when you find:
- Fungus between lens elements
- Peeling, cloudy, or heavily oxidized optical coating
- Cracked corrector plate, objective, mirror, filter, or eyepiece lens
- Lens-element separation
- Bent optical tube affecting alignment
- Loose primary mirror or lens cell
- Water inside sealed electronics
- Burned connectors or repeated power failure
- Missing proprietary controller with no verified replacement
- Severe battery leakage reaching circuit boards
- Damaged mount axis that binds or slips
- Unverified solar filter damage
- Removed or altered serial information
- Seller refusal to permit reasonable inspection
The correct decision depends on price and repair access. A damaged premium telescope can still be a rational restoration project for an experienced buyer, but it should not be presented as a ready-to-use instrument.
What Questions Should You Ask the Seller Before Meeting?
Ask for specific facts and photographs before spending time or travel money.
Identity and history questions
Ask:
- What is the exact brand and model number?
- What aperture and focal length are printed on the telescope?
- What is the serial number, and is the label intact?
- When and where was it purchased?
- Is the original receipt available?
- Has the telescope had more than one owner?
- Why is it being sold?
- Where has it been stored?
- Has it been exposed to rain, flooding, salt air, smoke, or persistent humidity?
- Has it ever been dropped or shipped after the original purchase?
A receipt is not always available for older equipment, but the seller’s explanation should remain consistent.
Repair and modification questions
Ask:
- Have the optics ever been removed?
- Has a corrector plate, objective cell, mirror cell, or focuser been rotated?
- Has the mirror been recoated?
- Has the mount been opened or lubricated?
- Have gears, bearings, encoders, boards, or motors been replaced?
- Is any modification reversible?
- Does every original function still work?
- Are there known pointing, tracking, power, or connectivity errors?
- Has the telescope been used for solar observing?
- Is any warranty transferable? Verify this with the manufacturer rather than assuming.
Modifications are not automatically bad. They become risky when the work is undocumented, irreversible, electrically unsafe, or incompatible with current support.
Completeness questions
Request one photograph showing the complete package and separate photographs of:
- Optical tube
- Objective, corrector, or primary mirror
- Focuser and rear port
- Dovetail or mounting rings
- Mount head
- Tripod or Dobsonian base
- Hand controller
- Power supply
- Counterweights and shaft
- Cables and adapters
- Finder
- Diagonal
- Eyepieces and filters
- Cases
- Serial labels
Ask the seller to identify every included item. A photograph containing an accessory does not necessarily mean it is included.
How Can You Verify the Exact Model and Compatibility?
Match the telescope to an official manual, specification page, or support document before inspecting it.
Product names can be reused across generations. The same model family may have different:
- Controllers
- Power connectors
- Firmware paths
- Dovetail standards
- Tripod interfaces
- Focusers
- Optical designs
- Included accessories
- Camera drivers
- App requirements
Use the manufacturer’s manual library to confirm:
- Correct operating voltage and polarity
- Required controller
- Original tripod or base
- Counterweight requirement
- Assembly sequence
- Optical design
- Collimation method
- Firmware or driver support
- Storage and cleaning restrictions
Do not power a used mount with an unverified adapter. Matching plug shape does not prove correct voltage, polarity, or current capability.
How Should You Evaluate the Seller and Transaction?
Use a traceable marketplace, verify the item independently, and avoid payment methods that remove practical recourse.
The U.S. Federal Trade Commission advises online buyers to research products and sellers and warns that demands for gift cards, cryptocurrency, wire transfers, or other hard-to-reverse methods are common scam indicators.[1][2]
Transaction warning signs
Be cautious when the seller:
- Refuses a current photograph
- Uses only copied product images
- Cannot show the serial label
- Pressures immediate payment
- Offers shipping far below realistic cost
- Changes the payment recipient
- Claims a third party will handle delivery without verifiable terms
- Refuses a platform-supported payment method
- Requests gift cards, cryptocurrency, or an unexpected wire
- Will not state return or inspection terms in writing
- Offers a price far below comparable listings without a credible reason
Safer practices
- Keep messages on the marketplace when practical.
- Review the platform’s current buyer-protection terms.
- Save the listing, photographs, messages, and payment record.
- Confirm who pays shipping, insurance, taxes, and return freight.
- Meet in a safe location or bring another person when inspecting at a private property.
- Do not carry more cash than necessary.
- Obtain a written receipt with model, serial number, included items, price, date, and seller identity where lawful and appropriate.
- Check local rules when buying high-value used property.
Buyer-protection policies and local law change. Verify current terms rather than relying on an older article.
What Should You Bring to an In-Person Inspection?
Bring only tools that support non-destructive testing. Do not disassemble the seller’s telescope without explicit permission.
Basic inspection kit
- Printed or downloaded official manual
- Checklist and pen
- Phone with camera and notes
- Small diffuse flashlight
- White card or clean sheet of paper
- Known-good eyepiece in the correct barrel size
- Correct battery pack or manufacturer-approved power supply
- Fresh disposable batteries when the device uses them
- Compatible data cable when software testing is agreed
- Collimation cap or Cheshire for a Newtonian
- Small ruler or tape measure
- Clean nitrile gloves for handling dirty mechanical parts
- Lens cap or towel to protect removed accessories
- Another person for large equipment
Do not bring cleaning fluid and begin cleaning during the inspection. Dirt can hide damage, but an improvised cleaning attempt can create damage and a dispute.
Why use a known-good eyepiece?
A damaged eyepiece, diagonal, or Barlow can make a healthy telescope appear defective. Test with an accessory whose behavior is already understood.
When the telescope requires a diagonal or unusual adapter to reach focus, confirm the complete optical path is present.
How Do You Inspect the Optical Tube and Exterior?
Start with structural alignment, impact damage, corrosion, fasteners, and mounting interfaces before looking at the glass or mirrors.
Optical-tube checklist
Inspect for:
- Deep dents
- Crushed tube sections
- Loose seams
- Cracks around mounting points
- Bent dovetail bars
- Damaged tube rings
- Missing screws
- Non-original holes
- Corrosion
- Water staining
- Smoke or chemical odor
- Insect debris
- Loose internal parts
- Damaged vents or fans
- Cross-threaded accessory ports
Gently rotate or reposition the tube as the manual permits. Listen for loose components, but do not shake the telescope.
A small exterior dent may be cosmetic. A dent near the focuser, corrector cell, objective cell, mirror cell, or dovetail can affect alignment or structural safety.
Check every thread and interface
Test without forcing:
- Eyepiece holder
- Visual back
- Camera thread
- Finder shoe
- Dovetail clamp
- Tube-ring bolts
- Counterweight shaft
- Tripod attachment
- Accessory tray
- Dew shield
- Lens or mirror caps
Cross-threaded proprietary parts can be expensive to replace even when the optics are healthy.
How Do You Inspect a Used Refractor?
Look for clear, evenly coated lens surfaces, an intact cell, smooth focus, and no fungus, separation, chips, or internal haze.
Objective-lens inspection
Use diffuse room light and view the objective from several angles.
Check for:
- Chips at the edge
- Cracks
- Fungus patterns
- Cloudy internal surfaces
- Coating scratches
- Coating discoloration
- Oil or moisture between elements
- Separation patterns near the edge
- Retaining-ring damage
- Evidence that the cell was opened
- Uneven gaps or shifted elements
A few dust particles are normal. An intense flashlight can make harmless dust look severe, so do not use flashlight appearance as the sole decision criterion.
Focuser and tube inspection
Move the focuser through its full travel.
Confirm:
- Smooth movement
- No grinding
- No bent drawtube
- Reasonable lateral play
- Working tension and lock controls
- Intact fine-focus mechanism, if present
- Secure rotator
- Undamaged threads
- Ability to hold the expected diagonal and eyepiece load
Rack-and-pinion backlash and minor stiffness may be serviceable. A drawtube that visibly tilts or cannot hold focus is more serious.
What about chromatic aberration?
An achromatic refractor may show expected false color on bright targets. That is a design characteristic, not automatically damage.
Compare the telescope with its published design. Unexpected asymmetry, inability to focus, or severe color on one side of the image may indicate alignment, diagonal, eyepiece, or atmospheric problems.
How Do You Inspect a Newtonian or Dobsonian Reflector?
Inspect mirror coatings, secondary support, spider vanes, focuser alignment, mirror cell, base condition, and collimation without touching either mirror.
Primary-mirror inspection
Look from the front under moderate ambient light.
Check for:
- Broad coating haze
- Peeling or flaking
- Large scratches
- Corrosion
- Fungus
- Water damage
- Adhesive contamination
- Chips
- Mirror clips pressing tightly
- Missing or damaged center mark
- Debris that suggests open storage
Ordinary dust is not a reason to reject a reflector. Celestron and other manufacturers advise against unnecessary optical cleaning because repeated contact can damage coatings.[3]
A flashlight behind the mirror may reveal tiny coating pinholes that appear alarming but do not necessarily predict visible performance. Judge the overall coating, reflected image, and actual star test.
Secondary-mirror and spider inspection
Check:
- Secondary coating
- Holder security
- Spider-vane straightness
- Center bolt condition
- Adjustment screws
- Evidence of dropped tools
- Rotation of the holder
- Cracks in plastic support parts
Do not loosen the secondary during a sales inspection. A loose holder can fall onto the primary mirror.
Mirror cell and cooling fan
Inspect:
- Collimation knobs
- Locking screws
- Springs
- Cell mounting bolts
- Fan operation
- Fan guard
- Wiring and connector
- Mirror support pads
- Signs of overtightened clips
The exact screw functions vary. Use the manual rather than turning every rear-cell screw.
Dobsonian base
Check for:
- Swollen particleboard
- Delaminated edges
- Warping
- Water staining
- Loose altitude bearings
- Cracked side panels
- Missing feet
- Sticking or overshooting motion
- Damaged tension system
- Base rubbing against the ground board
Move the telescope slowly in altitude and azimuth. Motion should be controllable without sudden release.
How Do You Inspect an SCT or Maksutov?
Inspect the corrector, secondary assembly, rear port, focuser, primary-mirror movement, and collimation while keeping the optical assembly intact.
Corrector and front assembly
Check for:
- Cracks
- Edge chips
- Fungus
- Internal haze
- Coating damage
- Loose retaining ring
- Rotated or disturbed corrector markings
- Loose secondary housing
- Improvised fasteners
- Cleaning streaks reaching the cell edge
Do not remove the corrector plate or secondary housing. Celestron’s SCT guidance treats collimation as an optical alignment task, while internal disassembly is not ordinary buyer inspection.[4]
Focuser and image shift
Turn the focus knob gently through a meaningful range.
Watch for:
- Roughness
- Binding
- Excessive free movement
- Focus that never reaches the target
- A large image jump when reversing focus direction
- Unusual scraping
- Primary movement that appears unsecured
Some image shift can occur in moving-primary designs. Severity matters: the target should not repeatedly leave a moderate-power field during ordinary focusing.
Rear port and accessories
Inspect the:
- Visual back
- Reducer or corrector
- Diagonal
- Threaded adapters
- Focus motor
- Cooling vents
- Rear cap
Missing proprietary adapters can turn an attractive optical tube into an incomplete system.
How Do You Inspect Eyepieces, Diagonals, Filters, and Finders?
Treat accessories as separate optical products and value only the items that are complete, clean, compatible, and useful to you.
Eyepieces
Check for:
- Scratched eye or field lens
- Fungus
- Internal haze
- Loose elements
- Rattling
- Cross-threaded filter threads
- Damaged barrel
- Hardened or torn eye guard
- Sticky grease
- Missing caps
Rotate the eyepiece while viewing a target. A defect that rotates with the eyepiece is likely in the eyepiece rather than the telescope.
Diagonals
Confirm whether the diagonal is a prism or mirror design.
Inspect:
- Mirror or prism surface
- Housing screws
- Barrel alignment
- Compression ring
- Eyepiece lock
- Thread condition
- Evidence of a dropped prism
- Coating deterioration
A poor diagonal can reduce contrast or prevent accurate focus.
Filters
Check:
- Exact filter type
- Coating condition
- Glass security
- Thread condition
- Delamination
- Scratches
- Storage case
- Correct size
Do not assign meaningful value to an unknown filter solely because it appears colored.
Solar filters
Treat any uncertain solar filter as unsafe.
Walk away from or exclude from the valuation any solar filter with:
- Punctures
- Tears
- Creases
- Loose mounting
- Separation
- Scratches of uncertain depth
- Improvised repairs
- Unknown material
- Missing manufacturer identification
A storage case or seller assurance does not prove a solar filter is safe. Replace or obtain manufacturer guidance when integrity is uncertain.
Finders and red-dot sights
Check alignment adjustment, bracket fit, battery compartment, reticle illumination, lens condition, and secure mounting.
A missing finder is easy to replace only when the shoe and mounting standard are known.
How Do You Inspect a Manual Mount and Tripod?
The mount should support the telescope securely, move smoothly, lock reliably, and settle without excessive vibration.
Alt-azimuth mount
Test:
- Both axes through full practical travel
- Slow-motion controls
- Clutches
- Tension adjustment
- Balance
- Locking hardware
- Saddle and safety stop
- Tripod spreader
- Leg clamps
- Feet
The tube should not fall when a clutch is released unexpectedly. Support the telescope during testing.
Equatorial mount
Check:
- Right ascension and declination motion
- Worm engagement
- Backlash
- Clutch operation
- Polar-axis hardware
- Counterweight shaft
- Counterweight locks
- Setting circles, if present
- Fine-motion controls
- Motor couplings
A small amount of backlash can be normal. Binding, repeated slipping, metal debris, or a visibly bent shaft requires further evaluation.
Tripod
Inspect for:
- Cracked castings
- Bent legs
- Loose rivets
- Missing bolts
- Damaged leg locks
- Corrosion
- Spreaders that do not lock
- Improvised repairs
- Mismatched mount interface
Extend each leg and apply only normal operating load. Do not perform a destructive stress test.
How Do You Test a Computerized or GoTo Mount?
Power the mount with the correct supply, test both axes at several speeds, verify the controller and connections, and check for repeatable errors.
Power inspection
Before power-up:
- Verify voltage and polarity from the official manual.
- Inspect the battery compartment.
- Look for white, green, or brown corrosion.
- Check the power socket for looseness or heat damage.
- Confirm the adapter belongs to the mount.
- Secure the telescope and counterweights.
Never test a mount using a random adapter.
Functional test
Test:
- Power-on sequence
- Hand-controller display
- Keypad buttons
- Both axes at low and high speed
- Direction changes
- Stop response
- Tracking mode
- Home or index sensors, when present
- GPS, Wi-Fi, Bluetooth, or app connection, when included
- USB or serial connection, when practical
- Error messages
- Motor sound
- Cable movement through the full range
A daytime test cannot fully prove pointing accuracy, but it can reveal dead motors, failed buttons, encoder problems, connection loss, and severe mechanical binding.
Firmware and software
Use the official support page to check:
- Whether the controller generation is supported
- Compatible operating systems
- Required drivers
- Firmware-update path
- Account or app requirements
- Availability of replacement cables
- Whether the seller has removed personal accounts
Do not update firmware during the initial inspection unless both parties agree and a failed update will not create a dispute. First record the existing version and verify basic operation.
How Do You Inspect a Used Astronomy Camera or Smart Telescope?
Confirm the exact sensor or device version, connect with official software, capture a real image, inspect power and ports, and verify account transfer.
Astronomy camera checklist
Check:
- Model and sensor
- Protective-window condition
- USB and power ports
- Cooling fan
- Cooler response
- Dew-heater function, if present
- Cable stability
- Driver recognition
- Short exposure
- Long exposure
- Temperature reading
- Condensation
- Desiccant history
- Thread condition
ZWO manuals state that many cooled cameras use sealed sensor chambers and discourage casual opening because moisture can enter the chamber.[5] Do not open a camera during inspection.
Smart telescope checklist
Verify:
- Device powers on
- Battery charges normally
- App connects
- Account can be unbound or transferred
- Internal storage is accessible
- Motors move without error
- Plate solving or target acquisition works when conditions permit
- Image capture saves correctly
- Firmware support remains available
- Tripod and charger are included
- Seller data is removed
A smart telescope that cannot be released from the seller’s account may be unusable even when the optics are intact.
How Should You Perform a Daytime Optical Test?
Use a distant stationary target, keep the telescope away from the Sun, and verify focus, contrast, alignment, and mechanical behavior at low and moderate magnification.
Solar safety: Never point an unfiltered telescope at or near the Sun. Do not sweep the sky for a daytime target. Use a terrestrial object in the opposite direction from the Sun.
Daytime test sequence
- Set up the telescope according to the manual.
- Aim at a distant sign, antenna, tree branch, or high-contrast object.
- Start with low magnification.
- Confirm the image reaches focus.
- Move the focuser through both sides of focus.
- Check that the image remains reasonably centered.
- Increase to moderate magnification.
- Test mount motion and vibration.
- Rotate the diagonal or eyepiece to isolate accessory defects.
- Check the full focus range with the included optical path.
Daytime turbulence can soften distant images. Do not diagnose optical quality from a target viewed across a hot roof or road.
What a daytime test can reveal
- Failure to reach focus
- Severe misalignment
- Damaged focuser
- Loose optical element
- Major haze
- Incorrect adapter
- Vibration
- Poor mount motion
- Diagonal or eyepiece defect
- Gross chromatic or geometric problem
It cannot reliably prove diffraction-limited optical quality.
How Should You Perform a Nighttime Star Test?
Use a centered bright star at suitable magnification after the telescope has stabilized, and separate collimation, seeing, thermal effects, and optical defects.
Basic night test
- Allow the telescope to approach outdoor temperature.
- Check or adjust collimation as the design permits.
- Select a bright star at a useful altitude.
- Center it precisely.
- Focus carefully.
- Examine the in-focus image during steady moments.
- Defocus only slightly to check symmetry.
- Recenter after every mount movement.
- Compare more than one star or target.
- Test a planet or the Moon when available.
Sky-Watcher manuals explain that centered, slightly defocused star images can help evaluate collimation in reflecting telescopes.[6]
Do not overinterpret one star test
A distorted image may come from:
- Poor atmospheric seeing
- Telescope not thermally stable
- Misalignment
- Pinched optics
- Dew
- A low target
- Mount vibration
- Diagonal error
- Eyepiece error
- Observer accommodation
A complete optical-quality star test requires experience and controlled conditions. When the purchase is expensive, arrange an experienced independent inspection.
How Can You Tell Dust From Coating Damage or Fungus?
Dust sits on a surface and usually looks like isolated particles; coating damage changes reflection or transmission; fungus often forms branching, web-like, or circular growth patterns.
Dust
Typical characteristics:
- Discrete particles
- Uneven distribution
- More visible under bright oblique light
- Little effect in ordinary amounts
- Potentially removable with the approved method
Coating deterioration
Possible signs:
- Broad dull areas
- Uneven reflectivity
- Peeling
- Flaking
- Iridescent patches
- Corrosion near edges
- Persistent haze after surface dust is excluded
Cleaning does not restore a failed coating.
Fungus or internal contamination
Possible signs:
- Branching or web-like marks
- Circular colonies
- Haze between elements
- Growth near lens edges
- Musty storage odor
- Recurrence after superficial cleaning
Do not assume every branching mark is fungus, and do not attempt chemical treatment during inspection. Internal contamination normally requires professional evaluation.
How Do You Separate Telescope Problems From Accessory Problems?
Change one component at a time and keep the target, magnification, and conditions as consistent as possible.
Use this sequence:
- Test with a known-good eyepiece.
- Remove the Barlow.
- Test without a diagonal when the design can focus safely that way.
- Rotate the eyepiece.
- Rotate the diagonal.
- Compare another eyepiece.
- Recheck focus.
- Recenter the target.
- Check collimation.
- Repeat after thermal stabilization.
| Symptom | Likely area to investigate |
|---|---|
| Defect rotates with eyepiece | Eyepiece |
| Defect rotates with diagonal | Diagonal |
| Image shifts when focuser reverses | Focuser or moving primary |
| Blur changes rapidly from moment to moment | Seeing or thermal currents |
| One side never focuses like the other | Alignment or optical problem |
| Mount jumps during tracking | Gear, balance, encoder, or controller |
| Image is fine manually but GoTo fails | Alignment procedure, location/time data, encoder, firmware, or mount |
| Camera spots stay fixed between telescopes | Camera window or sensor system |
This process does not replace professional optical testing, but it prevents a common mistake: blaming the optical tube for a bad accessory.
How Should You Calculate a Fair Used-Telescope Price?
Start with current local comparable value, then subtract verified costs and risk while adding only accessories you would actually buy.
Do not calculate value from the seller’s original receipt alone. Telescope prices, included accessories, support, and replacement availability change.
Repair-adjusted value framework
Use:
Offer ceiling = comparable working value − missing-part cost − immediate repair cost − uncertainty reserve + useful verified accessory value
Definitions:
- Comparable working value: Recent local or platform prices for the same model, revision, and condition
- Missing-part cost: Delivered price of necessary replacements
- Immediate repair cost: Written estimate or realistic parts-and-labor allowance
- Uncertainty reserve: Amount retained for untested or unsupported functions
- Useful accessory value: Your realistic used value, not the seller’s retail total
Hypothetical calculation example
Assume the following illustrative figures:
- Comparable complete working package: $900
- Missing proprietary cable: $60
- Battery-compartment repair estimate: $90
- Untested tracking risk reserve: $120
- Useful verified eyepiece value: $70
Calculation:
$900 − $60 − $90 − $120 + $70 = $700
The $700 result is a negotiation ceiling for this hypothetical buyer, not a universal market price. If tracking later tests successfully, the uncertainty reserve may change. If the eyepiece is unwanted, its value should be zero to that buyer.
Do not overvalue bundles
A package may include many low-value or incompatible items.
Value separately:
- Optical tube
- Mount
- Tripod or base
- Controller
- Power supply
- Essential adapters
- Eyepieces
- Filters
- Camera
- Cases
- Specialty accessories
Do not add original retail prices. Used accessory value depends on condition, compatibility, current demand, and whether the buyer needs it.
When Should You Buy, Negotiate, or Walk Away?
Buy when:
- Model and ownership are credible
- Serial information is intact
- Essential parts are complete
- Optics have only acceptable wear
- Mechanics operate safely
- Electronics pass agreed tests
- Image performance is consistent with the design
- Repair risk is low
- Price reflects actual condition
- Transport can be handled safely
Negotiate when:
- Defects are documented and repairable
- Replacement parts are available
- Missing accessories have known costs
- Cosmetic wear is substantial
- Batteries are expired
- Cleaning or collimation is required
- One nonessential function remains untested
- The seller accepts written condition notes
Walk away when:
- The seller blocks reasonable verification
- Ownership is questionable
- Serial information appears altered
- Optical damage is severe or internal
- Structural parts are unsafe
- Electronics fail intermittently
- Required proprietary parts are unavailable
- Repair cost is unknown and material
- Solar equipment is uncertain
- Payment terms resemble a scam
- The deal only works if every optimistic assumption is true
Walking away is not an accusation. It is a risk-management decision.
Real-World Inspection Scenarios
Scenario 1: Dusty 8-inch Dobsonian
The primary mirror looks dusty under a flashlight, but the coating is even, the base is dry, the bearings move smoothly, the focuser works, and a nighttime test produces a sharp centered star after collimation.
Decision: Buy or negotiate modestly.
Dust alone does not justify treating the mirror as damaged. Budget for normal maintenance, not recoating.
Scenario 2: Computerized SCT with intermittent power
The corrector is intact and the optical tube focuses, but the mount resets when slewing, the battery compartment contains corrosion, and the seller cannot provide the original power supply.
Decision: Negotiate only with a verified repair path; otherwise walk away.
A good optical tube does not make an unreliable computerized package fully functional.
Scenario 3: ED refractor with internal branching marks
The tube and focuser look excellent, but branching marks appear between objective elements and cannot be reached from the exterior.
Decision: Walk away unless a qualified service provider gives a written, economically acceptable repair assessment.
The buyer should not assume internal fungus can be removed without affecting spacing, alignment, or coatings.
Scenario 4: Premium eyepieces hiding a weak telescope
A package includes several desirable eyepieces, but the mount is unstable and the optical tube has a bent dovetail.
Decision: Value the accessories separately.
Do not allow attractive accessories to hide an unsafe or unusable main system.
What Are the Pros and Cons of Buying Used?
Advantages
- Lower acquisition cost
- Access to discontinued designs
- Better equipment within a fixed budget
- Accessories may already be included
- Depreciation may be lower after purchase
- Local inspection may reveal the exact condition
- Established models often have known support information
Limitations
- Warranty may be absent or nontransferable
- Hidden damage is possible
- Shipping can create new damage
- Proprietary parts may be unavailable
- Batteries and electronics age
- Previous modifications may be undocumented
- Return rights may be limited
- Optical service can exceed the expected savings
Used equipment is not automatically better value. The savings must remain after necessary repairs, missing parts, transport, and risk.
What Buying Mistakes Should You Avoid?
| Mistake | Why it creates risk | Better approach |
|---|---|---|
| Buying from one dark photograph | Damage and missing parts remain hidden | Request structured current photos |
| Judging optics by dust alone | Flashlights exaggerate harmless particles | Inspect coatings and test performance |
| Ignoring the mount | A good tube on a failed mount is not a complete system | Test every axis and lock |
| Using a random power supply | Wrong polarity or voltage can damage electronics | Verify the manual first |
| Skipping a known-good eyepiece | A bad accessory can imitate telescope failure | Bring a verified eyepiece |
| Assuming GoTo power-on proves operation | Motors, encoders, tracking, or ports may still fail | Test functions systematically |
| Valuing every accessory at retail | Bundles often contain unwanted or obsolete items | Assign realistic individual value |
| Updating firmware before basic testing | A failed update can complicate diagnosis | Record version and test first |
| Cleaning during inspection | Cleaning can damage optics or hide responsibility | Inspect first and clean after purchase |
| Ignoring shipping method | Poor packaging can destroy a good telescope | Agree on original-style protection and insurance |
| Trusting an unknown solar filter | Damage may cause permanent injury | Exclude or replace uncertain filters |
| Paying through an irreversible method | Recovery may be difficult after fraud | Use traceable protected payment terms |
Complete Used-Telescope Inspection Checklist
Before arranging the inspection
- Exact brand and model confirmed
- Aperture and focal length confirmed
- Serial label photographed
- Official manual downloaded
- Seller history and reason for sale recorded
- Storage history discussed
- Drop, water, smoke, salt, and repair history discussed
- Modifications documented
- Complete package photographed
- Missing parts identified
- Current replacement support checked
- Payment and return terms recorded
- Shipping or meeting plan confirmed
Optical tube and structure
- No serious dents or cracks
- Dovetail or rings are straight and secure
- No loose internal component
- No severe corrosion or water staining
- Threads are not cross-threaded
- Caps fit correctly
- Focuser travels fully
- Focuser holds a normal load
- Finder shoe is intact
- Fans and vents are undamaged
Refractor optics
- No objective crack or chip
- No internal fungus
- No lens separation
- No broad coating failure
- Lens cell appears undisturbed
- Dew shield operates normally
- Image reaches focus
- Expected color correction matches the design
Newtonian or Dobsonian optics
- Primary coating is broadly even
- No large scratch, flaking, or corrosion
- Secondary coating is acceptable
- Spider and holder are secure
- Mirror cell is complete
- Collimation hardware works
- Mirror clips are not visibly clamping the surface
- Cooling fan works
- Base is not swollen or warped
- Altitude and azimuth motion are controllable
SCT or Maksutov optics
- Corrector is not cracked
- No internal fungus or severe haze
- Secondary housing is secure
- Corrector retaining hardware appears intact
- Rear port threads are good
- Focus knob moves smoothly
- Image shift is acceptable
- Telescope reaches focus
- Collimation can be evaluated on a centered star
Mount and tripod
- Both axes move through their range
- Clutches hold safely
- No severe binding or slipping
- Backlash is understood
- Saddle and safety stops work
- Counterweights and locks are complete
- Counterweight shaft is straight
- Tripod legs and clamps are sound
- Spreader or tray locks correctly
- Vibration is acceptable at moderate power
Electronics
- Correct power specification confirmed
- Battery compartment is clean
- Mount powers on reliably
- Hand controller display and keys work
- Both motors work at several speeds
- No repeating motor error
- Tracking mode activates
- GPS, Wi-Fi, or app connects when included
- Required ports and cables work
- Firmware and driver support checked
- Seller account is removed from smart equipment
Accessories
- Eyepiece lenses are intact
- Eyepiece elements do not rattle
- Diagonal surface and alignment are acceptable
- Filter coatings and threads are intact
- Finder works and mounts securely
- Cases are dry and free from mold
- Chargers and adapters are correct
- Solar filters are excluded when integrity is uncertain
- Every accessory is compatible and useful
Performance and transaction
- Daytime focus test completed safely
- Night test completed when practical
- Known-good eyepiece used
- Thermal and seeing limitations considered
- Defects isolated from accessories
- Repair-adjusted value calculated
- Receipt lists model and serial number
- Included items are written down
- Payment is traceable
- Transport or shipping protection is adequate
How We Developed This Checklist
This guide uses six inspection principles:
- Verify identity before condition: The exact model and revision determine compatibility and support.
- Separate cosmetics from function: Dust and paint wear are different from coating failure, structural damage, or electronic faults.
- Test the complete system: Optical tubes, mounts, controllers, cables, and accessories must work together.
- Change one variable at a time: Known-good accessories help isolate defects.
- Price verified condition: Missing parts, repairs, and uncertainty reduce value.
- Preserve transaction recourse: Documentation and traceable payment reduce avoidable risk.
No used listing, seller, telescope, mount, camera, or accessory was personally tested for this guide.
Should You Buy the Used Telescope?
Buy when the exact model is verified, the optics are fundamentally sound, the mount is safe, electronics pass meaningful tests, required parts remain available, and the price still makes sense after repairs and uncertainty.
For a simple manual Dobsonian, prioritize mirror coatings, base condition, focuser operation, and smooth movement. For a refractor, prioritize objective condition, lens-cell integrity, focus, and mount stability. For a computerized telescope, treat the controller, motors, ports, power system, and software support as essential parts of the purchase.
For an expensive, vintage, modified, or difficult-to-service instrument, arrange an inspection by an experienced astronomy-club member, telescope technician, or optical service provider before payment.
Frequently Asked Questions
Is it safe to buy a used telescope online?
It can be, but verify the exact item with current photographs, research the seller and model, use the marketplace’s current protected payment process, document the condition, and agree on shipping and return terms. Avoid sellers who demand unusual irreversible payment methods.
How much dust is acceptable on a used telescope?
A modest amount of dust is common and usually less important than fungus, scratches, coating failure, water damage, or structural problems. Do not reject an otherwise sound telescope only because a flashlight reveals particles.
Can you test a telescope during the day?
Yes. A distant terrestrial target can confirm focus, contrast, focuser movement, mount stability, and major optical problems. Keep the telescope pointed safely away from the Sun. A daytime test cannot fully replace a centered-star test.
Is a used computerized telescope riskier than a manual telescope?
It has more systems that can fail, including power inputs, motors, encoders, controllers, ports, batteries, firmware, apps, and accounts. A computerized telescope can still be an excellent purchase when every essential function and support path is verified.
Should you buy a telescope with fungus?
External contamination may be serviceable, but fungus between lens elements, inside a corrector assembly, or in a sealed camera is high risk. Buy only when a qualified repair provider confirms the work, cost, and likely outcome.
Should you buy a used telescope without a warranty?
A missing warranty is not automatically disqualifying, especially for a simple manual telescope. The price should reflect the loss of coverage, and the buyer should verify condition, replacement parts, repair options, and any nontransferable warranty terms.
Sources
Sources were accessed July 30, 2026.
- Federal Trade Commission — Online Shopping
- Federal Trade Commission — A Way to Spot Scams: How Someone Asks You to Pay
- Celestron — Caring for Your Telescope: Maintain, Store, and Ship
- Celestron — SCT and EdgeHD Collimation Guide
- ZWO — Guides & Manuals
- Sky-Watcher — Reflector Telescope Manual and Star-Collimation Guidance
- Celestron — Manuals and Software
- Sky-Watcher — Product Manual Library
- ZWO — Guides and Manuals
- iOptron — Telescope Mount Manuals
- Royal Astronomical Society of Canada — Telescope Basics
- Royal Astronomical Society of Canada — Beginner Telescopes and Accessories
- Sky & Telescope — Choosing Astronomy Equipment
- Celestron — Firmware Update History
More from Telescope Comparisons & Tests
Manual vs GoTo Telescope: Which Is Better for Beginners?
Manual and GoTo telescopes solve different beginner problems. A manual telescope offers simpler setup, fewer electronic dependencies, and often more optical capability within a limited budget, while a GoTo telescope can locate cataloged objects and track them after a successful alignment. This comparison explains why GoTo does not improve aperture, remove light pollution, or automatically make a telescope suitable for long-exposure astrophotography. It compares setup time, tracking, portability, reliability, learning value, power requirements, and total ownership cost. The article also introduces the original TRACK decision framework, an illustrative break-even calculation for session time, five real-world buyer scenarios, separate purchase checklists, and troubleshooting tables for both manual and computerized systems. Beginners can use the guide to decide whether they prefer learning sky navigation, managing an electronic alignment workflow, or choosing a push-to system that combines manual movement with digital guidance."
Refractor vs Reflector Telescope for Viewing Planets
A refractor is usually the easier planetary telescope at the same aperture, while a Newtonian reflector usually provides more resolving power for the same budget by offering a larger mirror. This guide compares unobstructed contrast, chromatic aberration, central obstruction, collimation, thermal preparation, mount stability, tracking, magnification, and portability. It explains how each design performs on the Moon, Jupiter, Saturn, Mars, Venus, Uranus, and Neptune, and separates equal-aperture, equal-price, and equal-portability comparisons. A 100 mm versus 150 mm aperture calculation, size recommendations, real-world buyer scenarios, a six-step decision framework, troubleshooting guidance, and a complete buying checklist help readers select a telescope that will deliver useful planetary performance in their actual observing environment.
8-Inch vs 10-Inch Dobsonian: Is the Extra Aperture Worth It?
An 8-inch Dobsonian is the better default purchase for most first-time buyers, while a 10-inch is worth considering when deep-sky performance is the priority and the larger tube can be moved easily. This guide explains the 10-inch telescope’s approximately 56% greater nominal collecting area, higher theoretical resolution, and practical advantages on globular clusters, faint stars, galaxies, and nebulae. It also examines the less obvious tradeoffs: wider and heavier components, faster focal ratios, tighter collimation, more visible coma, larger exit pupils, thermal preparation, storage, vehicle fit, and total ownership cost. A same-series specification example, eyepiece calculations, real-world buyer scenarios, a transport fit test, troubleshooting guidance, and a detailed checklist help readers choose the telescope they are most likely to use regularly
Explore More Topics
How to Choose Your First Telescope: A Beginner’s Buying Guide
Choosing a first telescope requires more than comparing aperture or advertised magnification. This practical beginner’s guide explains how to match a telescope to observing goals, light pollution, storage space, setup tolerance, and interest in visual observing or imaging. It compares refractors, Dobsonian reflectors, compound telescopes, and smart telescopes, then shows how aperture, focal length, focal ratio, magnification, and mount stability affect real use. Readers can use a quick-selection table, the original SPACE decision framework, a worked specification comparison, realistic household scenarios, new and used equipment checklists, and a troubleshooting chart. The guide also explains why a larger aperture cannot fully overcome bright urban skies, what to verify before buying a software-dependent smart telescope, and how to observe the Sun safely. Recommendations are based on authoritative guidance and published specifications rather than hands-on product testing or paid rankings
How Much Should You Spend on Your First Telescope?
Most beginners should plan a complete first-telescope budget of roughly $350–$700, although the right amount depends on observing goals, portability, automation, and whether the buyer wants direct eyepiece viewing or screen-based imaging. This guide explains what different budget ranges can realistically provide, why very low-cost telescope packages require caution, and when spending more for aperture, GoTo control, smart imaging, or compact optics is justified. It also separates visual astronomy from modular astrophotography, calculates total ownership cost, and shows how accessories, power, storage, shipping, and software can change the real price. The original FIRST Budget Test helps readers evaluate favorite targets, included equipment, real-world portability, desired skills, and total cost. Practical scenarios, a buying checklist, common mistakes, troubleshooting guidance, safety information, and current US market examples help beginners choose a stable, complete setup they are likely to use regularly.
Are Smart Telescopes Worth It for Beginners?
Smart telescopes can be worthwhile for beginners who want automated target finding, live-stacked deep-sky images, and a compact system controlled from a phone or tablet. However, they are not a universal replacement for traditional telescopes. Beginners who value direct eyepiece views, high-magnification planetary observing, manual sky navigation, or component-by-component upgrades may prefer a refractor, reflector, or catadioptric telescope. This guide explains how smart telescopes combine optics, cameras, motorized tracking, and image processing; compares them with traditional and modular imaging setups; and examines costs, software dependence, batteries, light pollution, target suitability, and long-term flexibility. It also provides the original WORTH decision framework, a hypothetical cost-per-session example, real-world beginner scenarios, a purchase checklist, common mistakes, and troubleshooting steps. The goal is to help readers choose based on their actual observing style rather than marketing claims or specifications alone