How to Choose Your First Telescope: A Beginner’s Buying Guide

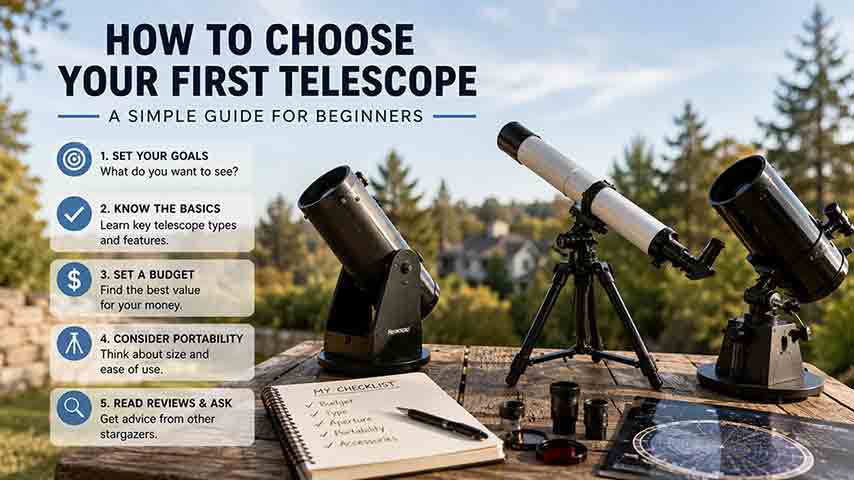
How to Choose Your First Telescope: A Beginner’s Buying Guide
Choose your first telescope by prioritizing a stable mount, enough aperture for your targets, and a setup you can carry and use regularly. For most visual beginners, a small refractor or a 130–200 mm Dobsonian is the simplest starting point. Choose a compact compound telescope for portability or a smart telescope when automated imaging matters more than direct eyepiece observing.
Key Takeaways
- Prioritize aperture and mount stability over advertised magnification. A larger primary lens or mirror collects more light, while a steady mount keeps the view usable.
- Choose for your normal observing location. Storage, stairs, balconies, travel, and setup time can matter more than one extra specification.
- Match the telescope to the experience you want. Visual observing, smartphone snapshots, and long-exposure astrophotography require different equipment.
- Start with a complete, usable system. Include the mount, finder, eyepieces, power needs, and storage—not only the optical tube—in your comparison.
Learning how to choose your first telescope is mainly about avoiding a mismatch between the instrument and your real routine. This guide explains the essential specifications, compares telescope types, provides calculation examples, and gives you a practical decision framework, buying checklist, and troubleshooting table.
Editorial note: This guide is based on published specifications, authoritative documentation, and practical selection criteria rather than hands-on product testing.
Quick Answer: Which Beginner Telescope Fits Your Priority?
Use this table as a starting point, then confirm the complete weight, mount stability, storage needs, and included accessories before buying.
| Your main priority | Practical starting type | Main limitation |
|---|---|---|
| Simple setup and low maintenance | 70–102 mm refractor on a stable alt-azimuth mount | Less aperture for the cost |
| Maximum visual capability for the money | 130–200 mm Dobsonian reflector | Larger storage footprint |
| Compact lunar and planetary observing | 90–127 mm Maksutov-Cassegrain | Narrower field of view |
| Family use in a small space | 100–150 mm tabletop Dobsonian | Requires a rigid table or platform |
| Automated images and easy sharing | Smart telescope | Software, battery, and device dependence |
| Lowest-commitment first step | 7×35 to 10×50 binoculars | Limited planetary detail |
These ranges are editorial starting points, not universal standards. A smaller telescope with a stable mount and convenient storage can be a better first purchase than a larger instrument that is difficult to use.
How Should You Choose Your First Telescope?
The best first telescope is the one that fits what you want to observe, where you will use it, and how much equipment you are willing to carry and set up. Begin with your observing habits, then compare optical designs and specifications.
Use this five-step process:
- Decide whether you want visual observing, image-based observing, or both.
- List the objects you most want to see.
- Define your storage, carrying, and setup limits.
- Choose an optical design and mount that fit those limits.
- Compare complete packages, including essential accessories.
This sequence is more reliable than starting with a brand, a sale price, or a large magnification claim.
What Do You Want to Observe?
Your preferred targets determine which telescope characteristics deserve the most attention. No beginner telescope is equally optimized for planets, wide star fields, faint galaxies, travel, and long-exposure imaging.
| Main interest | Characteristics to prioritize | Practical beginner direction |
|---|---|---|
| Moon and planets | Stable mount, sharp optics, moderate or long focal length | Refractor, Maksutov-Cassegrain, or well-aligned reflector |
| Star clusters and bright nebulae | Wider low-power views and useful aperture | Short-focus refractor or Dobsonian reflector |
| Galaxies and faint nebulae | More aperture and darker skies | Medium-size Dobsonian |
| Quick family sessions | Simple aiming, comfortable viewing, short setup | Tabletop Dobsonian or alt-azimuth refractor |
| Shareable images | Automatic tracking, camera, and image stacking | Smart telescope |
| Long-exposure astrophotography | Accurate motorized tracking and imaging compatibility | Dedicated equatorial imaging system |
A beginner should also set realistic expectations. The Moon, Jupiter, Saturn, bright star clusters, and double stars can be rewarding first targets. Most galaxies and nebulae appear faint and largely colorless through an eyepiece, especially from a bright urban location.
How Does Light Pollution Change Your Telescope Choice?
Light pollution lowers the contrast between faint celestial objects and the background sky. NASA describes it as stray artificial light scattered into the night sky, which is why darker locations reveal more stars and faint deep-sky detail than bright urban locations. (NASA: How to Find Good Places to Stargaze)
A larger aperture collects more light, but it cannot fully restore contrast lost to a bright sky. Urban beginners should prioritize the Moon, planets, double stars, and bright clusters, while treating access to a darker observing location as part of the purchase decision.
A portable telescope that can travel to darker skies may therefore show more useful deep-sky detail than a larger telescope that must remain under strong city lighting.
Which Telescope Type Is Best for a Beginner?
A refractor is usually the simplest low-maintenance option, a Dobsonian usually offers the most visual aperture for the money, and a compound telescope offers a compact tube. A smart telescope is a separate image-first category rather than a direct replacement for every traditional telescope.
Refractor
A refractor uses a front objective lens to gather and focus light.
Pros
- Low routine maintenance
- Closed optical tube
- Crisp views of the Moon, planets, and double stars
- Simple operation when paired with an alt-azimuth mount
Cons
- Large apertures become expensive and heavy
- Long tubes may be awkward to transport
- Inexpensive short achromatic models may show color fringing around bright objects
- Some entry-level packages include weak tripods
Best suited to: beginners who value fast setup, low maintenance, and bright solar-system targets.
Newtonian Reflector
A Newtonian reflector uses a curved primary mirror at the rear of the tube and a smaller secondary mirror near the front.
Pros
- More aperture per unit of cost than many refractors
- Useful for planets, clusters, nebulae, and galaxies
- No chromatic aberration from a front objective lens
- Available in compact tabletop and larger floor-standing versions
Cons
- Mirrors occasionally require alignment, called collimation
- The open tube can collect dust
- The eyepiece position changes as the telescope moves
- A reflector on a lightweight equatorial mount can be frustrating for a beginner
Best suited to: buyers who want strong visual capability and are willing to learn basic alignment.
Dobsonian Reflector
A Dobsonian is a Newtonian reflector on a simple, low-mounted alt-azimuth base.
Pros
- Stable, intuitive manual movement
- Strong aperture value
- Quick setup
- Few mechanical complications
Cons
- Full-size models need floor and storage space
- Manual tracking becomes harder at high magnification
- Tabletop versions require a rigid raised surface
- Standard Dobsonians are not designed for conventional long-exposure astrophotography
NASA’s Night Sky Network notes that a small manual reflector on a tabletop or Dobsonian mount can work well for beginning stargazers because the setup is simple and avoids unnecessary electronics.
Best suited to: visual observers who want the largest aperture they can comfortably carry and store.
Maksutov-Cassegrain or Schmidt-Cassegrain
A compound telescope combines lenses and mirrors to fold a long optical path into a compact tube.
Pros
- Compact tube for its focal length
- Comfortable eyepiece position
- Strong lunar and planetary performance
- Often available with computerized tracking
Cons
- Higher cost per unit of aperture than a Newtonian reflector
- Often narrower fields of view
- May need more time to adjust to outdoor temperature
- Computerized packages require power and alignment
Best suited to: apartment users, frequent travelers, and observers focused on the Moon, planets, and double stars.
Smart Telescope
A smart telescope combines optics, a digital camera, tracking, software, and app control in an integrated system.
Pros
- Automated target finding and tracking
- Image stacking can reveal objects gradually on a screen
- Easy sharing and group viewing
- Lower setup friction for image-focused beginners
Cons
- Often provides little or no traditional eyepiece experience
- Depends on batteries, software, wireless connections, and mobile devices
- Offers less visual aperture per dollar than many manual telescopes
- Software support and device compatibility can change
Best suited to: beginners who mainly want guided imaging and shareable results, and who are comfortable relying on an app, batteries, onboard electronics, and screen-based observing rather than a traditional eyepiece workflow.
What Should You Check Before Buying a Smart Telescope?
A smart telescope is partly a software purchase. Check the following before comparing image examples:
- Whether the app supports your current Android or iOS version
- Whether an account or cloud connection is required
- Whether images can be stored and exported locally
- Which file formats are available
- Whether the telescope still works without internet access
- Expected battery runtime and whether the battery is replaceable
- Firmware-update and recovery procedures
- Warranty coverage for electronics
- The manufacturer’s published software-support policy, if one exists
These checks do not predict how long a product will be supported. They help identify how dependent the telescope is on services and devices outside the optical system.
Refractor vs. Reflector vs. Compound Telescope: Which Is Better?
The better design depends on your priorities. Use the table below to compare ownership experience rather than treating one optical design as universally superior.
| Feature | Refractor | Newtonian/Dobsonian | Compound telescope |
|---|---|---|---|
| Initial setup | Usually simple | Simple on a Dobsonian base | Moderate, especially if computerized |
| Routine maintenance | Low | Occasional collimation | Low to moderate |
| Aperture for the money | Lower | Usually highest | Moderate |
| Portability | Good at smaller sizes | Varies; larger models are bulky | Compact tube |
| Wide-field observing | Good with suitable short-focus designs | Good with suitable focal length and eyepiece | Often narrower |
| Lunar and planetary observing | Strong | Strong when aligned and thermally stable | Strong |
| Deep-sky visual observing | Limited by affordable aperture | Strongest value | Capable but more costly |
| Long-exposure imaging | Depends mainly on the mount | Standard Dobsonian is unsuitable | Possible on a suitable tracking mount |
Choose a refractor for simplicity, a Dobsonian for visual value, or a compound telescope when compactness is a primary constraint.
Worked Example: Comparing Two Telescope Specifications
Suppose a buyer is comparing two unbranded packages. This example shows how to interpret the specifications without assuming that either telescope is universally better.
| Specification | Telescope A | Telescope B |
|---|---|---|
| Optical design | Refractor | Tabletop Dobsonian |
| Aperture | 80 mm | 130 mm |
| Focal length | 900 mm | 650 mm |
| Mount | Alt-azimuth tripod | Tabletop Dobsonian base |
| Likely strength | Moon, planets, quick setup | General visual observing and brighter deep-sky views |
| Routine maintenance | Low | Occasional collimation |
| Important unknown | Tripod stability | Availability of a rigid support surface |
Telescope B has approximately (130 ÷ 80)² = 2.64 times the geometric light-collecting area of Telescope A. That favors faint-object visibility, but it does not settle the purchase.
Telescope A may be the better choice for a user who wants low maintenance and has a genuinely stable tripod. Telescope B may be the better choice for a user who wants more visual reach and has a solid table or platform. If Telescope A has a weak tripod or Telescope B has no usable support surface, the real-world result can reverse the apparent specification advantage.
How Much Aperture Does a Beginner Need?
Aperture is the diameter of a telescope’s main lens or mirror. A larger aperture gathers more light and can resolve finer detail, but it also increases size, weight, cooling requirements, and cost.
NASA’s Telescopes 101 explains that the size of a telescope’s primary mirror or lens determines how much light it can collect. For beginners, the practical goal is not the largest possible aperture; it is the largest aperture that remains easy enough to use regularly.
Practical Starting Ranges
The following ranges are editorial shopping guidelines rather than formal performance guarantees.
| Configuration | Practical starting range | Typical use |
|---|---|---|
| Portable refractor | 70–102 mm | Moon, planets, bright clusters, quick sessions |
| Tabletop reflector | 100–150 mm | Families, small homes, general visual observing |
| Full-size Dobsonian | 150–200 mm | More planetary detail and stronger deep-sky reach |
| Compact Maksutov | 90–127 mm | Moon, planets, double stars, limited storage |
| Astronomy binoculars | 7×35 to 10×50 | Learning the sky and wide-field observing |
NASA’s Night Sky Network describes 7×35 to 10×50 binoculars as a practical first astronomy instrument because they are portable, versatile, and useful for wide-field targets. Good binoculars are often a better entry point than a poorly mounted, very small telescope.
How Much More Light Does a Larger Aperture Collect?
Light-collecting area increases approximately with the square of the aperture.
Relative light gathering = (larger aperture ÷ smaller aperture)²
For example, compare a 150 mm telescope with a 100 mm telescope:
(150 ÷ 100)² = 2.25
The 150 mm aperture therefore has about 2.25 times the geometric light-collecting area of the 100 mm aperture. Real optical systems also lose some light through coatings, obstructions, and transmission, so this calculation is a comparison rather than a prediction of exactly how dramatic the view will appear.
How Do Focal Length, Focal Ratio, and Magnification Work?
These specifications describe different parts of telescope performance. Aperture controls light gathering; focal length helps determine image scale and magnification; focal ratio describes the relationship between focal length and aperture.
Focal Length
Focal length is the effective distance over which a telescope brings light to focus. A longer focal length produces more magnification with the same eyepiece, while a shorter focal length can support wider views when other design factors are comparable.
Focal Ratio
Focal ratio equals focal length divided by aperture.
For a telescope with a 750 mm focal length and a 150 mm aperture:
750 ÷ 150 = f/5
For a visual beginner, focal ratio should not replace aperture, mount stability, and portability as the main buying criteria. Focal ratio becomes especially important when comparing field of view, optical correction, and imaging behavior.
Magnification
Telescope magnification equals telescope focal length divided by eyepiece focal length.
Magnification = telescope focal length ÷ eyepiece focal length
A telescope with a 650 mm focal length produces:
650 ÷ 25 = 26×with a 25 mm eyepiece650 ÷ 10 = 65×with a 10 mm eyepiece650 ÷ 5 = 130×with a 5 mm eyepiece
Celestron’s official magnification guidance uses the same formula and recommends beginning with the lowest magnification, which generally means the eyepiece with the longest focal length.
How Much Magnification Is Useful?
A common rule of thumb is a maximum useful magnification of about twice the aperture in millimeters, or roughly 50 times the aperture in inches, under very good conditions. Celestron describes 50–60 times the aperture in inches as an ideal-condition rule of thumb, not a guaranteed operating level.
For example, the rule suggests an upper limit near 200× for a 100 mm telescope. Atmospheric turbulence, optical quality, collimation, thermal conditions, target brightness, and mount stability often make a lower magnification sharper and more useful.
Avoid choosing a telescope because a box advertises an extreme power figure. The eyepiece can make an image larger even when the telescope cannot reveal additional detail.
Why Is the Mount as Important as the Optics?
A mount must keep the telescope steady, move smoothly, and allow the observer to follow objects as Earth rotates. Good optics on an unstable support still produce a poor observing experience.
Alt-Azimuth Mount
An alt-azimuth mount moves vertically and horizontally. It is intuitive, quick to set up, and generally the easiest manual mount for a visual beginner.
A Dobsonian base is a sturdy form of alt-azimuth mount.
Equatorial Mount
An equatorial mount aligns one axis with Earth’s rotational axis. After alignment, it can follow celestial motion mainly around one axis.
Equatorial mounts are valuable for specific observing and imaging goals, but a beginner must learn counterweights, polar alignment, axis locks, and less intuitive movement. Do not choose one merely because it appears more advanced.
Computerized Go-To Mount
A Go-To mount uses motors and software to find and track objects. It can reduce time spent searching, but it does not eliminate setup.
Depending on the system, the user may still need to level the mount, confirm the date and location, align on reference stars, manage power, or connect an app.
How Can You Judge Mount Stability?
When possible, inspect a display telescope or a similar setup at an astronomy club. Aim at a distant object, focus, and lightly touch the focuser.
The image should settle quickly. Long-lasting vibration, sudden slipping, or jerky movement indicates that the support may be too weak or poorly balanced.
Should a Beginner Buy a Telescope for Astrophotography?
A beginner should first distinguish between simple snapshots and long-exposure astrophotography. These are not the same equipment problem.
| Imaging goal | What it usually requires |
|---|---|
| Smartphone image of the Moon | Many visual telescopes plus a phone adapter |
| Short planetary video | Stable telescope, suitable camera, and preferably tracking |
| Long-exposure nebula or galaxy images | Accurate equatorial tracking, imaging camera, careful alignment, and processing |
| Automated stacked images | Smart telescope or integrated imaging system |
Long-exposure deep-sky astrophotography is primarily a tracking-mount challenge. A large manual visual telescope does not automatically become an appropriate imaging system when a camera is attached.
A beginner who wants direct eyepiece observing should choose a visual telescope first. A beginner whose main goal is saving and sharing images should consider a smart telescope or a purpose-built imaging setup from the beginning.
Use the SPACE Framework Before Comparing Models
The SPACE framework is an original five-part filter for narrowing a telescope purchase before looking at brands.
S — Sky Access
Where will you actually observe? Note buildings, balcony ceilings, trees, streetlights, travel time, and the amount of open sky.
P — Primary Purpose
Choose one leading goal: visual planetary observing, general visual observing, wide-field exploration, or image-based observing. A clear first priority prevents incompatible expectations.
A — Assembly and Setup
Decide how many pieces, cables, alignment steps, and minutes of setup you will tolerate on an ordinary night. Convenience is not a minor feature when it determines whether the telescope gets used.
C — Carrying and Storage
Measure doorways, shelves, vehicle space, and stairs. Consider the mount, base, tripod, counterweights, accessories, and power supply—not only the optical tube.
E — Expansion Path
Ask what you are most likely to want next: more aperture, easier travel, automatic imaging, better planetary views, or more advanced astrophotography. Your first telescope does not need to do everything, but it should not block your likely next step.
Which Telescope Fits Your Living Situation?
These examples show how the same budget can lead to different choices.
Example 1: City Apartment With Stairs
The observer mainly wants the Moon and planets and must carry the telescope downstairs. A compact refractor or Maksutov on a stable alt-azimuth mount is likely to be used more often than a large floor-standing Dobsonian.
The trade-off is reduced aperture and a narrower range of faint deep-sky targets.
Example 2: Suburban Home With Garage Storage
The observer has a driveway, easy ground-level storage, and an interest in visual deep-sky objects. A 150–200 mm Dobsonian offers a strong balance of aperture, simplicity, and long-term visual usefulness.
The trade-off is bulk and manual tracking.
Example 3: Family That Wants Shareable Results
Several people want to view together, but taking turns at an eyepiece may be inconvenient. A smart telescope can display a developing image on a phone or tablet and make group participation easier.
The trade-off is a more screen-based experience and dependence on software and power.
Example 4: Buyer Unsure About the Hobby
The observer enjoys the night sky but has not used a telescope before. Astronomy binoculars, a library telescope, or an astronomy-club event can provide useful experience before a larger purchase.
The trade-off is limited planetary detail, but the financial and storage commitment is lower.
What Accessories Do You Actually Need?
A beginner needs a small set of useful accessories, not a large case of low-quality extras.
Start with:
- One low-power eyepiece for finding objects
- One medium-power eyepiece for the Moon and planets
- A red-dot finder or optical finder
- A dim red light
- A star map or reliable astronomy app
- A stable observing chair
- Dust caps or suitable storage protection
- A collimation tool if the reflector design requires one
Optional accessories include a Barlow lens, Moon filter, smartphone adapter, dew shield, power bank, and additional eyepieces. Add them after using the telescope enough to identify a real limitation.
Do You Need a Barlow Lens?
A Barlow lens increases the effective magnification of an eyepiece. A 2× Barlow approximately doubles the magnification of a compatible eyepiece.
A Barlow cannot create detail that the aperture, optics, atmosphere, and mount do not support. It is useful when it fills a sensible magnification gap, not when it is used to chase the largest possible number.
Do You Need a Moon Filter?
A Moon filter can make a bright lunar view more comfortable, especially at low magnification, but it is not required for eye safety during normal nighttime lunar observing.
Increasing magnification also spreads the Moon’s light over a larger apparent area and can reduce perceived brightness.
What Should You Check Before Buying?
New-Telescope Checklist
- Aperture and focal length are clearly stated.
- The package includes a suitable mount or base.
- The complete setup fits your storage space.
- You can carry every component safely.
- The finder can be aligned.
- The focuser moves smoothly.
- At least one useful low-power eyepiece is included.
- Required diagonal, adapters, cables, or power equipment are included.
- Replacement eyepieces use a commonly supported barrel size.
- The manual, warranty, return terms, and local support are clear.
Used-Telescope Checklist
- Inspect lenses and mirrors for chips, fungus, coating damage, or severe scratches.
- Confirm that dust caps and essential hardware are present.
- Check that the mount moves smoothly and holds position.
- Test the focuser through its full range.
- Confirm that the finder and diagonal are usable.
- For computerized systems, test motors, cables, ports, handset, app connection, and power input.
- Check whether replacement parts and software support still exist.
A small amount of dust is usually less serious than fungus, damaged coatings, broken electronics, missing proprietary hardware, or an unstable mount.
What Common Telescope Buying Mistakes Should You Avoid?
Buying by Magnification
Large magnification claims do not establish image quality. Useful magnification depends on aperture, optics, atmospheric conditions, alignment, and stability.
Ignoring the Mount
A weak tripod can make focusing and tracking difficult. Evaluate the support with the same care as the optical tube.
Buying Too Large
A larger telescope is not automatically a better first telescope. If it is difficult to store, carry, cool, or assemble, it may remain unused.
Expecting Camera-Like Views
Long-exposure images collect and process light differently from the human eye. Most faint deep-sky objects look subtler through an eyepiece than they do in published photographs.
Starting With Too Much Power
High magnification narrows the field, amplifies vibration, and makes manual tracking harder. Begin with the longest-focal-length eyepiece and increase power only after centering the target.
Buying Accessories Before Learning the Telescope
Two useful eyepieces and a stable mount are more valuable than a large bundle of poor accessories. Use the original setup before deciding what to add.
Assuming Automation Removes Every Difficulty
Computerized and smart telescopes still depend on clear sky, an open view, accurate setup, power, and functioning software. Automation changes the workflow; it does not cancel weather, light pollution, or physics.
How Can You Troubleshoot a Disappointing First View?
| Problem | Likely cause | What to try |
|---|---|---|
| Cannot find a target | Finder is not aligned | Align the finder in daylight on a distant stationary object |
| Image is blurry | Poor focus, turbulence, or excessive magnification | Return to low power and refocus carefully |
| Telescope shakes | Weak support, loose fittings, long tripod legs, or wind | Tighten connections, shorten the legs, or move to shelter |
| Planet appears very small | Expectations are based on processed images | Observe patiently and use only the power the air supports |
| Stars look asymmetric in a reflector | Collimation may be off | Follow the manufacturer’s collimation procedure |
| Image will not settle | Telescope is warmer or colder than the outdoor air | Allow time for thermal adjustment |
| Object leaves the field quickly | High power and Earth’s rotation | Use lower power and practice smooth tracking |
| Go-To mount misses targets | Alignment or date/location data is inaccurate | Repeat alignment and verify setup information |
| Faint object is invisible | Light pollution, Moonlight, haze, or insufficient aperture | Try a brighter target or a darker observing location |
| Eyepiece view is black | Cap, eye position, diagonal, or focus problem | Remove all caps and start with the low-power eyepiece |
Can You Use a Beginner Telescope to Observe the Sun?
Never look at the Sun through an unfiltered telescope, binoculars, finder, or camera lens. Concentrated sunlight can cause severe and permanent eye injury.
The American Astronomical Society’s solar-filter guidance states that a solar filter for optical equipment must be designed for that purpose and secured over the front aperture, before sunlight enters the telescope. Eyepiece-end solar filters are dangerous, and eclipse glasses do not make it safe to look through an otherwise unfiltered telescope.
Use solar-observing equipment only according to its manufacturer’s instructions and recognized astronomical safety guidance.
A Simple Decision Tree for Your First Telescope
Do you mainly want direct eyepiece observing?
- No: Consider a smart telescope or a dedicated imaging system.
- Yes: Continue.
Must the telescope fit in a small apartment or travel frequently?
- Yes: Consider a compact refractor, Maksutov-Cassegrain, tabletop reflector, or binoculars.
- No: Continue.
Is maximum visual capability per unit of cost your priority?
- Yes: Consider a Dobsonian reflector.
- No: Continue.
Is low maintenance more important than aperture value?
- Yes: Consider a refractor.
- No: Compare a Dobsonian with a compact compound telescope.
Are you still uncertain?
Attend an astronomy-club observing event, borrow a library telescope, or begin with binoculars before making a larger commitment.
Which Telescope Should You Buy First?
As an editorial recommendation, a stable 130–200 mm Dobsonian is a practical starting range for many visual beginners who have suitable storage and can comfortably move the complete setup. This is not a universal requirement. A 70–102 mm refractor is a stronger choice when low maintenance, fast setup, and portability are more important than deep-sky reach.
Choose a 90–127 mm compound telescope when compact storage and lunar or planetary observing are your priorities. Choose a smart telescope when automated image-based observing matters more than direct eyepiece use. Choose binoculars or a borrowed telescope when you are still deciding whether astronomy will become a regular hobby.
Your next step should match your situation:
- Apartment or travel user: measure storage and carrying limits before comparing optical specifications.
- Backyard visual observer: compare stable Dobsonians by complete weight, base size, and included eyepieces.
- Image-first user: compare smart telescopes or tracking systems by workflow, power needs, app support, and target suitability.
- Undecided beginner: attend a local observing event or borrow equipment before purchasing.
The right first telescope is not the one with the most impressive number on the box. It is the instrument that matches your targets, location, physical limits, and willingness to set it up repeatedly.
Frequently Asked Questions
Is a 70 mm telescope good enough for a beginner?
A well-made 70 mm telescope on a stable mount can show lunar craters, Jupiter’s bright moons, Saturn’s rings under suitable conditions, bright star clusters, and many double stars. A larger aperture can reveal fainter objects and more detail, but the mount and optical quality remain important.
Is a 100 mm or 130 mm telescope better for a beginner?
A 130 mm telescope has more light-collecting area and greater theoretical resolving ability. However, a stable and portable 100 mm telescope may be the better purchase if the 130 mm system has a weak mount or is difficult to use regularly.
Is a Dobsonian difficult to use?
A manual Dobsonian is mechanically simple because it moves up and down and from side to side. The main beginner skills are aligning the finder, locating targets, focusing, and manually following objects.
Can a beginner telescope show galaxies?
Yes, but the result depends heavily on aperture and sky darkness. The Andromeda Galaxy and several other bright galaxies are accessible to small telescopes under suitable conditions, although they generally appear as faint gray structures rather than colorful photographic images.
Should a first telescope have computerized Go-To tracking?
Go-To can be useful when automatic locating and tracking justify the extra setup, power requirements, and cost. A manual telescope may be better for a beginner who values simplicity, aperture, and learning the sky.
How much should a beginner reserve for accessories?
There is no universal percentage because packages vary. Confirm what is included and reserve enough for any missing low-power eyepiece, finder, storage protection, power equipment, and required adapters. Delay optional purchases until you have identified a specific need.
Sources
Sources accessed July 30, 2026.
- NASA Science — What Kind of Telescope Should I Buy?
- NASA Science — Binoculars: A Great First Telescope
- NASA Science — Telescopes 101
- NASA Science — How to Find Good Places to Stargaze
- NASA Night Sky Network — How to Choose a First Telescope
- American Astronomical Society — Solar Filters for Optics
- Celestron — What Is Magnification as It Pertains to Telescopes?
- Sky & Telescope — How to Choose a Telescope for Astronomy
- Sky & Telescope — How to Choose Your First Telescope
More from Telescope Buying Guides
How Much Should You Spend on Your First Telescope?
Most beginners should plan a complete first-telescope budget of roughly $350–$700, although the right amount depends on observing goals, portability, automation, and whether the buyer wants direct eyepiece viewing or screen-based imaging. This guide explains what different budget ranges can realistically provide, why very low-cost telescope packages require caution, and when spending more for aperture, GoTo control, smart imaging, or compact optics is justified. It also separates visual astronomy from modular astrophotography, calculates total ownership cost, and shows how accessories, power, storage, shipping, and software can change the real price. The original FIRST Budget Test helps readers evaluate favorite targets, included equipment, real-world portability, desired skills, and total cost. Practical scenarios, a buying checklist, common mistakes, troubleshooting guidance, safety information, and current US market examples help beginners choose a stable, complete setup they are likely to use regularly.
Are Smart Telescopes Worth It for Beginners?
Smart telescopes can be worthwhile for beginners who want automated target finding, live-stacked deep-sky images, and a compact system controlled from a phone or tablet. However, they are not a universal replacement for traditional telescopes. Beginners who value direct eyepiece views, high-magnification planetary observing, manual sky navigation, or component-by-component upgrades may prefer a refractor, reflector, or catadioptric telescope. This guide explains how smart telescopes combine optics, cameras, motorized tracking, and image processing; compares them with traditional and modular imaging setups; and examines costs, software dependence, batteries, light pollution, target suitability, and long-term flexibility. It also provides the original WORTH decision framework, a hypothetical cost-per-session example, real-world beginner scenarios, a purchase checklist, common mistakes, and troubleshooting steps. The goal is to help readers choose based on their actual observing style rather than marketing claims or specifications alone
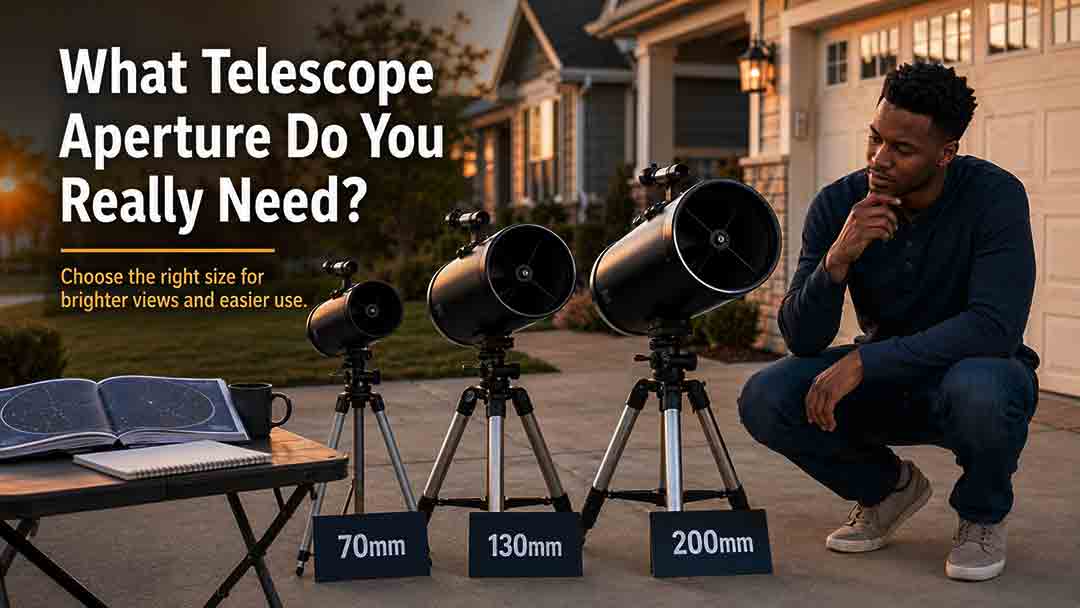
What Telescope Aperture Do You Really Need?
This guide explains how to compare up to four telescope eyepieces using magnification, exit pupil, true field, sky coverage, eye relief, weight, and observer-pupil matching. It defines a reference-eyepiece method so every ratio and percentage has a clear direction, prioritizes field-stop-based true field when reliable data is available, and warns when AFOV and field-stop estimates differ or when mixed calculation methods are used. The article adds the original Four-Dimension Eyepiece Role Map, a reproducible same-field-stop example, pupil-adjusted brightness calculations, weight conversion rules, compatibility reminders, and a transparent field-method warning threshold. Readers can identify meaningful role differences, evaluate possible overlap, and understand what calculations cannot reveal, including optical quality, comfort, mechanical safety, and real-world compatibility. The guidance is based on published specifications and authoritative references rather than product testing or universal rankings
Explore More Topics
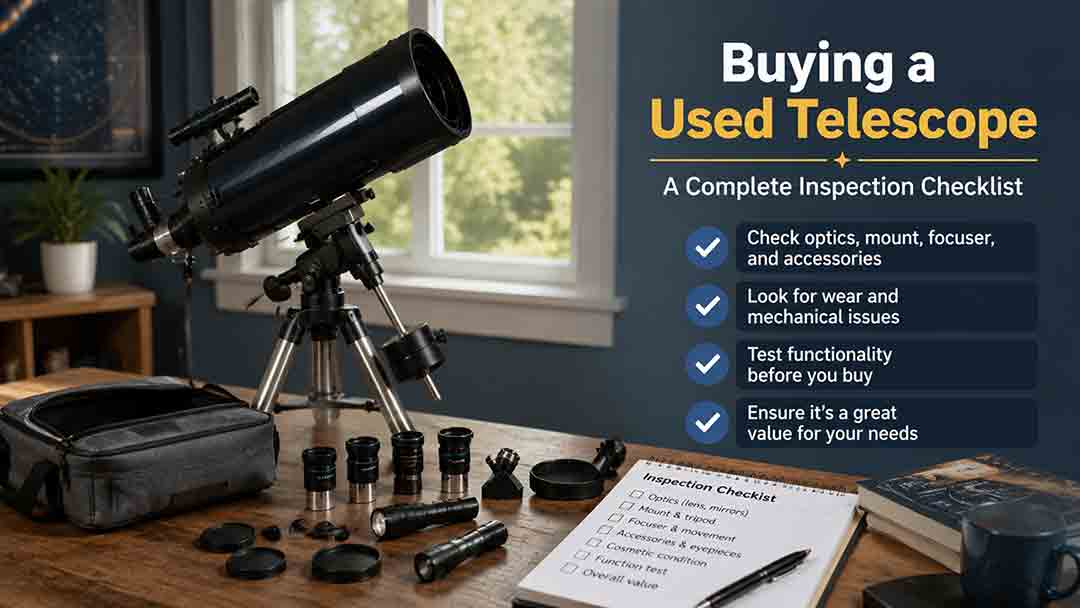
Buying a Used Telescope: A Complete Inspection Checklist
A used telescope can offer excellent value when the buyer verifies the exact model, ownership, optical condition, mechanical safety, electronic function, and complete accessory list before payment. This guide provides a structured inspection process for refractors, Newtonian and Dobsonian reflectors, Schmidt-Cassegrains, Maksutovs, manual and computerized mounts, eyepieces, filters, cameras, and smart telescopes. It distinguishes harmless dust and cosmetic wear from fungus, coating failure, bent hardware, water damage, unsupported electronics, and unsafe solar equipment. Readers also receive seller questions, daytime and nighttime test procedures, a repair-adjusted pricing formula, transaction-safety guidance, four practical scenarios, a buy-negotiate-walk-away framework, and a comprehensive printable checklist. The central recommendation is to price only verified function and preserve enough budget for missing parts, repairs, and uncertainty.
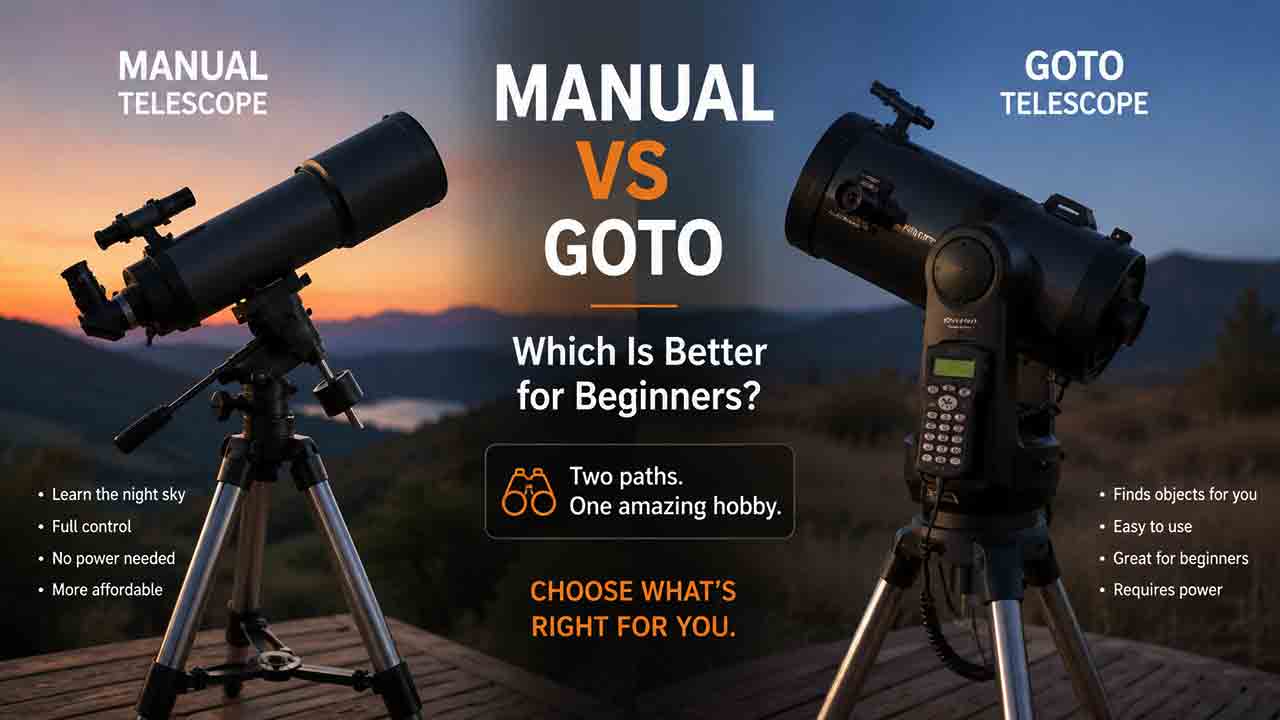
Manual vs GoTo Telescope: Which Is Better for Beginners?
Manual and GoTo telescopes solve different beginner problems. A manual telescope offers simpler setup, fewer electronic dependencies, and often more optical capability within a limited budget, while a GoTo telescope can locate cataloged objects and track them after a successful alignment. This comparison explains why GoTo does not improve aperture, remove light pollution, or automatically make a telescope suitable for long-exposure astrophotography. It compares setup time, tracking, portability, reliability, learning value, power requirements, and total ownership cost. The article also introduces the original TRACK decision framework, an illustrative break-even calculation for session time, five real-world buyer scenarios, separate purchase checklists, and troubleshooting tables for both manual and computerized systems. Beginners can use the guide to decide whether they prefer learning sky navigation, managing an electronic alignment workflow, or choosing a push-to system that combines manual movement with digital guidance."
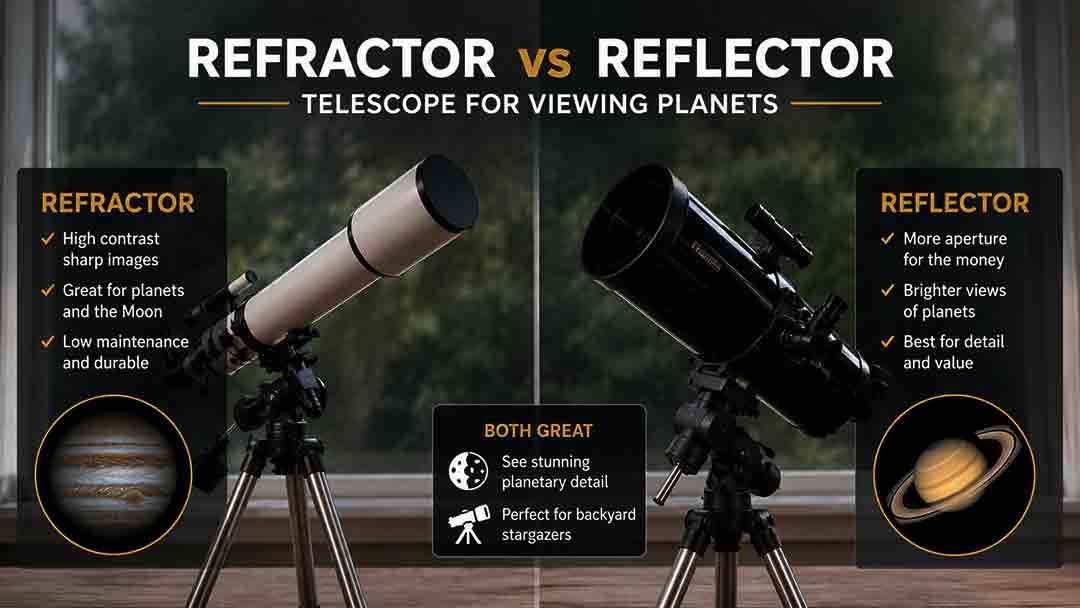
Refractor vs Reflector Telescope for Viewing Planets
A refractor is usually the easier planetary telescope at the same aperture, while a Newtonian reflector usually provides more resolving power for the same budget by offering a larger mirror. This guide compares unobstructed contrast, chromatic aberration, central obstruction, collimation, thermal preparation, mount stability, tracking, magnification, and portability. It explains how each design performs on the Moon, Jupiter, Saturn, Mars, Venus, Uranus, and Neptune, and separates equal-aperture, equal-price, and equal-portability comparisons. A 100 mm versus 150 mm aperture calculation, size recommendations, real-world buyer scenarios, a six-step decision framework, troubleshooting guidance, and a complete buying checklist help readers select a telescope that will deliver useful planetary performance in their actual observing environment.