How Much Should You Spend on Your First Telescope?

How Much Should You Spend on Your First Telescope?
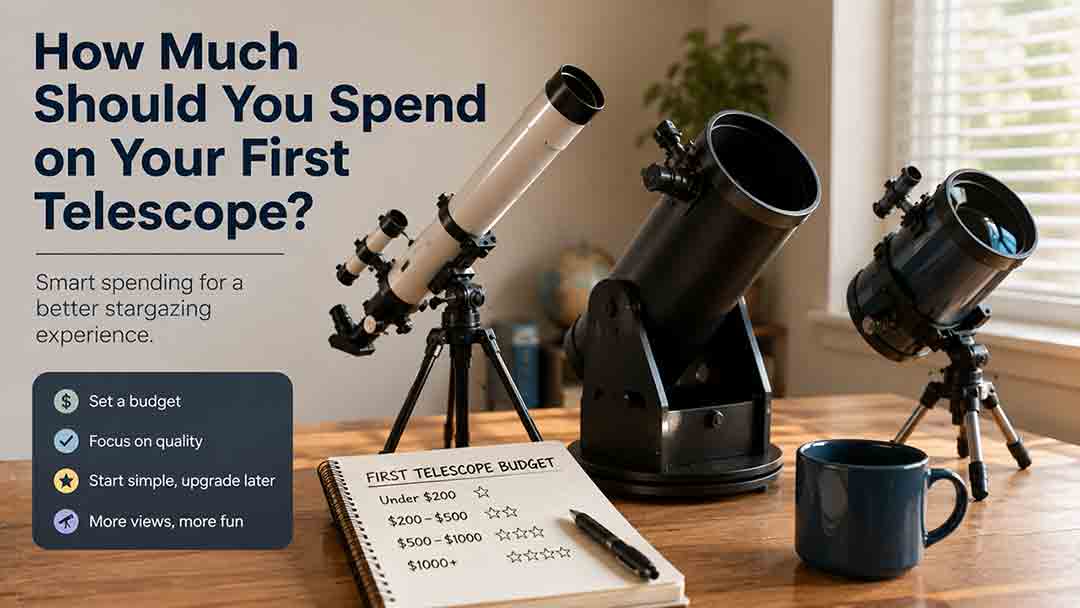
For most beginners in the United States, a realistic first-telescope budget is about $350–$700 for a complete visual setup. Spend less only when the package is stable and genuinely usable, or begin with binoculars. Spend more when you specifically need computerized pointing, smart imaging, greater aperture, or compact premium optics—not because a higher price automatically creates better views.
Key Takeaways
- A practical first telescope budget should include the mount, eyepieces, power, transport, and weather protection—not only the optical tube.
- The $350–$700 range currently contains many capable manual, tabletop, smart, and entry computerized options, but the best choice depends on observing style.
- If your total budget is below about $200, good binoculars, a club loaner, or additional saving may provide better value than a weak telescope on an unstable mount.
- Visual astronomy, smart-telescope imaging, and modular astrophotography require different budgets; do not compare them as if they were the same activity.
- Spend enough to remove the barriers that would stop you from observing, but avoid paying for automation, size, or accessories you will not use.
This guide explains how much beginners should spend, what each budget range can realistically buy, which costs are often overlooked, and when paying more is justified. It also includes the original FIRST Budget Test, a total-cost calculation, user scenarios, a decision tree, a buying checklist, common mistakes, and troubleshooting advice.
Method note: This guide is based on published specifications, authoritative documentation, current official US listings, and practical selection criteria rather than hands-on product testing. Prices and availability were checked on July 30, 2026 and can change without notice.
Quick Navigation
- How Much Should a Beginner Spend?
- What Each Budget Range Buys
- Visual, Smart, and Imaging Budgets
- The FIRST Budget Test
- Total Ownership Cost
- Beginner Scenarios
- Buying Checklist
- Troubleshooting
- FAQ
How Much Should a Beginner Spend on a First Telescope?
A sensible target for many beginners is $350–$700 for the complete observing setup, not just the telescope box. This range is broad enough to include capable tabletop Dobsonians, mid-size manual reflectors, practical refractors, entry smart telescopes, and some computerized systems.
This is an editorial recommendation, not a universal minimum. A careful buyer can spend less and be satisfied, while another beginner may need to spend more for portability, automated target finding, accessibility, or a specific imaging goal.
The most important question is not “What is the most telescope I can afford?” It is “What is the least expensive complete setup that I will carry outside, operate successfully, and use regularly?”
Why Is There No Single Correct Price?
A first telescope is not one standardized product. The price depends on five separate choices:
- Observing method: direct eyepiece viewing, smart-telescope imaging, or modular astrophotography.
- Optical design: refractor, reflector, catadioptric, or integrated digital system.
- Mount: manual, push-to, motorized GoTo, or equatorial tracking.
- Aperture and portability: larger optics usually cost and weigh more.
- Included equipment: eyepieces, tripod, finder, battery, filters, case, and software may or may not be included.
Two telescopes with similar prices can therefore deliver very different experiences. One may prioritize a large mirror and simple base, while another spends more of the budget on motors, electronics, compact engineering, or software.
What Do Different First-Telescope Budgets Buy?
The following ranges describe the US market as observed in July 2026. They are decision bands, not guarantees of quality. Sale pricing, tariffs, taxes, bundles, shipping, and regional availability can move an individual product into another band.
| Total budget | What it can reasonably support | Main opportunity | Main risk |
|---|---|---|---|
| Below $200 | Binoculars, a small basic telescope, used equipment, or club/library access | Low-cost way to test interest | Shaky mounts, weak accessories, exaggerated magnification claims |
| $200–$350 | Entry manual telescope or smaller tabletop reflector | Usable lunar, planetary, and bright-object observing | Quality varies widely; accessories and support may be limited |
| $350–$700 | Strong mainstream beginner choices, including tabletop Dobsonians, 5–6-inch visual reflectors, entry smart telescopes, and selected computerized models | Best balance of usability, capability, and manageable commitment for many beginners | Buying the wrong observing style despite a good product |
| $700–$1,200 | 6–8-inch visual systems, compact computerized telescopes, higher-capability smart systems, or better mounts | More aperture, automation, portability engineering, or tracking | Greater weight, setup demands, software dependence, and ownership cost |
| Above $1,200 | Larger aperture, premium compact optics, advanced automation, or the beginning of a modular imaging system | Specialized capability and longer-term growth | Paying for complexity before preferences are known |
Official listings illustrate how widely current beginner-oriented equipment is distributed. In July 2026, Sky-Watcher USA listed 130 mm and 150 mm tabletop Dobsonians at about $305 and $355, a 150 mm floor-standing Dobsonian at $515, and a 200 mm model at $725. Sky-Watcher USA, “Telescopes” and “Dobsonian Telescopes,” official US product listings, including Heritage and Classi... Celestron’s beginner collection ranged from small instruments below $200 to app-assisted reflectors around $260–$500 and an 8-inch app-guided Dobsonian at $879. Celestron, “Beginner Telescopes,” official US collection and current listing prices Celestron, “StarSense Explorer 8-inch Smartphone App-Enabled Dobsonian Telescope,” official product listing Seestar’s official US listings placed integrated smart telescopes around $399–$699, depending on model. Seestar US Official Store, official smart-telescope product listings, including S30, S30 Pro, and S50
These examples are a market snapshot, not endorsements. Price alone does not establish optical quality, mount stability, suitability, or long-term value.
Is a Telescope Under $200 Worth Buying?
Sometimes, but this is the price range that requires the most caution. A small telescope can provide enjoyable views of the Moon, Jupiter’s brightest moons, Saturn’s rings under suitable conditions, bright star clusters, and terrestrial targets. The problem is that low-cost packages may allocate too little of the price to the mount, focuser, finder, and eyepieces.
NASA’s Night Sky Network has advised beginners with a budget around $150 to consider good binoculars and an astronomy-club membership before buying a telescope. Binoculars are easier to aim, provide a wide field of view, and remain useful after a telescope is purchased. NASA Science, Night Sky Network, “What Kind of Telescope Should I Buy?” May 30, 2023 NASA Science, Night Sky Network, “Binoculars: A Great First Telescope,” updated May 15, 2024
A sub-$200 telescope is more defensible when:
- The mount is stable enough to focus without prolonged shaking.
- The optical design and aperture are clearly specified.
- The package avoids unrealistic “675x” or similar marketing claims.
- The return policy is practical.
- The buyer accepts limited aperture and accessories.
- The instrument has a specific role, such as travel, lunar observing, or supervised family use.
If these conditions are not met, saving longer or buying used equipment from a knowledgeable astronomy club may be the better decision.
Is $350–$700 the Best Range for Most Beginners?
For many beginners, yes. This range is large enough to avoid many toy-like packages while still limiting financial risk before the buyer understands personal preferences.
The range can support several legitimate paths:
- A manual tabletop reflector with useful aperture.
- A 5–6-inch visual reflector on a simple base.
- A stable mid-size refractor package.
- An entry smart telescope for screen-based imaging.
- A smaller computerized telescope when automation matters more than maximum aperture.
The choice within the range matters more than moving from the bottom to the top. A $400 telescope that matches the owner’s home, targets, and observing style can be more valuable than a $700 telescope that is too heavy or too complicated to use.
When Is $700–$1,200 Reasonable for a First Telescope?
This range is reasonable when the beginner can name the capability being purchased.
Examples include:
- A larger visual aperture for faint deep-sky objects.
- A compact computerized system for users who need automatic target finding.
- A smart telescope with more imaging or software capability.
- A portable catadioptric system where compact storage matters.
- A better mechanical platform intended for several years of use.
Current official prices show that an 8-inch manual Dobsonian can fall around $725–$879, while compact computerized telescopes may range from roughly $649 to more than $1,000. Sky-Watcher USA, “Telescopes” and “Dobsonian Telescopes,” official US product listings, including Heritage and Classi... Celestron, “StarSense Explorer 8-inch Smartphone App-Enabled Dobsonian Telescope,” official product listing Celestron, official NexStar 4SE and NexStar 6SE computerized telescope listings Paying this amount can be justified, but the buyer should first confirm lifting limits, storage, power requirements, alignment steps, and whether the system fits the intended targets.
Should a Beginner Spend More Than $1,200?
Only with a clear reason. A higher budget may be appropriate for a physically compact premium design, a larger aperture, advanced accessibility needs, serious automated observing, or a planned imaging system.
It is not necessary merely to “avoid buying twice.” Interests change. A beginner who has not compared eyepiece observing, smart imaging, and modular astrophotography may spend heavily on the wrong path.
Before spending more than $1,200, attend a public observing event, use a club telescope, or borrow from a library telescope program where available. NASA’s Night Sky Network connects the public with hundreds of US astronomy clubs and events, while participating libraries in several countries offer telescope-loan programs. NASA Science, “Night Sky Network,” club and event finder, updated June 22, 2026 NASA Science, International Observe the Moon Night, “Find a Partner,” including the Library Telescope Program
How Does the Right Budget Change by Observing Goal?
The right budget changes substantially because “using a telescope” can describe several different activities.
| Primary goal | Practical starting approach | Typical spending priority | Common budgeting mistake |
|---|---|---|---|
| Moon and planets through an eyepiece | Stable visual telescope with useful focal length and aperture | Mount stability, optics, comfortable eyepieces | Paying for electronics while accepting a weak mount |
| Galaxies and nebulae visually | Dobsonian or other aperture-efficient reflector | Aperture, transport, dark-sky access | Buying more aperture than can be moved regularly |
| Easy deep-sky images | Integrated smart telescope | App support, tracking, sensor, file access, battery | Expecting a traditional eyepiece experience |
| Learn constellations and star-hopping | Binoculars or manual telescope | Wide field, finder, chart/app, club access | Spending heavily before learning the sky |
| Computerized visual observing | GoTo or app-guided telescope | Reliable mount, alignment, power, database/app | Assuming automation eliminates setup and sky conditions |
| Modular deep-sky astrophotography | Tracking mount plus separate optics and camera | Mount accuracy and payload before aperture | Treating a visual telescope package as a complete imaging rig |
How Much Should You Spend for Visual Astronomy?
A total budget of roughly $350–$750 is a practical starting area for many visual observers. It can support a stable manual telescope with enough aperture for the Moon, planets, double stars, clusters, and brighter nebulae or galaxies.
Visual astronomy rewards aperture, but only when the telescope is stable and usable. NASA explains that telescope mirrors and lenses gather and focus light, and larger optics can collect more light from faint objects. NASA Space Place, “How Do Telescopes Work?” updated April 13, 2026 However, a larger telescope that remains in storage gathers no light for its owner.
For visual use, prioritize spending in this order:
- Stable mount or base.
- Appropriate aperture and optical quality.
- Comfortable setup and transport.
- At least one useful low-power eyepiece and one moderate-power option.
- Finder alignment and learning resources.
- Additional accessories only after actual observing experience.
How Much Should You Spend for a Smart Telescope?
As of July 2026, entry integrated smart telescopes were officially listed around $399–$699, with more advanced systems extending far above that range. Seestar US Official Store, official smart-telescope product listings, including S30, S30 Pro, and S50 The complete cost may also include a tripod, case, external battery, filter, tablet, or replacement charging equipment.
A smart telescope is financially sensible when automation and live stacking will make the owner observe more often. It is a poor value when the buyer mainly wants direct eyepiece views or dislikes App, battery, Wi-Fi, and firmware dependence.
Before buying, confirm:
- Whether the tripod is included.
- Which phone and operating-system versions are supported.
- Whether observing works without continuous internet.
- Which image formats can be exported.
- Whether filters are included or proprietary.
- Battery runtime and external-power support.
- Warranty, repair location, and long-term software support.
How Much Should You Spend for Computerized GoTo Viewing?
A realistic complete budget often starts around $550–$1,100, depending on optical design, aperture, mount, and current pricing. Official July 2026 examples included app-controlled tabletop systems around $495–$545, a compact 4-inch computerized telescope at $649, and a 6-inch computerized Schmidt-Cassegrain at $1,049. Celestron, official NexStar 4SE and NexStar 6SE computerized telescope listings Sky-Watcher USA, “All-in-one Kits” and “Virtuoso GTi 150P,” official product listings
GoTo can help locate targets, but it does not remove the need for stable setup, correct time and location, alignment, power, clear sky, and suitable targets. Budget for a reliable power source rather than assuming disposable batteries will be convenient for every session.
How Much Should You Spend for Astrophotography?
First distinguish three activities:
- Phone snapshots through an eyepiece: a visual telescope plus a basic adapter may be sufficient.
- Integrated smart imaging: the telescope, camera, mount, and processing are packaged together.
- Modular long-exposure imaging: a tracking mount, optical tube or lens, camera, adapters, power, control, and processing are selected separately.
A modular deep-sky imaging setup can cost substantially more than a first visual telescope because the tracking mount is a major part of the system. Sky-Watcher’s July 2026 official listings placed lightweight imaging-mount packages alone around $585–$830 before adding the camera, lens or telescope, tripod details, power, and accessories. Sky-Watcher USA, official Star Adventurer imaging-mount listings and 2026 pricing
A beginner whose main interest is astrophotography should not buy a visual telescope first merely because it looks affordable. Start by defining the desired subjects, exposure length, camera, portability, and processing workflow.
What Should Your Telescope Budget Include?
The total ownership cost is the telescope price plus every item required to store, transport, power, operate, and safely use it.
Essential Costs
Depending on the system, essential costs may include:
- Telescope optical tube and mount.
- Tripod or stable tabletop platform.
- At least one practical eyepiece.
- Finder or target-assistance system.
- Batteries, power bank, or AC adapter.
- App-compatible phone or tablet.
- Transport case or protective storage.
- Red-light source and simple sky chart.
- Dew shield or approved dew control in humid climates.
- Taxes, shipping, and possible return shipping.
Optional Costs That Can Wait
Many beginners do not need to buy these immediately:
- Large eyepiece sets.
- Multiple color filters.
- Premium Barlow lens.
- Motorized focuser.
- Advanced narrowband filters.
- Camera adapters for an undefined imaging plan.
- Decorative cases or branded accessories.
- Cleaning kits beyond the manufacturer’s recommended basics.
Use the included equipment first. Additional purchases should solve an observed problem rather than an imagined future need.
Safety Costs That Are Never Optional When Relevant
Solar observing requires a properly designed filter that is securely mounted over the front aperture of the telescope and used according to the supplier’s and telescope manufacturer’s instructions. Never use an eyepiece-mounted solar filter, sunglasses, smoked glass, photographic filters, exposed film, or improvised material.
The American Astronomical Society warns that unfiltered telescopes, binoculars, and cameras can concentrate dangerous sunlight and that solar filters for optics must be attached securely over the front of the instrument. American Astronomical Society Solar Eclipse Task Force — Solar Filters for Optics: Telescopes, Binoculars & Cameras
Do not include solar capability in the buying decision unless a compatible, undamaged, properly fitted front-aperture filter is available.
How Should You Calculate the Total Cost?
Start with a hard total limit, subtract known support costs, and only then determine the telescope price.
The Total-Budget Formula
Maximum telescope package price = total available budget − required accessories − taxes and shipping − contingency reserve
This is a planning formula, not a rule that every beginner must allocate the same amounts.
Hypothetical $600 Example
Suppose a buyer has a strict total limit of $600 and expects the following costs:
- Telescope package: $455
- Protective case or storage solution: $55
- Power or batteries: $35
- Red light and basic chart: $20
- Tax, shipping, or price variation reserve: $35
Total: $600
The buyer should compare telescopes near $455, not search for a $600 telescope and discover later that the complete system exceeds the budget.
Hypothetical Cost-per-Use Example
Cost per observing session can reveal whether convenience is worth paying for.
- Setup A costs $450 and is used 10 times over two years: $45 per session.
- Setup B costs $700 and is used 35 times over two years: $20 per session.
This does not prove that the more expensive setup is better. It shows that repeat use can matter more than purchase price. Do not justify overspending with an unrealistic prediction of future use.
How Can You Use the FIRST Budget Test?
The FIRST Budget Test is an original decision framework for separating useful spending from expensive distractions.
F — Favorite Targets
List the three objects or categories you most want to observe.
- Moon and planets favor stable higher-magnification visual systems.
- Star clusters and broad Milky Way fields favor wide fields.
- Faint galaxies and nebulae visually favor aperture and darker skies.
- Easy color images of deep-sky objects favor smart telescopes or EAA.
- Long-exposure imaging favors tracking quality and a planned camera system.
Do not spend until the telescope’s optical design and mount fit those targets.
I — Included Equipment
Read the complete included-items list.
Check for:
- Tripod or base.
- Eyepieces and their focal lengths.
- Finder.
- Diagonal for a refractor or catadioptric telescope.
- Power cable or battery requirements.
- Smartphone adapter or App license.
- Solar filter, if advertised.
- Case, dust caps, and manuals.
A lower-priced telescope may become more expensive after missing essentials are added.
R — Real-World Portability
Measure the route from storage to observing location.
Record:
- Longest packed dimension.
- Heaviest individual component.
- Number of trips required.
- Door, stair, elevator, and vehicle clearance.
- Setup surface and tripod footprint.
- Time available on a normal weeknight.
A telescope should fit the owner’s ordinary life, not only an ideal dark-sky trip.
S — Skill and Software Path
Decide which skills you want the equipment to teach.
A manual telescope emphasizes sky navigation, focusing, eyepieces, and mount movement. A computerized telescope adds alignment and power management. A smart telescope emphasizes target selection, image accumulation, App control, and processing. A modular imaging system adds polar alignment, camera control, guiding, calibration, and post-processing.
Pay for the learning path you actually want.
T — Total Ownership Cost
Add all required costs for the first year. Include likely accessories, power, transport, software, subscriptions, repair shipping, and planned upgrades.
Then ask two questions:
- Would I still choose this system if no upgrades were purchased for one year?
- Can I operate it on an ordinary clear night without buying another essential component?
If either answer is no, the advertised price is not the real price.
Which Telescope Features Are Worth Paying More For?
Pay more when the feature removes a real constraint or creates a capability you have already identified.
| Feature | Worth paying more when… | Not worth paying more when… |
|---|---|---|
| Larger aperture | You can store, transport, cool, and collimate the instrument as needed | The size will prevent regular use |
| Stronger mount | High magnification or focusing currently causes vibration | The optical tube is too small to challenge the existing mount |
| GoTo or app guidance | Target finding is the main barrier and you accept alignment and power needs | You want to learn manual star-hopping and prefer no electronics |
| Compact catadioptric design | Storage and transport matter more than aperture per dollar | Wide-field viewing is the main goal |
| Smart imaging | You want screen-based deep-sky images and easy sharing | You expect a traditional eyepiece view |
| Premium eyepiece | Eye relief, field of view, or comfort is a demonstrated problem | The telescope mount or alignment is the actual problem |
| Better focuser | Precise focus or heavy accessories exceed the current focuser’s capability | The image is soft because of poor seeing or incorrect collimation |
| Tracking mount | Imaging or prolonged high-power observing requires tracking | The owner mainly wants simple manual visual use |
Is Aperture Always Worth More Money?
Aperture is the diameter of the telescope’s primary lens or mirror. A larger aperture can gather more light and improve potential resolution, but it also tends to increase size, weight, cooling time, and cost.
The practical aperture is the largest one the owner can use regularly. A 200 mm Dobsonian may provide more visual reach than a smaller refractor, but a compact refractor may be the better purchase for a balcony observer who must carry equipment through stairs and narrow doors.
Is High Magnification Worth Paying For?
Do not buy based on a large magnification number printed on the box. Telescope magnification is calculated by dividing the telescope focal length by the eyepiece focal length, and usable magnification is limited by aperture, optical quality, mount stability, atmospheric conditions, and target brightness. Celestron Knowledgebase — What Is Magnification/Power as It Pertains to Telescopes?
The American Astronomical Society also advises caution with inexpensive telescopes that advertise unusually high power, because poor optics and shaky mounts can make such claims impractical. American Astronomical Society, “Telescopes & Binoculars,” guidance on avoiding poor-quality, high-power telescope mar...
A stable low- or moderate-power view is usually more useful than an enlarged, dim, vibrating image.
What Do Real-World Beginner Scenarios Suggest?
Scenario 1: A Family Has a $250 Total Limit
The family wants to explore the Moon and learn constellations with children. The budget must include everything.
A carefully selected used telescope, a small stable tabletop model, or good binoculars may be more sensible than a new tripod telescope with an unstable mount. A club event or library telescope can help the family confirm interest before spending the full amount.
Scenario 2: A Beginner Has $500 for Visual Observing
The buyer wants the Moon, planets, clusters, and brighter deep-sky targets from a suburban yard.
This budget can support a capable tabletop reflector, a 5–6-inch manual reflector, or a practical refractor package. The buyer should prioritize mount stability and portability, then reserve enough for storage and one useful accessory if the included eyepieces are limited.
Scenario 3: An Apartment Resident Has $700
The buyer has little storage, must use an elevator, and sometimes travels by car. Compactness matters more than maximum aperture.
A smaller refractor, compact computerized telescope, collapsible tabletop reflector, or entry smart telescope may be more useful than a large floor-standing Dobsonian. The buyer should compare the complete packed kit, not just optical-tube weight.
Scenario 4: A Beginner Wants Deep-Sky Photos for $600
The buyer wants recognizable nebula and galaxy images with minimal assembly.
An integrated smart telescope may fit this goal better than a low-cost visual telescope plus an improvised camera setup. The buyer must accept screen-based observing, App dependence, batteries, and limited component upgrades.
Scenario 5: A Beginner Has $1,000 and Mainly Wants Saturn
The buyer should not automatically select the largest smart telescope or the most feature-rich GoTo system.
A stable visual telescope with suitable aperture and focal length may provide better value for direct planetary observing. The budget should protect mount stability, optical quality, comfortable eyepieces, and manageable setup.
Scenario 6: A Beginner Wants Serious Astrophotography
The buyer should define whether “astrophotography” means phone snapshots, smart-telescope images, planetary video, or long-exposure deep-sky imaging.
For modular deep-sky imaging, the mount can consume most or all of a typical first-telescope budget before the camera and optics are added. Starting with a camera and tracking platform, or an integrated smart telescope, may be more coherent than buying a visual package that cannot support the intended exposures.
What Common Spending Mistakes Should Beginners Avoid?
Buying the Largest Telescope the Budget Allows
Large aperture is useful only when the telescope fits the home, vehicle, strength, climate, and observing schedule. Measure first.
Spending the Entire Budget on the Box
A telescope that still needs a tripod, power source, diagonal, usable eyepiece, or transport solution is not within budget.
Choosing by Advertised Magnification
High magnification does not compensate for small aperture, poor optics, weak mounting, or turbulent air.
Buying a Large Eyepiece Kit Immediately
Most beginners use a small number of focal lengths regularly. Learn the included eyepieces before buying a full set.
Paying for GoTo Without Budgeting for Power
Computerized pointing depends on successful setup, alignment, and a reliable power source. Motors do not make clouds, buildings, or light pollution disappear.
Confusing Visual Astronomy With Astrophotography
A telescope that produces satisfying eyepiece views may not be an efficient long-exposure imaging system. The mount requirements are different.
Treating a Sale Price as Proof of Value
A discount does not fix a shaky mount, poor ergonomics, missing accessories, unsupported App, or unsuitable optical design.
Ignoring Returns, Warranty, and Repair Shipping
A heavy telescope can be expensive to return. Read the return window, restocking terms, warranty process, and responsibility for shipping before ordering.
What Should You Check Before Spending?
Observing Goals
- I can name my three highest-priority targets.
- I know whether I want eyepiece viewing, screen imaging, or both.
- I understand whether planets, wide fields, or faint deep-sky objects are the priority.
- I have compared the experience at a club event or through borrowed equipment when possible.
Complete Budget
- My total limit includes tax and shipping.
- The mount or tripod is included.
- At least one useful eyepiece is included for visual observing.
- Required power equipment is included or budgeted.
- Storage and transport protection are included or budgeted.
- I know whether Apps, cloud features, or subscriptions cost extra.
- I have not assumed that every optional accessory is necessary.
Practical Fit
- I have measured the storage area.
- I can lift the heaviest component safely.
- The telescope fits through doors, stairs, elevators, and the vehicle.
- The normal setup time fits my observing schedule.
- The tripod or base fits the available observing surface.
- I understand dew, temperature, wind, and weather limits.
Product Quality and Support
- The aperture, focal length, and mount type are clearly stated.
- I have ignored unrealistic magnification marketing.
- I have reviewed the manual before purchase.
- Replacement parts or service are available.
- The return and warranty terms are acceptable.
- Current App compatibility is verified for connected products.
Safety
- I will never point unfiltered optics at the Sun.
- Any solar filter is designed for the instrument and attaches securely over the front aperture.
- The telescope cannot strike walls, railings, furniture, or people while moving.
- The setup will stand on stable ground away from traffic and trip hazards.
- Electronics will be protected from rain, sprinklers, and excessive condensation.
How Can You Fix a Budget Mismatch?
| Problem after purchase | Likely budget mistake | First response |
|---|---|---|
| Image shakes while focusing | Too much money went to aperture and too little to the mount | Shorten tripod legs, tighten connections, reduce wind exposure, and assess return options before buying eyepieces |
| Targets are difficult to find | Finder, alignment, or learning support was overlooked | Align the finder in daylight, start with low power, use a chart or App, and attend a club event |
| High-power image is blurry | Advertised magnification shaped the purchase | Return to the lowest-power eyepiece and increase gradually only when the image remains sharp |
| Telescope is rarely used | Size, weight, or setup time was underestimated | Create a simpler storage setup; if the barrier remains, consider selling or exchanging for a smaller system |
| Smart telescope feels restrictive | Screen-based observing or software dependence was misunderstood | Use raw-file export and available manual controls; compare a visual telescope before buying another integrated device |
| Accessories keep multiplying | The original package was incomplete or purchases lack a defined problem | Stop buying, list the exact limitation, and purchase only the item that addresses it |
| Deep-sky photos trail or rotate | A visual or alt-azimuth setup was expected to perform modular long exposures | Shorten exposures, use supported stacking, or plan a tracking mount rather than adding random accessories |
| Views are dim in the city | Sky brightness was treated as an equipment problem | Choose brighter targets, block direct lights, travel to darker skies when practical, and match filters to specific targets |
Do not open a telescope, modify electronics, or attempt internal repair unless the manufacturer explicitly authorizes it. Unapproved work may damage optics, seals, wiring, alignment, or warranty coverage.
Which Budget Is the Practical Next Step?
Choose your next step based on observing style rather than the largest available number:
- Below $200: begin with binoculars, a club, a library loaner, or a carefully verified small/used telescope.
- $200–$350: look for a stable manual or tabletop system and scrutinize the mount and included accessories.
- $350–$700: compare strong mainstream visual choices with entry smart or computerized options.
- $700–$1,200: spend more only for identified benefits such as aperture, compactness, automation, tracking, or accessibility.
- Above $1,200: pause for hands-on comparison unless the specialized goal is already clear.
For many beginners, the best answer to “How much should you spend on your first telescope?” is enough for a stable, complete, regularly usable setup—usually around $350–$700, but sometimes less or more depending on the observing method.
The next step is to write down three target types, measure the storage route, calculate the complete budget, and compare at least one manual visual option with any smart or computerized option under consideration.
Frequently Asked Questions
Is $300 enough for a good first telescope?
It can be. Around $300 may buy a capable tabletop reflector or entry manual telescope, especially when the package includes a stable base and useful eyepiece. Quality varies, so verify the mount, aperture, included equipment, support, and return policy rather than using price alone.
Is an $800 telescope too expensive for a beginner?
Not necessarily. An $800 budget can be reasonable for a larger Dobsonian, compact computerized telescope, or more capable smart system when the buyer understands the weight, setup, observing style, and accessory costs. It is too much when the extra capability is undefined or unlikely to be used.
Should I buy binoculars before a telescope?
Binoculars are a strong first step for many people because they are easy to aim, portable, useful for broad star fields, and valuable after a telescope is purchased. NASA’s Night Sky Network specifically recommends binoculars and club experience for beginners with a limited budget. NASA Science, Night Sky Network, “What Kind of Telescope Should I Buy?” May 30, 2023 NASA Science, Night Sky Network, “Binoculars: A Great First Telescope,” updated May 15, 2024
Should the first telescope budget include accessories?
Yes. Calculate the total cost of the mount or tripod, eyepieces, finder, power, storage, transport, weather protection, taxes, and shipping. Optional filters and premium eyepieces can usually wait until an actual need appears.
Is a used telescope a good way to save money?
A used telescope can offer good value when the optics, coatings, focuser, mount, electronics, and accessories can be inspected. Buying through a local astronomy club may make evaluation easier. Avoid equipment with damaged optics, corrosion, missing proprietary parts, unstable movement, or unsupported electronics unless repair costs are understood.
How much should I spend if I want astrophotography?
First define the type of astrophotography. Phone snapshots and integrated smart imaging can begin within a normal first-telescope budget. Modular long-exposure deep-sky imaging usually requires a separate tracking mount, camera, optics, power, and control system, so its budget should be planned independently from a visual telescope purchase.
Sources
The following sources were accessed on July 30, 2026, unless otherwise noted. Product prices, sale prices, availability, bundles, and specifications can change.
- Sky-Watcher USA official product listings: Telescopes and Dobsonian Telescopes
- Celestron, “Beginner Telescopes,” official US collection and current listing prices
- Celestron, “StarSense Explorer 8-inch Smartphone App-Enabled Dobsonian Telescope,” official product listing
- Seestar US Official Store, official smart-telescope product listings, including S30, S30 Pro, and S50
- NASA Science, Night Sky Network, “What Kind of Telescope Should I Buy?” May 30, 2023
- NASA Science, Night Sky Network, “Binoculars: A Great First Telescope,” updated May 15, 2024
- Celestron official product listings: NexStar 4SE and NexStar 6SE
- NASA Science, “Night Sky Network,” club and event finder, updated June 22, 2026
- NASA Science, International Observe the Moon Night, “Find a Partner,” including the Library Telescope Program
- NASA Space Place, “How Do Telescopes Work?” updated April 13, 2026
- Sky-Watcher USA official product listings: All-in-one Kits and Virtuoso GTi 150P
- Sky-Watcher USA, official Star Adventurer imaging-mount listings and 2026 pricing
- American Astronomical Society Solar Eclipse Task Force — Solar Filters for Optics: Telescopes, Binoculars & Cameras
- Celestron Knowledgebase — What Is Magnification/Power as It Pertains to Telescopes?
- American Astronomical Society, “Telescopes & Binoculars,” guidance on avoiding poor-quality, high-power telescope mar...
Editorial Method
Editorial method: Current prices and specifications were checked against official US listings and the sources above. No hands-on testing is claimed.
More from Telescope Buying Guides
How to Choose Your First Telescope: A Beginner’s Buying Guide
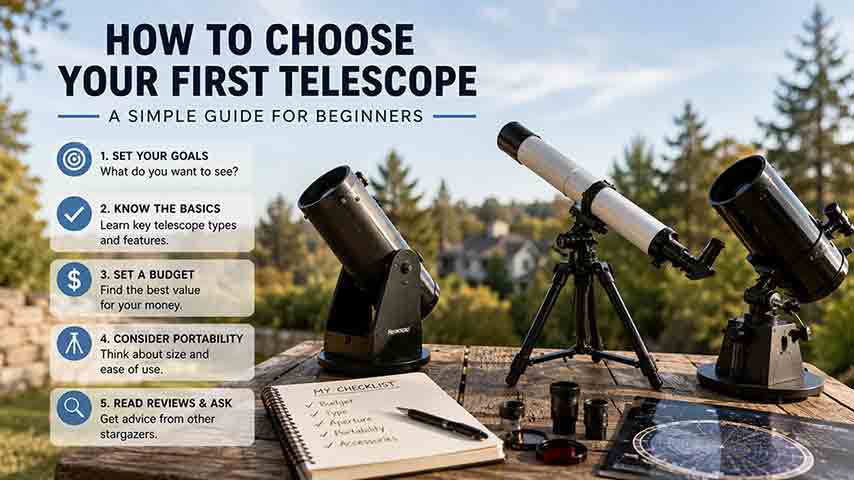
Choosing a first telescope requires more than comparing aperture or advertised magnification. This practical beginner’s guide explains how to match a telescope to observing goals, light pollution, storage space, setup tolerance, and interest in visual observing or imaging. It compares refractors, Dobsonian reflectors, compound telescopes, and smart telescopes, then shows how aperture, focal length, focal ratio, magnification, and mount stability affect real use. Readers can use a quick-selection table, the original SPACE decision framework, a worked specification comparison, realistic household scenarios, new and used equipment checklists, and a troubleshooting chart. The guide also explains why a larger aperture cannot fully overcome bright urban skies, what to verify before buying a software-dependent smart telescope, and how to observe the Sun safely. Recommendations are based on authoritative guidance and published specifications rather than hands-on product testing or paid rankings
Are Smart Telescopes Worth It for Beginners?
Smart telescopes can be worthwhile for beginners who want automated target finding, live-stacked deep-sky images, and a compact system controlled from a phone or tablet. However, they are not a universal replacement for traditional telescopes. Beginners who value direct eyepiece views, high-magnification planetary observing, manual sky navigation, or component-by-component upgrades may prefer a refractor, reflector, or catadioptric telescope. This guide explains how smart telescopes combine optics, cameras, motorized tracking, and image processing; compares them with traditional and modular imaging setups; and examines costs, software dependence, batteries, light pollution, target suitability, and long-term flexibility. It also provides the original WORTH decision framework, a hypothetical cost-per-session example, real-world beginner scenarios, a purchase checklist, common mistakes, and troubleshooting steps. The goal is to help readers choose based on their actual observing style rather than marketing claims or specifications alone
What Telescope Aperture Do You Really Need?
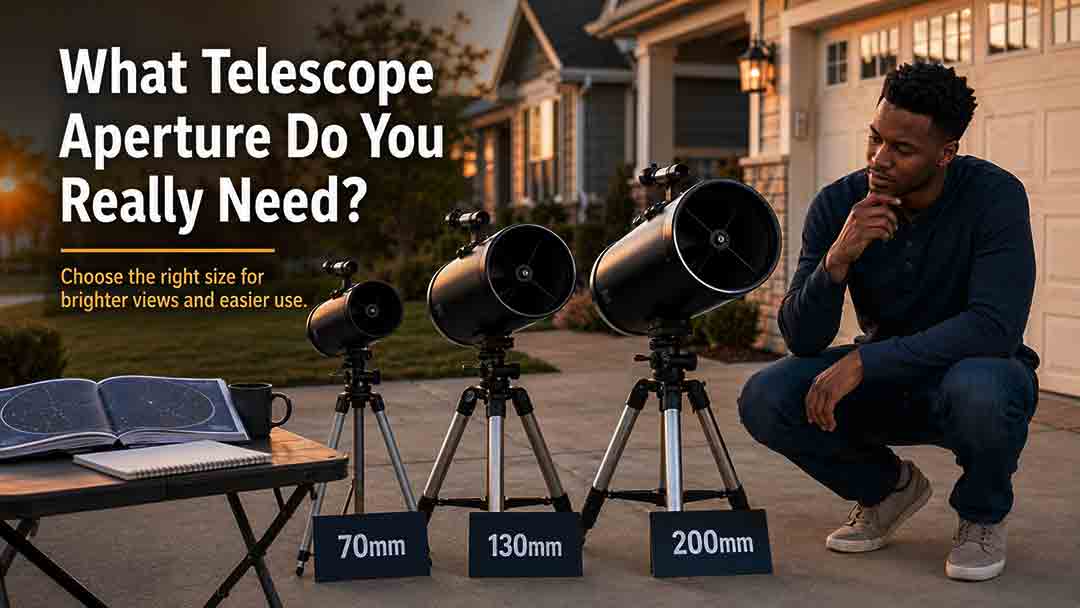
This guide explains how to compare up to four telescope eyepieces using magnification, exit pupil, true field, sky coverage, eye relief, weight, and observer-pupil matching. It defines a reference-eyepiece method so every ratio and percentage has a clear direction, prioritizes field-stop-based true field when reliable data is available, and warns when AFOV and field-stop estimates differ or when mixed calculation methods are used. The article adds the original Four-Dimension Eyepiece Role Map, a reproducible same-field-stop example, pupil-adjusted brightness calculations, weight conversion rules, compatibility reminders, and a transparent field-method warning threshold. Readers can identify meaningful role differences, evaluate possible overlap, and understand what calculations cannot reveal, including optical quality, comfort, mechanical safety, and real-world compatibility. The guidance is based on published specifications and authoritative references rather than product testing or universal rankings
Explore More Topics
Buying a Used Telescope: A Complete Inspection Checklist
A used telescope can offer excellent value when the buyer verifies the exact model, ownership, optical condition, mechanical safety, electronic function, and complete accessory list before payment. This guide provides a structured inspection process for refractors, Newtonian and Dobsonian reflectors, Schmidt-Cassegrains, Maksutovs, manual and computerized mounts, eyepieces, filters, cameras, and smart telescopes. It distinguishes harmless dust and cosmetic wear from fungus, coating failure, bent hardware, water damage, unsupported electronics, and unsafe solar equipment. Readers also receive seller questions, daytime and nighttime test procedures, a repair-adjusted pricing formula, transaction-safety guidance, four practical scenarios, a buy-negotiate-walk-away framework, and a comprehensive printable checklist. The central recommendation is to price only verified function and preserve enough budget for missing parts, repairs, and uncertainty.
Manual vs GoTo Telescope: Which Is Better for Beginners?
Manual and GoTo telescopes solve different beginner problems. A manual telescope offers simpler setup, fewer electronic dependencies, and often more optical capability within a limited budget, while a GoTo telescope can locate cataloged objects and track them after a successful alignment. This comparison explains why GoTo does not improve aperture, remove light pollution, or automatically make a telescope suitable for long-exposure astrophotography. It compares setup time, tracking, portability, reliability, learning value, power requirements, and total ownership cost. The article also introduces the original TRACK decision framework, an illustrative break-even calculation for session time, five real-world buyer scenarios, separate purchase checklists, and troubleshooting tables for both manual and computerized systems. Beginners can use the guide to decide whether they prefer learning sky navigation, managing an electronic alignment workflow, or choosing a push-to system that combines manual movement with digital guidance."
Refractor vs Reflector Telescope for Viewing Planets
A refractor is usually the easier planetary telescope at the same aperture, while a Newtonian reflector usually provides more resolving power for the same budget by offering a larger mirror. This guide compares unobstructed contrast, chromatic aberration, central obstruction, collimation, thermal preparation, mount stability, tracking, magnification, and portability. It explains how each design performs on the Moon, Jupiter, Saturn, Mars, Venus, Uranus, and Neptune, and separates equal-aperture, equal-price, and equal-portability comparisons. A 100 mm versus 150 mm aperture calculation, size recommendations, real-world buyer scenarios, a six-step decision framework, troubleshooting guidance, and a complete buying checklist help readers select a telescope that will deliver useful planetary performance in their actual observing environment.