How to Prevent Dew on a Telescope

How to Prevent Dew on a Telescope
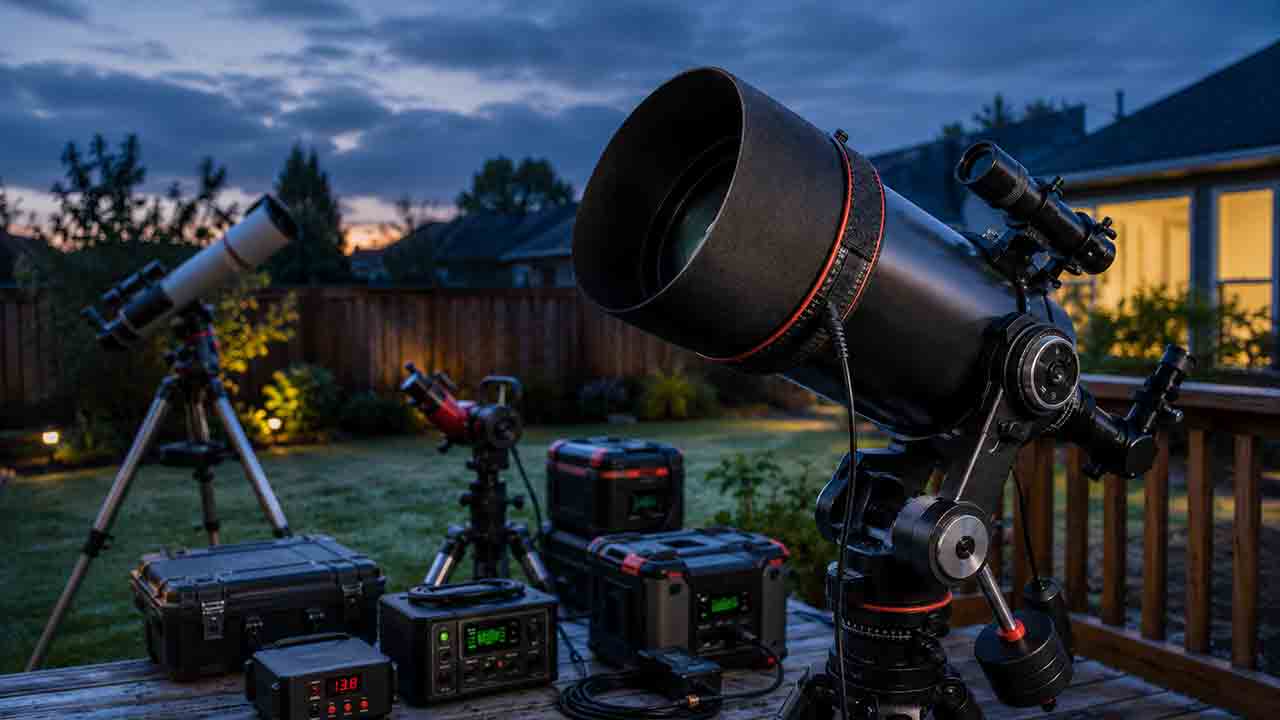
Prevent telescope dew by checking the air temperature and dew point before observing, using a correctly fitted dew shield, and applying gentle controlled heat to vulnerable optics before condensation appears. Keep eyepieces and finders covered when not in use, manage cables and battery capacity, and never wipe wet optical coatings. After the session, let every damp component dry completely before sealed storage.
Key Takeaways
- Dew forms when an optical surface cools to or below the surrounding air’s dew point; exposed glass can cool faster than the reported air temperature.
- A dew shield is a low-power first defense, while a heater strap or purpose-built heater ring provides more reliable protection during long or humid sessions.
- Use only enough heat to keep the vulnerable surface slightly above the dew point; excessive heat can waste power and disturb image quality.
- Schmidt-Cassegrain corrector plates, refractor objectives, finder scopes, eyepieces, camera lenses, and Newtonian secondary mirrors often need different protection.
- Do not wipe dew from coated optics or seal damp equipment in an airtight case; allow complete drying in a clean, dry location.
This guide explains why dew forms, how to estimate risk, which telescope parts need protection, and how to build a practical prevention system. It also includes the original CLEAR decision framework, a dew-point-spread example, a battery-runtime calculation, telescope-specific recommendations, a setup checklist, common mistakes, and troubleshooting steps.
Method note: This guide is based on NOAA and National Weather Service explanations, astronomy-organization guidance, official manufacturer documentation, and practical equipment-selection criteria rather than hands-on product testing. Dew behavior varies with local weather, telescope design, surface exposure, and observing duration.
Quick Navigation
- Why Dew Forms
- How to Estimate Dew Risk
- Dew Shields vs Heaters
- Recommendations by Telescope Type
- Step-by-Step Setup
- Power Calculation
- CLEAR Framework
- After-Session Drying
- Troubleshooting
- FAQ
Why Does Dew Form on a Telescope?
Dew forms when moisture in the air condenses on a surface whose temperature has fallen to or below the dew point. NOAA defines the dew point as the temperature at which water vapor begins changing into liquid water droplets. NOAA National Environmental Satellite, Data, and Information Service, “What Is Humidity?” Dew-point explanation NOAA National Weather Service, Glossary definition of dew and dew point
A telescope can become colder than the surrounding air because its exposed surfaces radiate heat toward the clear night sky. This radiative cooling explains why a corrector plate, objective lens, finder, or eyepiece may dew even when a nearby air-temperature reading remains slightly above the reported dew point.
What Is the Dew Point?
The dew point is the temperature at which air with its current moisture content becomes saturated and condensation can begin. A higher dew point generally indicates more moisture in the air, but dew formation depends on the temperature of the optical surface—not only the reported air temperature.
The dew-point spread is the difference between air temperature and dew point:
Dew-point spread = air temperature − dew point
A shrinking spread is a warning that only a small amount of additional cooling may trigger condensation.
Why Can Optics Cool Below the Air Temperature?
On a clear night, an exposed optical surface can lose heat by radiation toward the sky. Wind, nearby buildings, ground temperature, cloud cover, shields, and the telescope’s material and thermal mass affect the final surface temperature.
This is why a weather app cannot predict the exact minute that a particular telescope will dew. The app reports atmospheric conditions at a location or station, while the optic responds to its own exposure and temperature.
Why Does Dew Harm Observing?
Dew scatters light, reduces contrast, softens detail, and can make focusing difficult. In imaging, condensation can create halos, uneven brightness, lost frames, and failed autofocus.
Water that evaporates may also leave residue on optical surfaces. Repeatedly storing damp equipment can expose mechanical parts, electronics, coatings, foam, and cases to unnecessary moisture. Astronomy.com, “How Do Professional Observatories Deal With Dew on Mirrors and Lenses?” Effects of moisture and exces...
Dew does not automatically mean the telescope is permanently damaged. The priority is to stop the condensation from worsening, avoid rubbing the optics, and dry the equipment correctly.
How Can You Estimate Dew Risk Before Observing?
Check the forecasted air temperature, dew point, cloud cover, wind, and expected overnight temperature trend. The smaller the dew-point spread becomes, the more prepared the observer should be.
A Practical Dew-Point-Spread Example
Suppose the forecast at the start of a session is:
- Air temperature: 12°C
- Dew point: 9°C
- Dew-point spread: 3°C
Two hours later, the forecast expects:
- Air temperature: 9°C
- Dew point: 8°C
- Dew-point spread: 1°C
The second period presents a higher condensation risk because the air temperature is approaching the dew point. An exposed corrector plate or lens may reach the dew point sooner than the weather station’s air sensor because of radiative cooling.
This example is a planning tool, not a universal threshold. Dew may form with a wider reported spread under strong radiative cooling, while wind or cloud cover may delay it under other conditions.
Which Weather Signals Increase Risk?
| Weather or site condition | Why it matters | Practical response |
|---|---|---|
| Air temperature approaching dew point | Less additional cooling is needed for condensation | Install dew control before the session |
| Clear sky | Exposed surfaces can radiate heat efficiently | Use a shield and monitor vulnerable optics |
| Light wind or calm air | Less mixing may allow surfaces to remain colder | Prepare active heat for long sessions |
| High humidity or fog nearby | Moisture is abundant and conditions may worsen quickly | Use controlled heat and protect accessories |
| Wet grass, car roofs, or tables | Nearby surfaces are already reaching condensation conditions | Turn heaters on before optics fog |
| Falling temperature after sunset | Optics and air are moving closer to the dew point | Recheck heater power and battery |
| Coastal, lakeside, or low-lying site | Local moisture and drainage can raise dew risk | Bring a more complete dew-control system |
| Cloud cover increasing | May reduce radiative cooling but can signal changing humidity | Continue monitoring rather than assuming safety |
Visible moisture on grass or equipment cases is a useful warning, but it is not a precise measurement of the optical surface.
Should You Use Relative Humidity or Dew Point?
Dew point is usually the more direct planning value because it identifies the condensation temperature for the current moisture content. Relative humidity changes when air temperature changes, even if the amount of water vapor remains similar.
Use both when available, but compare air temperature with dew point rather than relying only on a high relative-humidity percentage.
Which Works Better: a Dew Shield or Dew Heater?
A dew shield is the simplest first defense, while controlled heat provides more dependable protection when moisture is severe or observing sessions are long.
A dew shield is an extension around an exposed front optical element. It reduces the optic’s exposure to the open sky, helps delay radiative cooling, and can also block stray light. Celestron describes dew shields as front-mounted tubes that reduce condensation on corrector plates. Celestron, “Telescope Dew Shields: Your Key to Crystal-Clear Views,” dew-shield function and combined protection
A dew heater is a purpose-built electrical heating element placed around or near a vulnerable optical cell. Its job is not to make the telescope hot; it supplies enough energy to keep the optical surface above the dew point.
Dew Shield vs Dew Heater Comparison
| Factor | Dew shield | Dew heater with controller |
|---|---|---|
| Power required | None | Battery or other compatible power source |
| Setup complexity | Low | Moderate |
| Best role | Delays dew and blocks stray light | Prevents dew during longer or wetter sessions |
| Effectiveness in heavy dew | May become insufficient | Usually more reliable when sized and controlled correctly |
| Risk of overheating optics | None from the shield itself | Possible if excessive uncontrolled heat is used |
| Cable management | None | Required |
| Portability | Lightweight versions roll or collapse | Adds strap, controller, cables, and power |
| Common targets | Refractor objective, SCT corrector, finder | Corrector, lens cell, finder, eyepiece, camera lens, secondary system |
| Maintenance | Keep clean and dry | Inspect heater, connectors, insulation, and cables |
A shield and heater are complementary rather than competing accessories. A shield reduces the heating demand, while a controller can reduce unnecessary power use.
When Is a Dew Shield Enough?
A dew shield may be sufficient when:
- The session is short.
- The dew-point spread remains comfortable.
- The site is dry or breezy.
- The optical surface is already recessed.
- The telescope is monitored closely.
- The observer can stop before condensation forms.
A shield is less likely to be enough during all-night imaging, humid coastal sessions, fog-prone locations, or nights when air temperature is expected to approach the dew point.
When Should You Add Active Heat?
Use a heater when dew repeatedly ends sessions, when the optics are highly exposed, or when unattended imaging must continue through changing conditions.
A controller is preferable to uncontrolled full power because the goal is gentle prevention. Celestron’s smart controllers monitor ambient conditions and regulate heater output, while its heater-ring documentation notes that excessive full-power operation on some larger systems can slightly degrade optical performance under certain conditions. Celestron, “Smart DewHeater and Power Controller 4X,” environmental monitoring and automatic heat control Celestron, “Dew Heater Ring,” heater power, thermistor control, and excessive-heat considerations
Which Telescope Parts Need Dew Protection?
The highest-risk part is usually an exposed optical surface with a clear view of the night sky. The exact priority depends on telescope design.
Refractor
The objective lens is exposed at the front, although a built-in dew shield provides some protection.
Practical setup:
- Extend the built-in dew shield fully.
- Add a correctly sized heater strap around the objective cell or in the location specified by the manufacturer.
- Keep the finder and eyepieces covered when not in use.
- Check that the heater cable does not interfere with focusing or tube rotation.
Do not wrap a heater over moving focuser parts or directly across glass unless the product is specifically designed for that location.
Schmidt-Cassegrain, EdgeHD, and Similar Corrector-Plate Designs
The large front corrector plate is highly exposed and commonly requires both a dew shield and active heat.
Practical setup:
- Install a compatible dew shield.
- Fit the heater strap or approved heater ring according to the exact model instructions.
- Start with low controlled output before dew appears.
- Route cables so they cannot pull on the front assembly or snag during slewing.
- Confirm compatibility with dust caps, solar filters, and other front-mounted accessories.
Celestron recommends combining a dew shield with controlled heating for demanding conditions and offers integrated systems that monitor corrector temperature and ambient conditions. Celestron, “Smart DewHeater and Power Controller 4X,” environmental monitoring and automatic heat control Celestron, “Celestron Origin Technology,” example of an integrated system that heats optics just above the dew point
Maksutov-Cassegrain
The front meniscus corrector is also exposed and can dew readily. Use a long compatible dew shield and a heater positioned according to the manufacturer’s guidance.
Because the glass can have substantial thermal mass, preventing dew is usually easier than trying to remove heavy condensation after it forms.
Newtonian Reflector and Dobsonian
The primary mirror is recessed deep in the tube and is often less exposed than a refractor objective or Schmidt corrector. The secondary mirror, finder, eyepiece, and open upper assembly of a truss telescope may dew first.
Practical priorities:
- Extend a light shroud on an open truss telescope when appropriate.
- Protect or heat the secondary only with equipment designed for the holder.
- Use a finder heater or cap the finder between targets.
- Keep unused eyepieces in a closed case.
- Avoid directing warm air into the optical tube.
- Do not place an ordinary heater strap around the outside of a large Newtonian tube and assume it will effectively heat the secondary.
Finder Scope and Red Dot Finder
Finder objectives and eyepieces are small, exposed, and can dew quickly. A short finder dew shield, small heater strap, or cap can help.
A red dot window can also fog. Use an approved heater or shield if needed, and keep the brightness control and battery compartment protected from moisture.
Eyepieces
Eyepieces commonly fog from ambient dew or warm breath.
Helpful practices:
- Keep unused eyepieces capped in a closed case.
- Return an eyepiece to the case instead of leaving it exposed.
- Avoid breathing directly onto the eye lens.
- Use an eyepiece heater made for the barrel or housing.
- Do not wipe a fogged eye lens with clothing or tissue.
Cameras, Guide Scopes, and Filters
Camera lenses, guide-scope objectives, and filter surfaces can also dew. Built-in camera sensor windows may have separate anti-dew systems that should be used only as documented.
Cable-heavy imaging systems require extra planning so heater leads do not affect guiding, focus, or mount movement.
How Do You Set Up a Dew-Prevention System?
The best time to prevent dew is before the optical surface becomes visibly wet.
Step 1: Review the Conditions
Check air temperature, dew point, expected temperature drop, humidity, wind, and session duration. Decide whether the night requires:
- Covers and a shield only.
- A shield plus one heater.
- Multiple heaters and a controller.
- Extra power for an all-night imaging session.
Step 2: Identify Vulnerable Components
List every exposed optical surface:
- Main objective or corrector.
- Finder objective and finder eyepiece.
- Newtonian secondary mirror.
- Main eyepieces.
- Guide scope.
- Camera lens.
- Red dot window.
Prioritize the surface that usually ends the session first.
Step 3: Install the Dew Shield
Fit the shield securely without contacting the optical surface or blocking the full aperture. Check that the shield cannot sag into the light path or fall during a mount slew.
A flexible shield must be rolled and fastened evenly. A rigid shield must match the optical tube and accessory clearances.
Step 4: Install the Heater Correctly
Place the heater where its manufacturer specifies. A common strap heats the metal cell or housing so warmth reaches the optic gently; an integrated ring may heat a corrector more directly.
Do not:
- Place a generic heater directly on optical glass.
- Cover vents or electronics.
- Trap the heater under an incompatible insulation layer.
- Cross cables over moving focusers.
- Use damaged insulation or connectors.
- Connect a heater to an unverified voltage or polarity.
Step 5: Start Low Before Dew Appears
Turn on the controller before condensation forms. Begin with a low output appropriate to the conditions and increase only when the optical surface approaches the dew point or begins to show early fogging.
The goal is a clear optic with minimal heat—not the warmest possible glass.
Step 6: Check Power and Cable Routing
Secure cables with enough slack for the mount’s full movement. Test a complete slew before darkness.
Keep power connectors away from wet ground, standing water, and trip paths. Use power supplies, fuses, connectors, and current limits specified for the equipment.
Step 7: Monitor During the Session
Inspect bright stars periodically. Early dew may appear as:
- Growing halos.
- Loss of contrast.
- Soft focus that does not respond normally.
- Uneven haze.
- A finder that suddenly shows fewer stars.
- Autofocus values drifting unexpectedly.
Also check the shield, controller, cables, and battery status.
How Much Power Does a Dew Heater Need?
Power use depends on heater design, size, controller output, weather, and the number of channels. Use the manufacturer’s rated voltage, current, and maximum power rather than estimating from physical size.
Electrical Relationships
For a DC accessory:
Power in watts = voltage × current
Energy in watt-hours = power × operating time
A controller running below full output reduces average power, but the actual duty cycle changes with conditions.
Hypothetical Battery-Runtime Example
Suppose a dew-control system contains:
- Main heater average draw: 8 W
- Finder heater average draw: 3 W
- Controller overhead: 1 W
- Total average load: 12 W
- Battery rated energy: 100 Wh
- Assumed usable energy after conservative losses: 80 Wh
Estimated runtime:
80 Wh ÷ 12 W = about 6.7 hours
This is a planning estimate, not a guarantee. Cold temperatures, battery age, cable loss, controller behavior, and simultaneous mount or camera loads can shorten runtime.
What Should You Include in the Power Budget?
Add:
- Every heater channel.
- Controller consumption.
- Telescope mount.
- Camera cooling.
- Mini computer.
- Guide camera.
- USB hub.
- Focuser.
- Network equipment.
- Safety reserve.
Do not discharge a battery beyond the limits stated by its manufacturer. Confirm that the power source can provide both the required energy and the peak current.
How Can You Use the CLEAR Dew-Control Framework?
The CLEAR framework is an original decision tool for matching dew protection to the complete observing system.
C — Conditions
Check:
- Air temperature.
- Dew point.
- Forecast temperature trend.
- Wind.
- Cloud cover.
- Fog or wet surfaces nearby.
- Site history.
- Planned session length.
A short session with a wide dew-point spread may require only passive protection. A humid all-night session needs a more conservative plan.
L — Lens and Surface Exposure
Identify which surface sees the open sky most directly.
Questions to ask:
- Is there a front corrector plate?
- Is the refractor shield long enough?
- Is the Newtonian secondary exposed?
- Is the finder usually the first item to fog?
- Are eyepieces left on an open tray?
- Does the guide scope have its own shield?
- Is a camera lens pointed upward for long periods?
E — Energy and Control
Determine:
- Heater voltage.
- Rated current or power.
- Number of channels.
- Controller capacity.
- Battery watt-hours.
- Expected runtime.
- Cable and connector compatibility.
- Whether temperature sensors are supported.
Use a controlled system when practical. More heat is not automatically better.
A — Airflow, Angle, and Accessories
Consider:
- Shield length and fit.
- Natural airflow.
- Wind exposure.
- Optical orientation.
- Nearby body heat and breath.
- Cable routes.
- Cases and caps.
- Accessory collisions.
- Whether the setup can be monitored.
Do not aim a fan, hot-air gun, or high-temperature dryer at coated optics.
R — Recovery and Storage
Plan what happens if dew appears:
- How will the session be paused?
- Which component can be gently warmed?
- Where will wet accessories be placed?
- How will the equipment dry after returning home?
- Is the storage case dry?
- Is desiccant maintained and replaced as needed?
- Can damp foam be removed and dried?
A prevention plan is incomplete without a safe drying plan.
What Does the Dew-Control Decision Tree Recommend?
Is the session short and the dew-point spread expected to remain comfortable?
- Yes: use caps, a dew shield, and regular checks.
- No: continue.
Is an exposed front lens or corrector the main optical surface?
- Yes: use a shield and prepare controlled heat.
- No: continue.
Does the finder, eyepiece, or secondary usually dew before the main optic?
- Yes: protect that component first.
- No: monitor the main optic.
Will the system run unattended or for several hours?
- Yes: use a controller, adequate power reserve, and secure cable routing.
- No: manual monitoring may be sufficient.
Has dew already formed?
- Yes: stop increasing exposure time or magnification, use approved gentle heat or allow controlled drying, and do not wipe the optic.
- No: maintain the lowest effective heater setting.
Is the equipment wet at the end of the session?
- Yes: do not seal it in an airtight case until fully dry.
- No: cap and store according to the manufacturer’s instructions after temperature equalization.
What Do Real-World Scenarios Suggest?
Scenario 1: Short Refractor Session in a Dry Climate
The forecast shows a moderate dew-point spread, light wind, and a one-hour observing session.
The built-in dew shield and regular inspection may be enough. The observer should still keep unused eyepieces covered and bring a small heater if the site has a history of sudden condensation.
Scenario 2: Schmidt-Cassegrain Near a Lake
The corrector plate is exposed, the air temperature is falling quickly, and the session will last several hours.
Use both a correctly fitted dew shield and controlled heating. Start the heater before visible dew appears, verify battery reserve, and protect the finder and eyepieces separately.
Scenario 3: Dobsonian Under Suburban Skies
The primary mirror remains clear, but the secondary mirror and finder fog after midnight.
Heating the outside of the lower tube is unlikely to solve the actual problem. Use a secondary-specific solution if compatible, add finder protection, and keep eyepieces in a closed case.
Scenario 4: Automated Imaging Rig
The telescope, guide scope, camera, focuser, mount, and computer share one battery.
Calculate the complete average load rather than budgeting only for the main heater. Use strain relief and test the full mount movement so heater cables do not cause tracking errors.
Scenario 5: Frost Instead of Liquid Dew
The optic cools below freezing in moist air and develops frost.
Do not scrape or wipe the frost. Stop the session, use only approved gentle heating, and allow the equipment to dry fully before sealed storage.
What Common Dew-Control Mistakes Should You Avoid?
Waiting Until the Optic Is Wet
A heater works best as prevention. Removing established condensation can require more heat and more time.
Using Maximum Heat by Default
Excess heat wastes battery capacity and can create temperature gradients that reduce image quality. Use a controller or the lowest effective setting.
Heating the Wrong Part
A strap around a tube may not efficiently warm a distant secondary mirror. Match the heater to the surface that actually dews.
Leaving Eyepieces Exposed
The main telescope may remain clear while an uncovered eyepiece, finder, or guide scope ends the session.
Wiping Dew From Optical Coatings
Rubbing wet optics can drag dust across coatings and leave streaks. RASC guidance specifically warns against wiping dew from telescope optics. Royal Astronomical Society of Canada Kingston Centre, “Telescope Buying Guide,” dew shields, heater straps, controlle...
Using a Heat Gun or Very Hot Dryer
Rapid, concentrated heat can create thermal stress, damage finishes, move dust, and disturb optical performance. Use only gentle methods approved for the equipment.
Ignoring Battery Capacity
A heater may work early in the session and fail when the temperature is lowest. Include a reserve and account for all other equipment sharing the power source.
Sealing Wet Equipment in a Case
Moisture trapped against optics, electronics, foam, and metal can prolong exposure. Sky & Telescope advises against capping or sealing a telescope while dew remains condensed. Sky & Telescope, “Dealing With Dew: Dew Heaters, Dew Shields and More,” telescope-type considerations and drying befo...
Forgetting Cable Movement
A heater lead can pull on the focuser, camera, guide scope, or corrector assembly. Test every mount position before unattended operation.
How Should You Dry and Store a Dewy Telescope?
Do not store the telescope while visible moisture remains.
If the Optics Are Already Wet
- End the observing session before water accumulates heavily.
- Do not rub the optical surface.
- Move the equipment to a clean, dry, protected location.
- Remove or loosen caps only as needed for drying and according to the manufacturer’s guidance.
- Allow moisture to evaporate naturally or with gentle ambient airflow.
- Dry the exterior, tripod, cables, and non-optical surfaces with suitable clean materials.
- Store only after optics, foam, cases, connectors, and accessories are fully dry.
Do not blow dust across wet optics or use compressed air on condensation.
Bringing Cold Equipment Into a Warm Room
Cold equipment can develop additional condensation when exposed to warmer humid indoor air.
If the optics are dry outdoors, follow the manufacturer’s recommended method for temperature equalization and capping. If moisture is already present, do not trap it in an airtight case; let the telescope dry in a clean environment before final storage.
There is no single universal procedure for every sealed, vented, open-tube, or electronic telescope. Model-specific storage instructions take priority.
Long-Term Storage
Celestron recommends indoor storage and suggests moisture-absorbing desiccant near or inside suitable storage cases. Celestron, “Caring for Your Celestron Telescope: How to Maintain, Store, and Ship,” indoor storage and desiccant guid...
Good storage practices include:
- A dry indoor location with moderate temperature changes.
- Clean dust caps after the equipment is dry.
- Dry foam and fabric before closing cases.
- Maintained desiccant that is replaced or regenerated as directed.
- No direct contact between loose desiccant material and optical surfaces.
- Periodic checks for moisture, corrosion, odor, or fungus.
- Batteries removed from accessories when recommended for long storage.
Desiccant supports dry storage; it does not replace proper field dew control.
How Can You Troubleshoot Dew-Control Problems?
| Problem | Likely causes | First checks |
|---|---|---|
| Corrector plate fogs despite a shield | Heavy dew, insufficient shield length, no active heat | Add compatible controlled heat and verify shield fit |
| Dew forms only at the center of the optic | Heat not reaching the full surface, output too low, poor heater placement | Check model-specific heater position and controller output |
| Stars look soft after increasing heat | Optic overheated, thermal currents, seeing deterioration | Reduce heater output and allow temperatures to stabilize |
| Finder dews before the main telescope | Small exposed optics, no finder shield or heater | Cap between uses or add a finder-specific solution |
| Eyepiece fogs repeatedly | Breath, exposed storage, warm face near cold glass | Keep spare eyepieces covered and avoid breathing on the eye lens |
| Heater feels hot but optic still dews | Wrong placement, undersized heater, damaged insulation, poor contact | Verify installation, rating, and compatibility |
| Battery dies before dawn | Load underestimated, cold battery, full-power operation | Recalculate watt-hours, use control, and add reserve |
| Controller shows normal output but no heat | Loose plug, wrong channel, damaged cable, incompatible connector | Inspect the full power path and test with approved equipment |
| Mount tracking changes when heater is connected | Cable drag, voltage drop, shared supply limitation | Reroute cables and verify power-source current capacity |
| Moisture appears inside a sealed optical system | Internal condensation or failed sealing | Stop use and contact the manufacturer or qualified service provider |
| Frost appears on optics | Surface below frost point | Do not scrape; apply approved gentle heat or end the session |
| Case smells damp after storage | Equipment or foam was sealed wet | Remove equipment, dry the case and foam fully, and inspect for damage |
Stop using any heater, controller, battery, or cable that becomes unusually hot, smells burnt, shows damaged insulation, or has exposed conductors. Disconnect power safely and follow the manufacturer’s service instructions.
Which Dew-Prevention Setup Should You Use?
Use a dew shield and regular monitoring for short sessions in relatively dry conditions.
Use a dew shield plus a controlled heater for front-corrector telescopes, long sessions, humid sites, and nights when temperature approaches the dew point.
Use component-specific protection for Newtonian secondary mirrors, finders, eyepieces, guide scopes, and camera lenses rather than applying heat to an unrelated part of the telescope.
Use a sensor-based controller and calculated power reserve for automated or all-night imaging systems.
The practical next step is to check the expected dew-point spread, identify the first optical surface that normally fogs, install the correct passive protection, and add only enough controlled heat to keep that surface clear.
Frequently Asked Questions
Can I wipe dew off a telescope lens?
No. Wiping a wet optical surface can move dust across the coating and leave scratches or residue. Prevent additional dew with approved gentle heat or end the session and allow the optic to dry naturally in a clean environment.
Should a dew heater feel hot?
A dew heater should provide gentle warmth, not uncontrolled high heat. Surface temperature depends on the product, controller setting, and conditions. Reduce power or disconnect the system if it becomes unusually hot, smells burnt, or affects image quality.
Where should a dew heater strap be placed?
Place the strap where the heater or telescope manufacturer specifies, commonly around the lens or corrector cell rather than over the glass. Integrated heater rings and secondary-mirror heaters require their own installation procedures.
Do Newtonian telescopes need dew heaters?
Sometimes. The recessed primary mirror is often less vulnerable, but the secondary mirror, finder, eyepieces, and exposed truss components may dew. Apply protection to the component that actually develops condensation.
Can a dew shield prevent all condensation?
No. A shield delays radiative cooling and may be enough in mild conditions, but heavy dew or long sessions can require active controlled heat.
Does frost require different treatment?
Frost is frozen condensation. Do not scrape or wipe it. Use only approved gentle heating or end the session, then allow the equipment to warm and dry completely before sealed storage.
Sources
The following sources were accessed on July 30, 2026. Product specifications, compatibility, power requirements, and support guidance can change.
- NOAA National Environmental Satellite, Data, and Information Service, “What Is Humidity?” Dew-point explanation
- NOAA National Weather Service, Glossary definition of dew and dew point
- Astronomy.com, “How Do Professional Observatories Deal With Dew on Mirrors and Lenses?” Effects of moisture and exces...
- Celestron, “Telescope Dew Shields: Your Key to Crystal-Clear Views,” dew-shield function and combined protection
- Celestron, “Smart DewHeater and Power Controller 4X,” environmental monitoring and automatic heat control
- Celestron, “Dew Heater Ring,” heater power, thermistor control, and excessive-heat considerations
- Celestron, “Celestron Origin Technology,” example of an integrated system that heats optics just above the dew point
- Royal Astronomical Society of Canada Kingston Centre, “Telescope Buying Guide,” dew shields, heater straps, controlle...
- Sky & Telescope, “Dealing With Dew: Dew Heaters, Dew Shields and More,” telescope-type considerations and drying befo...
- Celestron, “Caring for Your Celestron Telescope: How to Maintain, Store, and Ship,” indoor storage and desiccant guid...
Editorial Method
Editorial method: Technical and safety claims were checked against the sources listed above. No hands-on dew-control testing is claimed.
More from Setup Collimation & Maintenance
How to Store a Telescope Without Damaging the Optics
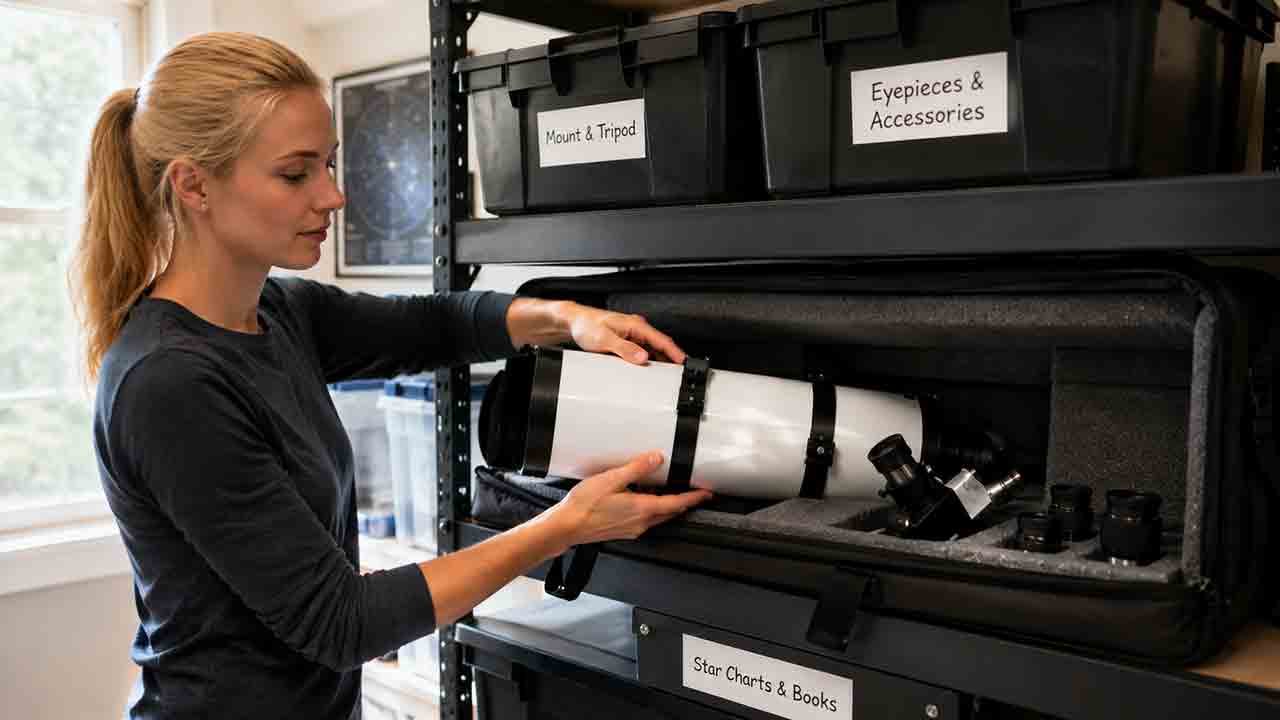
Safe telescope storage depends more on dryness, environmental stability, and secure support than on buying an expensive case. This guide explains how to dry a telescope after a damp observing session, when to install optical caps, and how to choose between assembled storage, a padded case, a closet, a garage, or an observatory. It provides separate recommendations for refractors, Schmidt-Cassegrains, Maksutovs, Newtonians, solid-tube and truss Dobsonians, mounts, eyepieces, filters, cameras, batteries, and solar equipment. Readers also receive a storage-location comparison, a three-home practical example, desiccant guidance, troubleshooting for condensation and musty cases, and a long-term checklist. The central recommendation is to keep equipment indoors when practical and never seal moisture inside caps, foam, bags, or covers.
How to Clean Telescope Lenses and Mirrors Safely
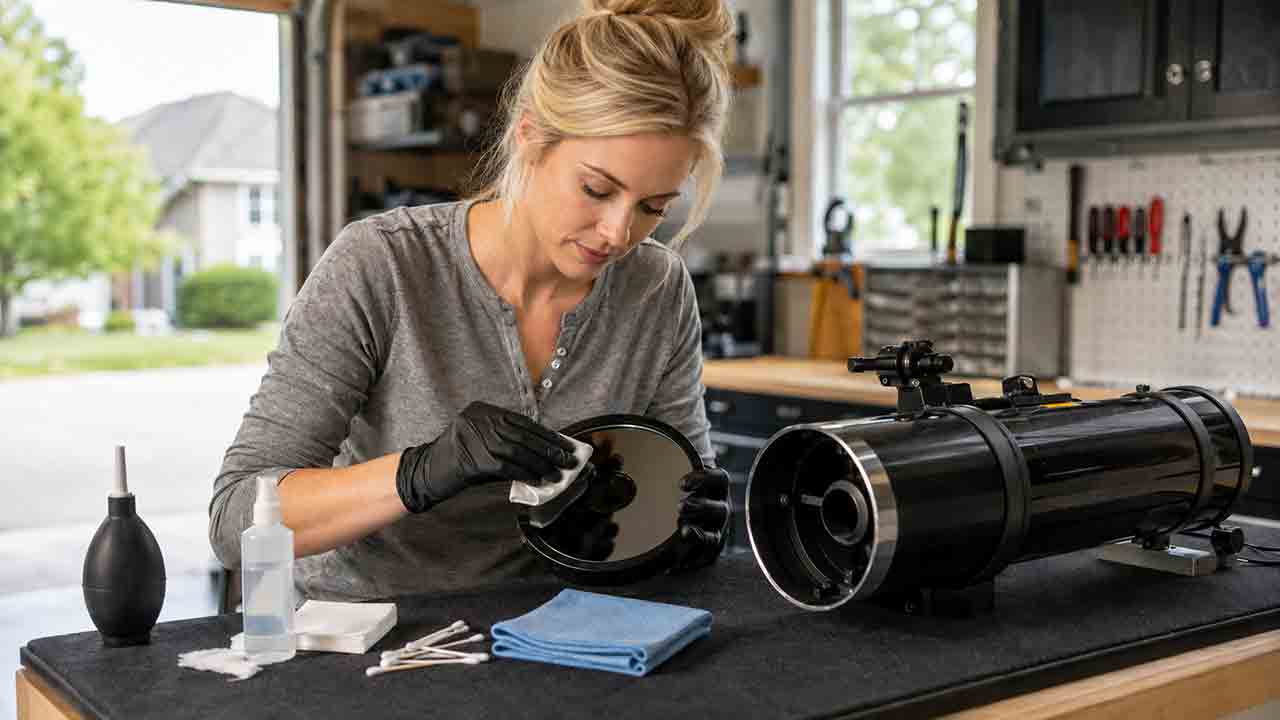
Safe telescope cleaning begins by deciding whether cleaning is needed at all. This guide explains why a few dust particles should usually be left alone, how to remove loose debris without scratching coatings, and how to clean accessible eyepiece lenses, refractor objectives, and corrector-plate exteriors with minimal contact. It separates lens care from Newtonian primary-mirror washing, secondary-mirror handling, diagonal-mirror instructions, dew management, and sealed optical assemblies that require professional service. Readers also receive a surface-by-surface comparison table, a clean-wait-service decision framework, three real-world contamination examples, troubleshooting guidance, and complete preparation and aftercare checklists. The central recommendation is to follow the exact manufacturer instructions and use the least invasive method that solves a genuine performance or contamination problem.
How to Collimate a Reflector Telescope Step by Step
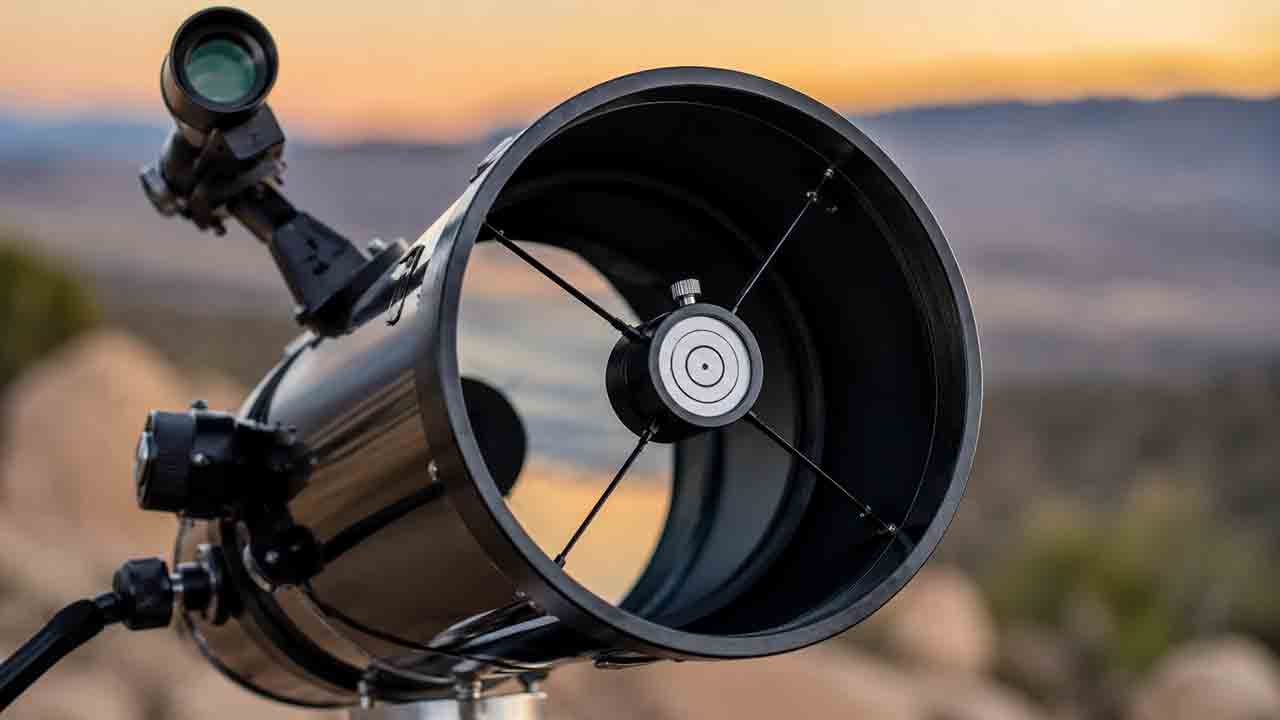
Collimating a Newtonian or Dobsonian reflector means aligning the secondary mirror, focuser axis, and primary mirror in the correct order. This guide shows readers how to identify the adjustment hardware, center and rotate the secondary, aim it at the primary center mark, align the primary with a cap or Cheshire, and verify the result on a centered star. It also compares collimation caps, sight tubes, Cheshires, lasers, Barlowed lasers, and autocollimators; explains laser safety and tool-registration errors; and provides an 8-inch f/6 Dobsonian example. Troubleshooting sections address shifting alignment, oval secondary reflections, conflicting tool readings, off-axis star tests, and mechanical flexure. The central recommendation is to make only the adjustment supported by the observed error and to follow the exact telescope and tool manuals.
Explore More Topics
How to Choose Your First Telescope: A Beginner’s Buying Guide
Choosing a first telescope requires more than comparing aperture or advertised magnification. This practical beginner’s guide explains how to match a telescope to observing goals, light pollution, storage space, setup tolerance, and interest in visual observing or imaging. It compares refractors, Dobsonian reflectors, compound telescopes, and smart telescopes, then shows how aperture, focal length, focal ratio, magnification, and mount stability affect real use. Readers can use a quick-selection table, the original SPACE decision framework, a worked specification comparison, realistic household scenarios, new and used equipment checklists, and a troubleshooting chart. The guide also explains why a larger aperture cannot fully overcome bright urban skies, what to verify before buying a software-dependent smart telescope, and how to observe the Sun safely. Recommendations are based on authoritative guidance and published specifications rather than hands-on product testing or paid rankings
How Much Should You Spend on Your First Telescope?
Most beginners should plan a complete first-telescope budget of roughly $350–$700, although the right amount depends on observing goals, portability, automation, and whether the buyer wants direct eyepiece viewing or screen-based imaging. This guide explains what different budget ranges can realistically provide, why very low-cost telescope packages require caution, and when spending more for aperture, GoTo control, smart imaging, or compact optics is justified. It also separates visual astronomy from modular astrophotography, calculates total ownership cost, and shows how accessories, power, storage, shipping, and software can change the real price. The original FIRST Budget Test helps readers evaluate favorite targets, included equipment, real-world portability, desired skills, and total cost. Practical scenarios, a buying checklist, common mistakes, troubleshooting guidance, safety information, and current US market examples help beginners choose a stable, complete setup they are likely to use regularly.
Are Smart Telescopes Worth It for Beginners?
Smart telescopes can be worthwhile for beginners who want automated target finding, live-stacked deep-sky images, and a compact system controlled from a phone or tablet. However, they are not a universal replacement for traditional telescopes. Beginners who value direct eyepiece views, high-magnification planetary observing, manual sky navigation, or component-by-component upgrades may prefer a refractor, reflector, or catadioptric telescope. This guide explains how smart telescopes combine optics, cameras, motorized tracking, and image processing; compares them with traditional and modular imaging setups; and examines costs, software dependence, batteries, light pollution, target suitability, and long-term flexibility. It also provides the original WORTH decision framework, a hypothetical cost-per-session example, real-world beginner scenarios, a purchase checklist, common mistakes, and troubleshooting steps. The goal is to help readers choose based on their actual observing style rather than marketing claims or specifications alone