How to Clean Telescope Lenses and Mirrors Safely

How to Clean Telescope Lenses and Mirrors Safely
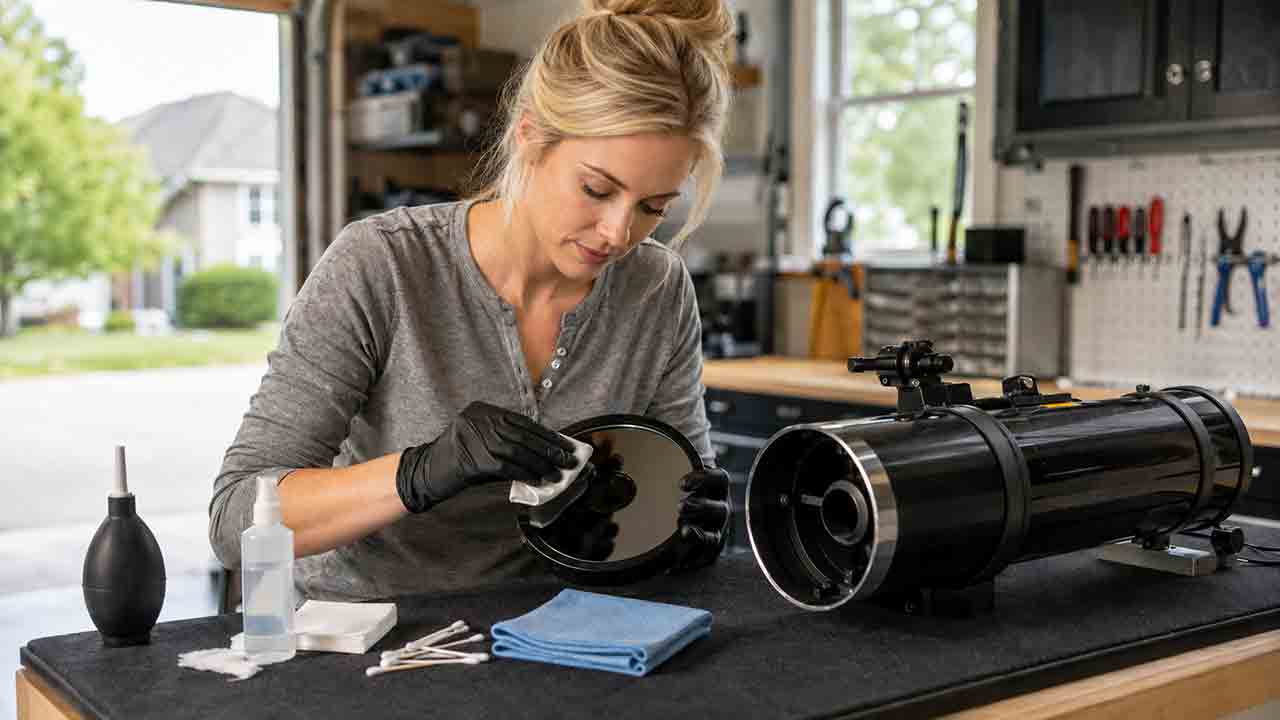
Clean telescope optics only when contamination is affecting use or could damage a coating. Start with the least invasive method: remove loose dust with a clean hand blower, then use a manufacturer-approved optical cleaner on a fresh lint-free applicator for accessible lens surfaces. Telescope mirrors require a different process and should be rinsed or removed only when the exact telescope or mirror instructions permit it.
Key Takeaways
- A few dust specks rarely justify cleaning; unnecessary contact creates more risk than the dust itself.
- Clean loose particles before touching a coated surface, and never rub visible grit across glass or a mirror.
- Refractor objectives, eyepieces, corrector plates, primary mirrors, and diagonal mirrors do not all use the same cleaning method.
- Apply approved cleaning fluid to the applicator unless the manufacturer specifically directs otherwise; do not flood a lens cell or sealed optical assembly.
- Stop and seek professional service when contamination is inside an optical group, a coating is failing, fungus is established, or safe disassembly is uncertain.
This guide helps you decide whether cleaning is necessary, choose the least risky method for each optical surface, remove fingerprints and dew residue, clean a Newtonian primary mirror only when appropriate, and recognize problems that ordinary cleaning cannot fix.
Editorial note: This guide is based on current manufacturer care instructions, optical-maintenance documentation, and practical risk-reduction criteria rather than hands-on testing of a specific telescope or cleaning product.
Should You Clean the Telescope Optics at All?
Clean only when the contamination is persistent, performance-relevant, chemically concerning, or likely to become harder to remove.
Celestron advises that a few visible dust particles do not justify cleaning and warns that excessive cleaning can prematurely damage optical coatings. Sky-Watcher manuals similarly recommend keeping optics capped and avoiding mirror or lens cleaning unless the user understands optical surfaces.
Usually leave the optic alone
Do not clean merely because a bright flashlight reveals:
- A few dust particles
- Minor lint
- A small amount of pollen
- Faint drying marks that do not affect use
- Tiny coating imperfections that cleaning cannot repair
- Dust visible only at an extreme viewing angle
A flashlight inspection exaggerates harmless contamination. Evaluate the telescope during normal observing or imaging before deciding.
Cleaning may be reasonable
Consider cleaning when you see:
- A fingerprint or oily smear
- Salt spray
- Sticky pollen or tree residue
- Insect deposits
- Dried dew residue
- Water spots that affect contrast or imaging
- Heavy dust that cannot be removed without a proper rinse
- Contamination identified by the manufacturer as coating-damaging
- A visible obstruction in an eyepiece field or camera image
Stop and seek service
Professional or manufacturer service is safer when:
- Contamination is between lens elements
- Fungus appears inside an objective, corrector assembly, eyepiece, or camera lens
- A corrector plate, primary mirror, or lens cell would need uncertain disassembly
- A coating is peeling, crazing, cloudy, or discolored
- The optic has scratches, chips, or chemical damage
- A mirror needs recoating
- The telescope is under warranty and disassembly may affect coverage
- The model manual forbids user removal of the optic
Cleaning removes contamination. It does not restore a damaged coating.
Which Cleaning Method Fits Each Optical Surface?
| Optical surface | Normal first response | Contact cleaning? | Important restriction |
|---|---|---|---|
| Eyepiece eye lens | Hand blower, then approved optical cleaner on fresh tissue or swab | Yes, when needed | Prevent fluid from wicking into the eyepiece |
| Refractor objective exterior | Blower, soft optical brush if approved, then damp applicator | Yes, gently | Do not disassemble or loosen the lens cell |
| SCT or Maksutov corrector exterior | Blower, then manufacturer-approved lens method | Yes, gently | Do not remove or rotate the corrector plate |
| Finder objective | Same as a small coated lens | Yes, when needed | Avoid flooding the retaining edge |
| Newtonian primary mirror | Leave light dust; use model-approved rinse when genuinely dirty | Sometimes, with special procedure | Do not use ordinary lens wiping as the default method |
| Newtonian secondary mirror | Blower only for light dust; remove and wash only with approved procedure | Rarely | Small mirror is easy to drop, rotate, or misalign |
| Mirror diagonal | Follow the diagonal manufacturer’s exact instructions | Model-specific | Some enhanced mirror coatings prohibit water-based lens cleaners |
| Solar filter | Follow the solar-filter manufacturer only | Usually no user cleaning beyond specified care | Replace damaged safety-critical material rather than improvising |
| Camera sensor or sealed optical group | Manufacturer service or sensor-specific procedure | Not covered here | Telescope-lens methods are not sensor-cleaning methods |
The safest method depends on the coating and assembly, not only on whether the surface looks like glass.
What Supplies Are Safe to Prepare?
Use clean, purpose-selected supplies and avoid household substitutions unless the optical manufacturer explicitly approves them.
Basic external-lens kit
Prepare:
- Clean hand-squeeze air blower
- Manufacturer-approved lens brush, if permitted
- Optical lens tissue or clean lint-free applicators
- Fresh cotton swabs or surgical cotton when specified
- Manufacturer-approved optical cleaning solution
- Clean nitrile gloves for handling mechanical parts
- Bright diffuse work light
- Clean towel beneath small accessories
- Dust caps
- Sealable bag for used applicators
Tele Vue operating guides recommend a very soft, lint-free tissue, cloth, cotton swab, or surgical cotton lightly moistened with suitable cleaner. They also advise using a fresh applicator for each stroke and minimizing the number of strokes.
Additional supplies for a model-approved primary-mirror wash
Depending on the exact mirror instructions, you may need:
- Clean basin or protected sink
- Lukewarm water
- Mild additive explicitly permitted by the manufacturer
- Distilled or deionized water for the final rinse
- Clean towels placed around, not across, the optical face
- A stable drying support
- Labels or photographs for documenting mirror-cell orientation
- Correct tools for the mirror cell
- A collimation tool for reinstallation
Do not remove a primary mirror simply because another telescope owner uses that method. Mirror cells and retaining systems differ.
Products to avoid unless specifically approved
Avoid:
- Paper towels
- Facial tissue containing lotion
- Clothing
- Dirty microfiber cloths
- Household dusters
- Tap-water drying without a final approved rinse
- Window cleaner
- Strong ammonia products
- Acetone or other aggressive solvents
- Abrasive pads or erasers
- High-pressure shop air
- Uncontrolled canned air
- Saliva or breath
- Pre-moistened wipes of unknown chemistry
- A reused swab or tissue dragged across the surface
Some optical manufacturers approve particular alcohol-based or glass-cleaning products for specific lenses. That does not make the same chemistry suitable for every mirror, filter, diagonal, or coated objective.
How Do You Prepare a Safe Cleaning Area?
Work indoors in a clean, well-lit, low-dust space where the optic cannot roll, fall, or be exposed to direct sunlight.
Preparation steps
- Read the telescope and accessory manuals.
- Confirm the optical surface and coating type.
- Remove jewelry that could strike the glass.
- Wash and dry your hands, or wear clean gloves for mechanical handling.
- Turn off fans that may move dust.
- Place a clean towel below small accessories.
- Stabilize the telescope tube horizontally or slightly downward.
- Remove batteries or power from nearby equipment when fluid is involved.
- Photograph the original mechanical orientation before removing any approved component.
- Keep caps and retaining hardware organized.
Do not clean a cold optic immediately after bringing it into a warm humid room. Allow the assembly to acclimate so condensation does not complicate the process.
How Do You Remove Loose Dust Without Scratching the Optic?
Use gravity and a clean hand blower before any brush, tissue, or swab touches the coating.
Step-by-step dust removal
- Hold or position the optical surface so loosened dust can fall away.
- Keep the blower tip away from the glass.
- Use several gentle bursts across the surface.
- Inspect under diffuse light rather than an intense flashlight.
- Stop if the remaining particles are not affecting use.
- Use an approved soft optical brush only when the manufacturer permits it and the brush is unquestionably clean.
Never touch the blower nozzle to the optic. Do not blow with your mouth because droplets can create new residue.
Why is canned air risky?
Aerosol dusters can eject liquid propellant, bittering agents, or condensed material when tilted, shaken, or used too close. Their pressure can also move grit unpredictably.
Use canned air only when the optical manufacturer explicitly permits it and follow the can’s orientation and distance instructions. A clean hand blower is the safer general starting tool.
How Do You Clean an Eyepiece Lens Safely?
Remove loose dust first, then lift oils with a lightly moistened fresh applicator using minimal pressure and as few strokes as possible.
Eyepiece eye lenses often need cleaning sooner than primary optics because eyelashes, skin oil, makeup, and fingerprints reach them easily.
Step-by-step eyepiece cleaning
- Remove the eyepiece from the telescope.
- Cap the barrel end so loosened debris cannot enter.
- Blow away loose dust.
- Inspect for grit before contact.
- Lightly moisten a fresh optical tissue or swab with approved cleaner.
- Touch the stain gently to soften it.
- Wipe or whisk the area with minimal pressure.
- Use a new applicator for the next pass.
- Use a dry fresh applicator only when the instructions require removal of residual fluid.
- Let the surface finish drying before capping.
Do not spray directly onto the eye lens. Liquid can wick around the retaining ring and reach internal elements.
What if residue remains?
A faint film may be less harmful than repeated polishing. Tele Vue notes that residual film may not affect visual performance and recommends using fewer strokes.
If residue is obvious during normal use, repeat with a fresh applicator and verified solution. Stop when continued cleaning no longer produces improvement.
How Do You Clean a Refractor Objective Safely?
Clean only the accessible outer surface, support the telescope securely, and prevent fluid from reaching the edge of the lens cell.
Step-by-step objective cleaning
- Retract or remove the dew shield only as the manual allows.
- Point the objective slightly downward.
- Remove loose dust with a hand blower.
- Use an approved brush only if needed.
- Lightly moisten a fresh lint-free applicator.
- Begin at the contaminated area rather than wiping the full objective automatically.
- Use low pressure and a short controlled stroke.
- Replace the applicator after each pass.
- Keep fluid away from the lens edge and retaining cell.
- Allow the surface to dry before replacing the cap.
Do not loosen the retaining ring, rotate lens elements, or remove an objective cell to clean an ordinary exterior mark.
What about large objectives?
Large coated lenses are expensive and difficult to clean evenly. When broad contamination covers much of the objective, consult the manufacturer before attempting a full-surface cleaning.
How Do You Clean an SCT or Maksutov Corrector Plate?
Treat the external corrector surface as a delicate coated optic, but do not remove, rotate, or loosen the corrector assembly.
A corrector plate is an aligned optical component. Its rotational orientation, centering, shims, and secondary position may matter.
Safe external-surface procedure
- Place the optical tube securely with the corrector slightly downward.
- Blow away all loose particles.
- Use a lightly moistened fresh applicator and approved cleaner.
- Work in small sections.
- Use each tissue, cotton pad, or swab only once across the surface.
- Avoid fluid accumulation at the retaining ring.
- Stop if residue appears to be inside the tube.
Do not remove the secondary housing, corrector retaining ring, or corrector plate for routine cleaning.
When should a corrector plate go to service?
Seek service for:
- Internal haze
- Fungus between surfaces
- Dried contamination under the plate
- Loose secondary housing
- Coating deterioration
- Corrector rotation or centering concerns
- Previous disassembly with unknown orientation
How Do You Clean a Newtonian Primary Mirror Safely?
Clean a primary mirror only when contamination justifies the risk, and use the exact mirror or telescope procedure. A rinse-based method is generally safer than treating the mirror like a camera lens.
Light dust on a primary mirror rarely affects visual sharpness. The mirror’s large area makes contamination look dramatic under bright light while blocking only a small fraction of the aperture.
Should you remove the mirror?
Remove the primary only when:
- The manual permits user removal
- The mirror cell can be documented and reassembled correctly
- The contamination cannot be safely addressed in place
- You understand mirror clips, support points, fans, and collimation hardware
- You can lift and support the mirror safely
- Warranty conditions have been checked
Some large Dobsonian designs support cleaning in the mirror box. Other telescopes require removal. Do not assume the same method applies.
Before removal
- Mark or photograph the tube and cell orientation.
- Record the position of connectors and fans.
- Place the tube horizontally.
- Support the mirror cell while removing fasteners.
- Keep collimation and cell-mounting hardware identified separately.
- Lift the mirror or cell using the approved support points.
- Never lift a mirror by the reflective face.
- Do not rest the coated surface against anything.
General low-contact wash sequence
Use this only when compatible with the manufacturer’s instructions:
- Place the mirror in a stable protected basin or approved mirror-box position.
- Rinse loose grit away with a gentle flow.
- Allow permitted cleaning solution to soak contamination rather than scrubbing immediately.
- Rinse again so released particles leave the surface.
- Use contact cleaning only when the manufacturer’s method specifically permits it.
- Never apply concentrated pressure to a stubborn particle.
- Complete the final rinse with distilled or deionized water when specified.
- Stand or support the mirror securely so water drains.
- Allow it to air-dry in a clean space.
- Remove isolated droplets only by the method approved for that coating.
Galaxy Optics publishes a distilled-water rinse procedure, while Obsession Telescopes demonstrates a model-specific mirror-cleaning workflow. These examples show why mirror instructions should come from the telescope or coating source rather than a generic lens-cleaning recipe.
Should you wipe a telescope mirror?
Do not dry-wipe a dusty mirror. Whether gentle contact is permitted during a wet wash depends on the coating and manufacturer procedure.
If an approved method permits contact, the surface must remain flooded, abrasive particles must already be removed, and pressure must be extremely low. Stop if a particle feels fixed or rough.
How should the mirror be reinstalled?
- Confirm that the mirror and cell are fully dry.
- Return support pads and cell components to their documented positions.
- Reconnect fans without pinching wires.
- Install mirror clips or retainers according to the manual.
- Do not tighten retaining clips against the mirror face unless the design specifically requires contact.
- Reinstall the cell in its original orientation.
- Collimate the telescope.
- Check for pinched optics with a centered star after thermal stabilization.
A mirror held too tightly can distort as temperature changes.
How Do You Clean a Newtonian Secondary Mirror?
Leave light dust alone and avoid removing the secondary unless contamination is significant and the manual supports removal.
The secondary is small, exposed, and easy to drop. Removal also affects rotation, position, and collimation.
When removal is justified:
- Place the tube horizontally.
- Support the secondary holder continuously.
- Document its orientation.
- Follow the manufacturer’s removal sequence.
- Keep tools away from the primary.
- Use the coating-approved rinse or cleaning method.
- Reinstall the holder securely.
- Recheck secondary position, rotation, tilt, and primary alignment.
Do not clean the secondary while it hangs over an uncovered primary mirror.
Why Do Diagonal Mirrors Need Separate Instructions?
A mirror diagonal may use an enhanced reflective coating and cleaning method that differs from both telescope mirrors and glass lenses.
Tele Vue’s diagonal-mirror instructions warn that scratches occur when abrasive particles are wiped across the surface and state that its specified mirror should be cleaned only when necessary. That document also prohibits water-based lens cleaners for the particular diagonal.
Therefore:
- Do not apply a refractor-lens method automatically.
- Do not rinse a sealed diagonal unless the manufacturer permits it.
- Do not disassemble the housing casually.
- Check whether the diagonal contains a mirror or prism.
- Follow the exact product instructions.
A prism diagonal and a dielectric mirror diagonal may require different care.
How Should You Handle Dew, Frost, and Condensation?
Prevent dew when possible, and let moisture evaporate without wiping the optical surface.
During observing
Use:
- Dew shield
- Purpose-built dew heater
- Regulated controller
- Eyepiece heater where needed
- Cap for unused accessories
- Shelter from direct radiative exposure where practical
Astro-Physics advises using appropriately controlled dew heaters and allowing existing moisture to clear before resuming.
After observing
- Move the telescope to a protected space.
- Keep the optic oriented so water cannot run into the cell.
- Allow moisture to evaporate.
- Keep dust away while the surface dries.
- Replace the dust cap only after the surface is dry.
- Dry the storage case separately when necessary.
Do not wipe dew with a cloth. Do not apply concentrated heat from a household hair dryer. Rapid or excessive heating can stress coatings, move contamination, or drive moisture into an assembly.
What if dew leaves spots?
Wait until the optic is fully dry. If visible residue affects normal use, apply the appropriate lens or mirror procedure rather than rubbing the fresh water mark.
What If You Find Fungus, Salt, Pollen, or Insect Residue?
Fungus
External suspected fungus warrants prompt manufacturer guidance; internal fungus usually requires professional disassembly and treatment.
Do not expose optics to unverified chemicals or ultraviolet treatments. Some marks identified as fungus are coating damage, internal haze, or ordinary residue.
Salt spray
Salt can attract moisture and may be more urgent than ordinary dust. Avoid dry wiping. Follow the manufacturer’s rinse or approved cleaning procedure promptly.
Sticky pollen and tree residue
Use soaking or a dampened applicator to soften residue. Do not scrape it with a fingernail or tool.
Insect deposits
Remove them before they harden when safe to do so. Use the approved fluid to soften the deposit, then lift it with a fresh applicator.
A Practical Decision Framework: Clean, Wait, or Seek Service?
| Observation | Recommended action | Why |
|---|---|---|
| A few dry dust specks | Wait | Cleaning risk exceeds likely performance benefit |
| Loose dust on an eyepiece | Hand blower | Lowest-contact useful action |
| Fresh fingerprint on external lens | Clean locally | Skin oil can spread and is easy to remove when fresh |
| Broad sticky residue on objective | Contact manufacturer or use approved full-surface method | Large-area wiping increases risk |
| Heavy dust on Newtonian primary | Check performance and manual; plan an approved rinse | Mirror needs a different method from a lens |
| Internal haze in SCT or refractor | Seek service | Disassembly can change optical alignment |
| Fungus between elements | Seek service promptly | Internal biological contamination requires specialist handling |
| Peeling or cloudy coating | Seek inspection or recoating advice | Cleaning cannot restore coating |
| Dew on optic | Let it evaporate | Wiping wet grit can scratch |
| Unknown solar-filter damage | Stop using and replace or obtain manufacturer guidance | Safety-critical filters should not be improvised |
Real-World Example: Three Dirty Optics, Three Different Decisions
An observer finds three problems after a humid weekend:
- A fingerprint on a 25 mm eyepiece
- Dust and two water spots on a refractor objective
- A visibly dusty 8-inch Newtonian primary mirror
Eyepiece decision
The fingerprint is likely to affect comfort and can attract more grime. The observer blows away dust, uses approved cleaner on a fresh swab, makes one controlled pass, and leaves the eyepiece uncapped until dry.
Refractor decision
The objective shows only two small spots. The observer first tests the telescope at night. Image contrast remains normal, so the observer leaves the objective alone rather than cleaning the entire lens.
If the spots later spread or affect imaging, the observer will treat only the affected area using the telescope manufacturer’s lens method.
Primary-mirror decision
The primary looks dusty under a flashlight, but stars and deep-sky views remain normal. The observer does not remove the mirror.
Several months later, sticky pollen and dried insect residue appear. The observer checks the manual, documents the mirror-cell orientation, and performs the approved low-contact wash, followed by collimation.
The same level of visible dirt does not justify the same response on every optical surface.
What Are the Most Common Telescope-Cleaning Mistakes?
| Mistake | Why it causes damage or poor results | Better approach |
|---|---|---|
| Cleaning after every dusty session | Repeated contact wears coatings | Clean only when justified |
| Using a flashlight as the performance test | It exaggerates harmless dust | Evaluate normal observing or imaging |
| Wiping before removing grit | Particles can scratch coatings | Blow or rinse loose debris first |
| Spraying fluid directly on a lens | Liquid can wick into the cell | Moisten the applicator |
| Reusing one cloth across the surface | It carries grit into later strokes | Use fresh applicators |
| Treating a mirror like a camera lens | Mirror coatings and contamination differ | Use a mirror-specific procedure |
| Using window cleaner or unknown wipes | Chemistry may attack coatings or leave residue | Use approved optical products |
| Breathing on the surface | Saliva droplets create residue | Use a clean hand blower |
| Using high heat to remove dew | Can create thermal stress and move contamination | Let moisture evaporate or use regulated dew control |
| Removing an SCT corrector for cleaning | Can disturb orientation and alignment | Clean only the accessible exterior |
| Tightening primary clips against the mirror | Can cause pinched optics | Follow the mirror-cell instructions |
| Cleaning a diagonal by a generic method | Some mirror coatings require special care | Read the exact diagonal manual |
| Sealing damp equipment | Traps moisture and encourages corrosion or fungus | Dry before capping and storage |
| Trying to polish a scratch away | Removes or damages coatings | Accept minor damage or seek professional evaluation |
How Do You Troubleshoot Cleaning Problems?
Why are there streaks after cleaning?
Possible causes include:
- Too much fluid
- Contaminated applicator
- Cleaner not approved for the coating
- Fluid drying before it is lifted
- Repeated passes redistributing oil
- Hard-water residue
Use a fresh applicator with the approved solution. Do not polish repeatedly when only faint cosmetic residue remains.
Why does dust return immediately?
Dust may be:
- Settling from the work area
- Held by static
- Inside the optical tube rather than on the inspected surface
- Coming from dirty caps or cases
- Visible only under intense illumination
Clean the caps and storage case, improve dust control, and stop chasing particles that do not affect use.
Why does a spot not move?
It may be:
- Coating damage
- A scratch
- Fungus
- Mineral deposit
- Contamination on an internal surface
- A mark in the glass substrate
Do not increase pressure. Photograph the mark under diffuse light and ask the manufacturer or an optical service provider.
Why is the image still soft after cleaning?
Soft images can result from:
- Poor focus
- Atmospheric seeing
- Thermal instability
- Dew
- Misalignment
- Pinched optics
- Excessive magnification
- Camera tilt
- Incorrect spacing
- Actual coating or optical damage
Cleaning should not be used as a general cure for image quality.
Why are there spots after a primary-mirror rinse?
The final rinse may have left minerals or droplets.
Use distilled or deionized water when the approved procedure calls for it, improve drainage, and avoid rubbing dry deposits. Seek coating-specific advice before repeating a full wash.
Why does the telescope need collimation after mirror cleaning?
Removing and reinstalling a primary or secondary changes mechanical alignment. Collimation is a normal required step after mirror-cell or secondary-holder removal.
Large shifts may indicate incorrect reassembly, uneven support, an unsecured cell, or a rotated secondary.
Telescope Optics Cleaning Checklist
Before cleaning
- Identify the exact optical surface
- Read the telescope or accessory manual
- Confirm that cleaning is genuinely needed
- Check warranty and service options
- Prepare approved cleaning supplies
- Create a clean, stable work area
- Remove loose accessories and power
- Photograph mechanical orientation if approved removal is required
- Plan how the optic will dry without collecting dust
During cleaning
- Remove loose particles before contact
- Use the least invasive effective method
- Keep fluid away from lens-cell edges and electronics
- Use fresh applicators
- Apply minimal pressure
- Stop if a particle feels fixed
- Keep tools away from mirror faces
- Avoid direct sunlight and uncontrolled heat
- Follow coating-specific instructions
After cleaning
- Allow the optic to dry fully
- Check for trapped moisture
- Replace caps only when dry
- Reinstall removed parts in documented orientation
- Confirm that retainers are not overtightened
- Reconnect fans or electronics safely
- Collimate if a mirror was removed
- Test under normal observing conditions
- Clean and dry the storage case
How We Developed These Recommendations
This guide uses a risk-first framework:
- Necessity: determine whether contamination affects use or presents a coating concern.
- Surface type: distinguish external lenses, correctors, eyepieces, telescope mirrors, diagonals, and sealed assemblies.
- Particle removal: remove loose abrasive material before any contact.
- Minimum intervention: clean only the affected area when appropriate.
- Manufacturer control: follow the exact coating and assembly instructions for mirror washing, disassembly, and solvents.
- Post-cleaning verification: check drying, mechanical reassembly, and collimation before judging performance.
No specific cleaner, telescope, mirror coating, or cleaning kit was hands-on tested for this guide.
What Should You Do Next?
For a dusty eyepiece or external lens, begin with a hand blower and stop if the remaining dust does not affect use.
For a fingerprint, salt mark, or sticky residue on an accessible lens, use the manufacturer-approved fluid on a fresh applicator and clean only as much as necessary.
For a dirty Newtonian primary, read the exact mirror-removal and washing instructions before touching the mirror cell. If the mirror still performs well and only looks dusty under a flashlight, leave it installed.
For internal haze, fungus, coating failure, an unfamiliar diagonal, or a sealed optical assembly, contact the manufacturer or a reputable optical service provider.
The safest telescope-cleaning habit is not perfect cleanliness. It is preventing contamination, recognizing when cleaning is justified, and using the least aggressive method that solves the actual problem.
Frequently Asked Questions
How often should telescope optics be cleaned?
There is no fixed schedule. Clean when contamination affects normal use, contains potentially harmful residue, or cannot be managed by prevention. A few dust particles do not justify routine contact cleaning.
Can you use isopropyl alcohol on telescope lenses?
Only when the telescope or accessory manufacturer approves the concentration and method for that specific coating. Alcohol can be part of some optical cleaners, but it should not be assumed safe for every lens, mirror, filter, cemented group, or painted surface.
Can you clean a telescope mirror with a microfiber cloth?
A dry microfiber cloth should not be rubbed across a dusty primary mirror. Mirror cleaning generally uses a coating-approved rinse or wet method after abrasive particles are removed. Follow the mirror or telescope manufacturer’s instructions.
Should you clean the inside of a telescope lens?
No ordinary maintenance should involve separating lens elements or opening a sealed optical group. Internal haze, fungus, or contamination should be evaluated by the manufacturer or an optical service technician.
Can a dirty telescope lens make images blurry?
Heavy residue, dew, fingerprints, or broad contamination can reduce contrast and scatter light, but a few dust specks rarely cause obvious blur. Check focus, seeing, temperature, collimation, and magnification before blaming ordinary dust.
Can you clean a solar filter?
Follow only the exact solar-filter manufacturer instructions. Do not rub, repair, wash, or apply chemicals unless the manufacturer explicitly permits it. Stop using a filter with uncertain damage, loose mounting, punctures, tears, or coating defects.
Sources
Sources were accessed July 30, 2026.
- Celestron — Caring for Your Telescope: Maintain, Store, and Ship
- Celestron — Lens Cleaning Kit and General Optical-Cleaning Materials
- Celestron — Manuals and Software
- Baader Planetarium — Cleaning and Maintenance of Optics
- Baader Planetarium — Important Care Tips for Astronomical Instruments
- Baader Planetarium — Cleaning and Maintenance of Optics
- Sky-Watcher — Product Manual Library
- Sky-Watcher — Telescope Care Guidance
- Obsession Telescopes — Cleaning Your Mirror
- Galaxy Optics — Telescope Mirror Cleaning Procedure
- Baader Planetarium — Cleaning and Maintenance of Optics
- Astro-Physics — Dew Removers and Dew-Control Guidance
More from Setup Collimation & Maintenance
How to Store a Telescope Without Damaging the Optics
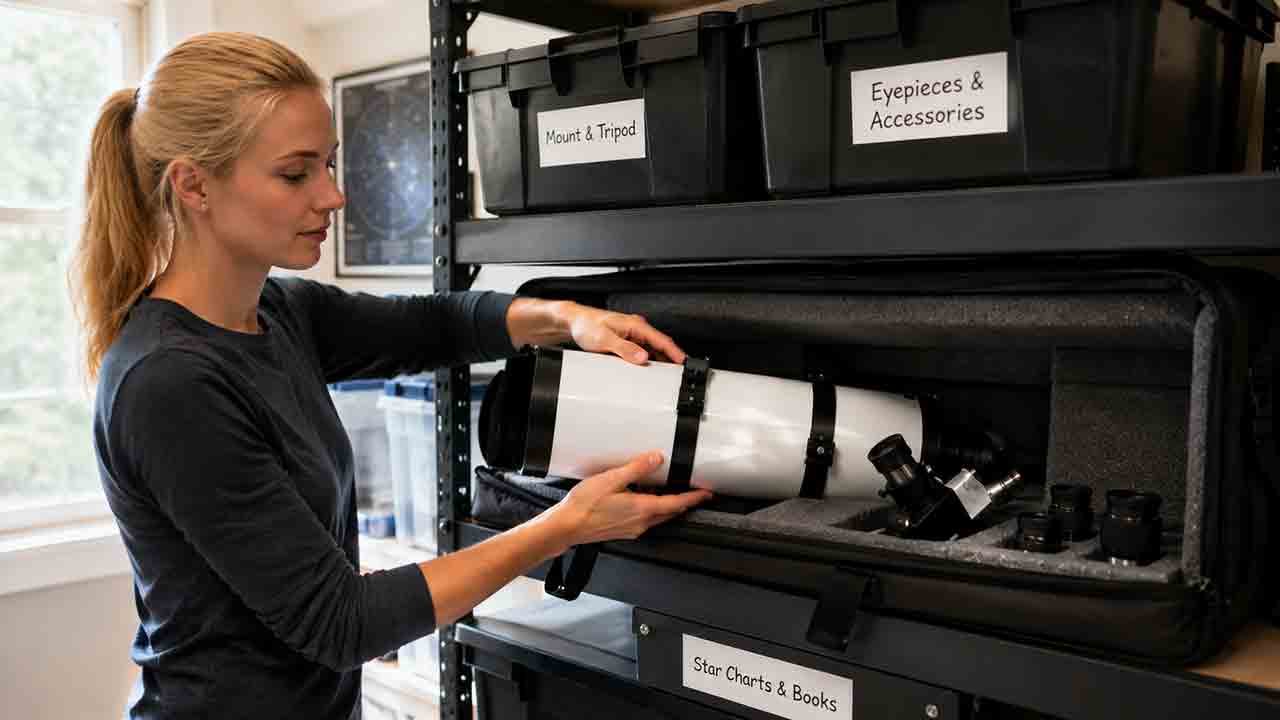
Safe telescope storage depends more on dryness, environmental stability, and secure support than on buying an expensive case. This guide explains how to dry a telescope after a damp observing session, when to install optical caps, and how to choose between assembled storage, a padded case, a closet, a garage, or an observatory. It provides separate recommendations for refractors, Schmidt-Cassegrains, Maksutovs, Newtonians, solid-tube and truss Dobsonians, mounts, eyepieces, filters, cameras, batteries, and solar equipment. Readers also receive a storage-location comparison, a three-home practical example, desiccant guidance, troubleshooting for condensation and musty cases, and a long-term checklist. The central recommendation is to keep equipment indoors when practical and never seal moisture inside caps, foam, bags, or covers.
How to Prevent Dew on a Telescope
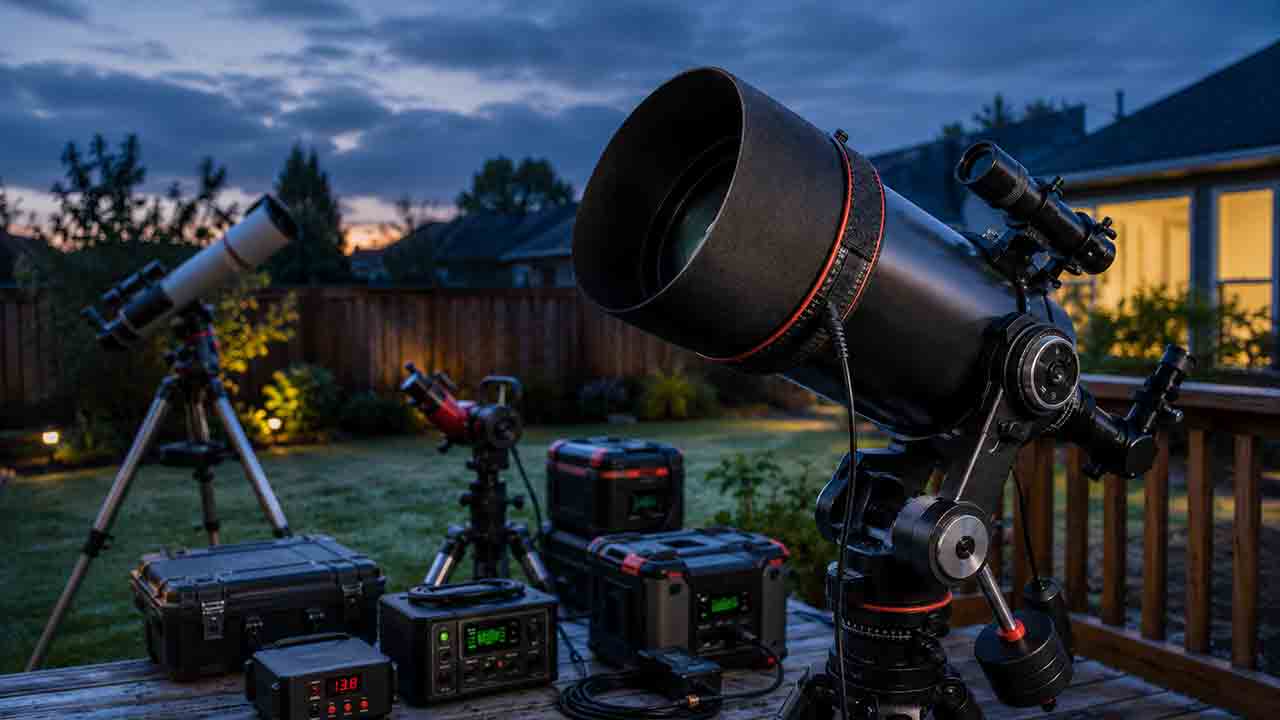
Telescope dew is best prevented before condensation becomes visible. Check the air temperature and dew point, extend or install a correctly fitted dew shield, and apply gentle controlled heat to exposed lenses, corrector plates, finder scopes, eyepieces, guide scopes, or secondary mirrors when conditions require it. This guide explains why optics can cool below the surrounding air, how to use dew-point spread as a planning signal, and why a shield and heater often work better together. It provides the original CLEAR decision framework, telescope-specific recommendations, a step-by-step setup process, a hypothetical battery-runtime calculation, real-world observing scenarios, a decision tree, buying and setup checklists, common mistakes, drying and storage guidance, and a troubleshooting table. The article also explains why optics should not be wiped while wet or sealed in a case before fully drying.
How to Collimate a Reflector Telescope Step by Step
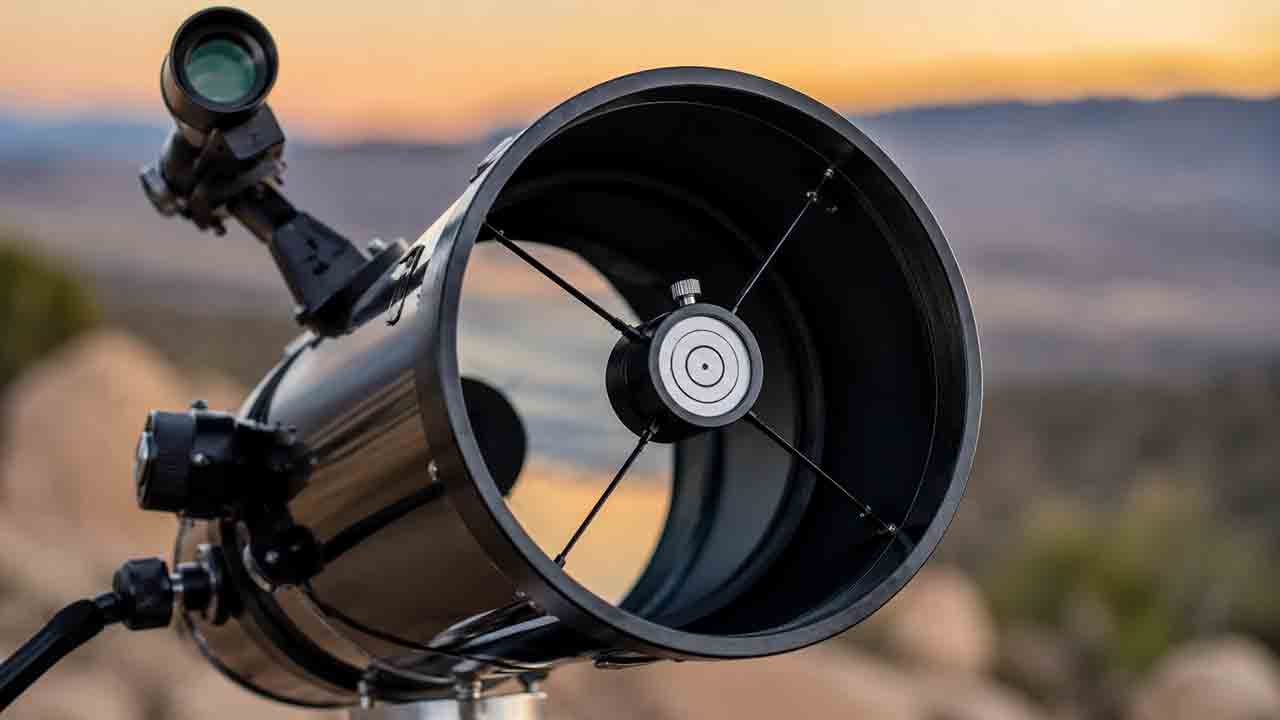
Collimating a Newtonian or Dobsonian reflector means aligning the secondary mirror, focuser axis, and primary mirror in the correct order. This guide shows readers how to identify the adjustment hardware, center and rotate the secondary, aim it at the primary center mark, align the primary with a cap or Cheshire, and verify the result on a centered star. It also compares collimation caps, sight tubes, Cheshires, lasers, Barlowed lasers, and autocollimators; explains laser safety and tool-registration errors; and provides an 8-inch f/6 Dobsonian example. Troubleshooting sections address shifting alignment, oval secondary reflections, conflicting tool readings, off-axis star tests, and mechanical flexure. The central recommendation is to make only the adjustment supported by the observed error and to follow the exact telescope and tool manuals.
Explore More Topics
How to Choose Your First Telescope: A Beginner’s Buying Guide
Choosing a first telescope requires more than comparing aperture or advertised magnification. This practical beginner’s guide explains how to match a telescope to observing goals, light pollution, storage space, setup tolerance, and interest in visual observing or imaging. It compares refractors, Dobsonian reflectors, compound telescopes, and smart telescopes, then shows how aperture, focal length, focal ratio, magnification, and mount stability affect real use. Readers can use a quick-selection table, the original SPACE decision framework, a worked specification comparison, realistic household scenarios, new and used equipment checklists, and a troubleshooting chart. The guide also explains why a larger aperture cannot fully overcome bright urban skies, what to verify before buying a software-dependent smart telescope, and how to observe the Sun safely. Recommendations are based on authoritative guidance and published specifications rather than hands-on product testing or paid rankings
How Much Should You Spend on Your First Telescope?
Most beginners should plan a complete first-telescope budget of roughly $350–$700, although the right amount depends on observing goals, portability, automation, and whether the buyer wants direct eyepiece viewing or screen-based imaging. This guide explains what different budget ranges can realistically provide, why very low-cost telescope packages require caution, and when spending more for aperture, GoTo control, smart imaging, or compact optics is justified. It also separates visual astronomy from modular astrophotography, calculates total ownership cost, and shows how accessories, power, storage, shipping, and software can change the real price. The original FIRST Budget Test helps readers evaluate favorite targets, included equipment, real-world portability, desired skills, and total cost. Practical scenarios, a buying checklist, common mistakes, troubleshooting guidance, safety information, and current US market examples help beginners choose a stable, complete setup they are likely to use regularly.
Are Smart Telescopes Worth It for Beginners?
Smart telescopes can be worthwhile for beginners who want automated target finding, live-stacked deep-sky images, and a compact system controlled from a phone or tablet. However, they are not a universal replacement for traditional telescopes. Beginners who value direct eyepiece views, high-magnification planetary observing, manual sky navigation, or component-by-component upgrades may prefer a refractor, reflector, or catadioptric telescope. This guide explains how smart telescopes combine optics, cameras, motorized tracking, and image processing; compares them with traditional and modular imaging setups; and examines costs, software dependence, batteries, light pollution, target suitability, and long-term flexibility. It also provides the original WORTH decision framework, a hypothetical cost-per-session example, real-world beginner scenarios, a purchase checklist, common mistakes, and troubleshooting steps. The goal is to help readers choose based on their actual observing style rather than marketing claims or specifications alone