How to Collimate a Reflector Telescope Step by Step

How to Collimate a Reflector Telescope Step by Step
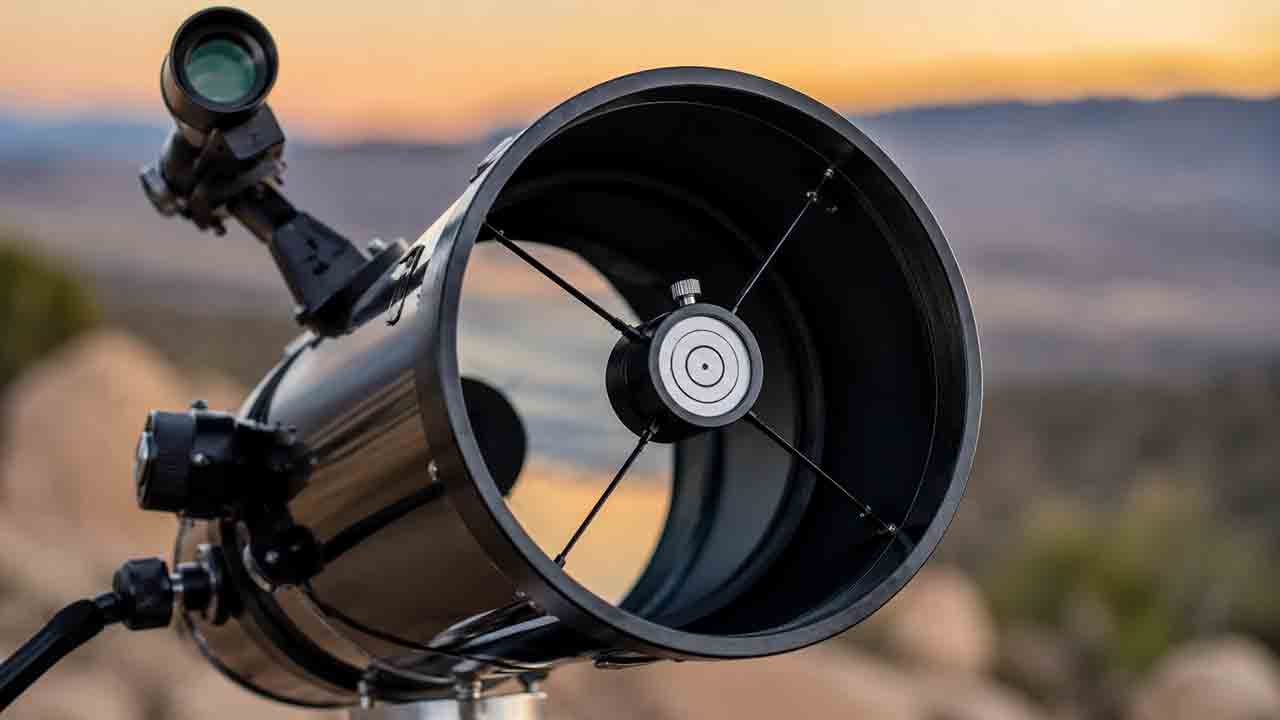
To collimate a Newtonian or Dobsonian reflector, first center and rotate the secondary mirror under the focuser, then tilt the secondary so the focuser axis points at the primary mirror’s center mark, and finally adjust the primary mirror until its center mark aligns with the collimation tool’s reference. Finish by checking a centered star at high power under steady conditions.
Key Takeaways
- This procedure applies to Newtonian reflectors and Dobsonian telescopes, not Schmidt-Cassegrain, Maksutov, or other reflector designs with different adjustment systems.
- Adjust in this order: secondary position and rotation, secondary tilt, then primary tilt.
- A collimation cap or Cheshire is sufficient for many visual telescopes; a laser is convenient only when it is itself aligned and seated squarely.
- Do not loosen the secondary mirror’s center bolt casually, touch either mirror, or overtighten adjustment and locking screws.
- A star test verifies the result, but atmospheric turbulence, thermal currents, poor focus, and an off-center star can imitate collimation errors.
This guide explains how to identify the adjustment hardware, choose a tool, complete a daylight alignment, use a laser safely, verify the result on a star, and diagnose common problems without turning every screw at once.
Scope note: In this article, “reflector telescope” means a standard Newtonian optical tube, including a Newtonian mounted on a Dobsonian base. Follow a different procedure for Schmidt-Cassegrain, Ritchey-Chrétien, classical Cassegrain, Dall-Kirkham, Maksutov-Newtonian, or other specialized systems.
Editorial note: This guide is based on manufacturer manuals, professional astronomy guidance, and practical alignment criteria rather than hands-on testing of a specific telescope or collimation tool.
What Is the Correct Collimation Order?
The correct order is to position the secondary mirror, aim the focuser axis at the primary mirror, and then aim the primary mirror back toward the focuser.
| Stage | What you are aligning | Typical adjustment | What correct alignment looks like |
|---|---|---|---|
| 1. Secondary position | Secondary mirror placement under the focuser | Secondary center bolt, spider position, or tube-axis placement when the manual permits | Secondary appears round and appropriately centered under the focuser |
| 2. Secondary rotation | Orientation of the secondary mirror | Gently rotate the secondary holder when required | The primary mirror reflection appears evenly framed |
| 3. Secondary tilt | Focuser axis toward the primary center | Three secondary tilt screws on many Newtonians | Crosshairs or laser point meet the primary center mark |
| 4. Primary tilt | Primary optical axis toward the focuser | Primary collimation knobs or screws | Primary center mark aligns with the Cheshire bright ring, cap pupil, or Barlowed-laser reference |
| 5. Star verification | Complete optical alignment under observing conditions | Very small primary adjustment only when necessary | Slightly defocused rings are centered around a centered star |
Do not start by making random primary adjustments. Each stage depends on the stage before it.
Which Telescopes Does This Guide Cover?
Newtonian reflector
A Newtonian uses a concave primary mirror at the back of the tube and a small flat secondary mirror near the front. The secondary redirects the focused light sideways into the focuser.
Dobsonian telescope
A Dobsonian is usually a Newtonian optical tube on a simple altitude-azimuth base. The optical collimation procedure is therefore the same as for another Newtonian, although access to the primary knobs and tube orientation may differ.
Which telescopes need a different guide?
Do not use this procedure on:
- Schmidt-Cassegrain telescopes
- EdgeHD optical tubes
- Maksutov-Cassegrains
- Maksutov-Newtonians
- Classical Cassegrains
- Ritchey-Chrétiens
- Corrected Dall-Kirkhams
- Bird-Jones reflectors with an internal corrector unless the exact manual describes the process
- Refractors
These systems have different optical geometry, adjustment points, and risks. The model manual overrides every generic instruction in this article.
How Can You Tell Whether a Reflector Needs Collimation?
Check collimation after transport, a strong impact, major temperature changes, or when centered star images and planetary detail remain asymmetric after focus and seeing have been ruled out.
A quick check is reasonable before each serious observing session, especially with a portable or truss-tube Newtonian. Adjustment is not always required.
Signs that may indicate miscollimation
- The primary center mark is visibly off-center in a collimation cap or Cheshire.
- A correctly seated laser does not hit the primary center mark.
- The reflected laser does not return to the tool’s reference.
- A centered, slightly defocused star shows an asymmetric pattern.
- Planetary detail remains soft despite steady seeing, correct focus, and thermal stability.
- Stars near the center of the field show consistent asymmetry.
Problems that can imitate bad collimation
Before adjusting mirrors, rule out:
- Poor atmospheric seeing
- A telescope that has not reached outdoor temperature
- Dew or frost
- Poor focus
- High magnification beyond current conditions
- A star positioned away from the center of the field
- Eyepiece aberrations
- Observer astigmatism
- Tube currents
- A pinched or stressed mirror
- A loose focuser or adapter
Collimation cannot correct atmospheric turbulence, damaged optics, or mechanical flexure.
What Are the Parts You Will Adjust?
Primary mirror
The primary mirror is the large concave mirror at the rear of the tube. Most beginner Newtonians have three primary adjustment knobs or screws. Some also have three smaller locking screws.
The primary’s center mark is normally a ring, triangle, or other marker placed at the geometric center. Do not remove or replace it unless you have confirmed that it is inaccurate and understand the marking procedure.
Secondary mirror
The secondary is the smaller flat mirror held near the front by a spider and central stalk.
Many holders have:
- One central bolt controlling axial position and retention
- Three surrounding screws controlling tilt
- A holder that can rotate when the center bolt is loosened slightly
The exact arrangement varies. The center bolt supports the secondary and should not be loosened without controlling the holder.
Spider vanes
Spider vanes support the secondary holder. They should normally be straight and under appropriate tension.
Do not adjust spider vanes as part of routine collimation unless the secondary holder is physically off-center and the manufacturer permits that correction.
Focuser
The focuser defines the viewing axis used by a cap, sight tube, Cheshire, or laser. A loose drawtube, poorly seated adapter, or tilted tool can create a false reading.
Check mechanical seating before changing the mirrors.
Which Collimation Tool Should You Use?
| Tool | Best use | Advantages | Limitations |
|---|---|---|---|
| Collimation cap | Basic visual alignment | Simple, inexpensive, no battery | Less guidance for secondary placement and fast systems |
| Sight tube | Secondary position, rotation, and focuser axis | Shows secondary edge, primary edge, and often crosshairs | Requires correct eye position and adequate light |
| Cheshire eyepiece | Precise primary alignment | Bright, sensitive primary reference; no laser risk | Usually needs external light and may be combined with a sight tube |
| Combination sight tube/Cheshire | Full manual workflow | One tool can handle secondary geometry and primary alignment | Long tools may not suit every focuser or focal ratio |
| Laser collimator | Fast focuser-axis alignment and rough primary adjustment | Easy to see, useful on long tubes | Incorrect if the laser is misaligned or seated at an angle |
| Barlowed laser | Primary alignment | Less sensitive to small outgoing-beam errors | Requires a compatible setup and careful interpretation |
| Autocollimator | Advanced residual-error refinement | Highly sensitive | Not required for most beginner visual setups |
Celestron and Sky-Watcher both publish instructions for cap or Cheshire-style alignment. Manufacturer laser manuals emphasize secure, square seating and correct tool alignment.
Best beginner choice
A combination sight tube and Cheshire is a strong general-purpose choice because it can show:
- The edge of the secondary
- The edge of the primary reflection
- The focuser axis
- The primary center mark
- The primary alignment reference
A simple cap can be adequate for a slower visual Newtonian that is already mechanically set up.
When is a laser useful?
A laser is useful when:
- The primary has an accurate center mark.
- The laser itself is aligned.
- The barrel fits the focuser consistently.
- The telescope tube is long or the primary controls are difficult to see from the focuser.
- The outgoing beam remains inside the telescope.
A laser is not automatically more accurate than a Cheshire.
What Should You Do Before Collimating?
Work in daylight, stabilize the telescope, remove unnecessary accessories, and identify every adjustment screw before turning anything.
Preparation checklist
- Read the exact telescope manual
- Confirm that the telescope is a standard Newtonian or Dobsonian
- Place the tube horizontally or at a safe, comfortable angle
- Secure the mount so the tube cannot move unexpectedly
- Remove the eyepiece, Barlow, camera, and filters
- Remove the front dust cap
- Check that the focuser and adapter are tight
- Identify secondary tilt screws and the secondary center bolt
- Identify primary adjustment and locking screws
- Confirm that the primary mirror has a center mark
- Prepare the correct screwdriver or hex key
- Arrange enough light to see the reflections
- Keep fingers, tools, and loose hardware away from the mirrors
- If using a laser, place a wall or beam stop beyond the tube opening
Critical safety precautions
- Never look into a laser beam or its direct reflection.
- Keep the tube pointed away from people, windows, reflective surfaces, aircraft, vehicles, and the sky.
- Confirm that a badly misaligned beam cannot escape into an occupied area.
- Remove the laser battery when storing it for a long period if the manufacturer recommends doing so.
- Do not collimate while the telescope is pointed at the Sun.
- Do not drop screws or tools onto the primary mirror.
- Keep one hand supporting the secondary holder if its central retaining bolt must be loosened.
How Do You Collimate With a Cap or Cheshire?
The following workflow is suitable for many standard Newtonians. Some telescopes arrive with the secondary position already correct, so routine collimation may require only secondary tilt and primary tilt.
Step 1: Seat the Tool Squarely
Insert the cap, sight tube, or Cheshire fully and consistently in the focuser.
Remove any loose 2-inch-to-1.25-inch adapter unless the tool requires it. If an adapter is used, seat it flat and tighten the same way you would secure an eyepiece.
Rack the focuser to a position where the full secondary edge and primary reflection can be evaluated. The exact position depends on tool length and telescope geometry.
If the apparent alignment changes when the tool is removed and reinserted, solve the seating problem before adjusting mirrors.
Step 2: Identify the Reflections
Looking through the tool, identify:
- The inner edge of the focuser or sight tube
- The physical edge of the secondary mirror
- The reflected edge of the primary mirror
- The primary mirror clips, if visible
- The primary center mark
- The reflection of the secondary holder
- The reflection of the tool’s pupil or Cheshire surface
Do not try to center every visible circle at once. Different reflections serve different alignment tasks, and the secondary reflection can appear offset in a correctly configured Newtonian.
Step 3: Center the Secondary Under the Focuser
Adjust the secondary’s position only if its physical edge is clearly misplaced under the focuser.
The secondary should appear round rather than strongly oval and should provide a balanced view of the primary reflection.
Possible adjustments include:
- Moving the secondary toward or away from the primary by changing its axial position
- Correcting spider-holder centering when the manual permits
- Adjusting focuser position only if a genuine mechanical installation error has been confirmed
How to adjust the axial position safely
- Support the secondary holder with one hand.
- Loosen the surrounding tilt screws only enough to permit controlled movement if required.
- Turn the center bolt in very small increments according to the manual.
- Keep enough thread engagement to retain the mirror securely.
- Recheck the secondary edge through the sight tube.
- Stop once the secondary is appropriately placed.
Routine collimation usually does not require repeating this step.
Step 4: Correct the Secondary Rotation
Rotate the secondary only when the primary reflection appears shifted toward one side because the secondary face is not oriented squarely toward the focuser.
- Support the secondary holder.
- Loosen the center bolt only enough to allow rotation.
- Rotate the holder in a very small movement.
- Retighten enough to hold its position.
- Recheck the secondary’s round appearance and the primary reflection.
- Avoid using tilt screws to hide a major rotation error.
A secondary that is badly rotated may show the primary reflection unevenly even when the center mark can be reached.
Step 5: Aim the Secondary at the Primary Center
Use the secondary tilt screws to place the sight-tube crosshairs over the primary center mark.
- Identify the three secondary tilt screws.
- Make a small change to one screw.
- Compensate with another screw if the holder becomes loose.
- Keep moderate, even pressure among the screws.
- Watch the primary center mark move relative to the crosshairs.
- Stop when the crosshairs meet the center mark.
Do not turn the central retaining bolt during this tilt step unless the model manual identifies it as part of the adjustment system.
Why does the secondary seem to move sideways?
Tilting the secondary changes the direction of the reflected primary image. Large tilt changes can also affect how centered or round the secondary appears.
If the secondary placement becomes poor, return to Step 3 rather than forcing the tilt screws farther.
Step 6: Align the Primary Mirror
Adjust the primary mirror until its center mark is centered in the Cheshire bright ring or around the collimation-cap pupil.
At the rear mirror cell, identify:
- Primary adjustment knobs or screws
- Locking screws, if present
- Cooling fan hardware that should not be mistaken for collimation controls
If locking screws are fitted, loosen them only enough to permit adjustment.
Then:
- Turn one primary adjustment knob slightly.
- Observe which direction the center mark moves.
- Continue with that knob or use another knob to move the mark toward the reference.
- Work in small increments.
- Keep the mirror cell supported by reasonable spring or screw tension.
- Stop when the primary center mark and the Cheshire or cap reference are aligned.
- Tighten locking screws gently and evenly, if the telescope uses them.
- Recheck the alignment because locking screws can shift the mirror.
Do not overtighten the cell. Excess force can damage threads, compress springs, or stress the mirror support.
Step 7: Repeat the Checks in Order
After adjusting the primary, verify:
- Secondary position and roundness
- Primary reflection framing
- Crosshairs on the primary center mark
- Primary center mark aligned with the Cheshire or cap reference
Small interactions are normal. Repeat only the stage that is no longer correct.
How Do You Collimate With a Laser?
Use a laser to aim the secondary at the primary center, then align the primary using a suitable return-beam or Barlowed-laser method.
Laser safety and tool validation are part of the procedure, not optional extras.
Step 1: Check the Laser Before Trusting It
Insert the laser and secure it consistently. Note the beam position on the primary center mark.
Rotate the laser in the focuser without changing its seating depth.
- If the dot stays in nearly the same place, the laser and seating are reasonably consistent.
- If the dot traces a circle, the laser may be misaligned, the adapter may be tilting it, or the focuser fit may be inconsistent.
Do not collimate the telescope to a moving laser reference.
Use the manufacturer’s laser-alignment procedure or a different tool when the laser fails this check.
Step 2: Confirm That the Beam Cannot Escape
Point the tube horizontally toward a wall or beam stop. From a safe position, confirm that the beam strikes the secondary and primary rather than leaving the front of the telescope.
Do not put your face over the tube.
Step 3: Align the Secondary Tilt
Use the secondary tilt screws to move the outgoing laser dot onto the center of the primary mark.
This sets the focuser axis, assuming the laser is aligned and seated correctly.
It does not by itself prove that the secondary is correctly centered or rotated under the focuser. A sight tube is better for that geometry.
Step 4: Align the Primary
Depending on the tool and telescope, use either:
- The return beam on the laser’s target window for a practical alignment
- A Barlowed-laser shadow method for a less beam-alignment-sensitive primary adjustment
- A Cheshire as the final primary reference
When using a simple return beam, errors in laser alignment or seating affect the result twice. A Cheshire cross-check is therefore valuable.
Adjust the primary until the selected reference is centered, then secure any locking screws gently and recheck.
Step 5: Remove the Laser Before Observing
Switch it off, remove it from the focuser, and install an eyepiece. Never leave a powered laser in an unattended telescope.
Which Method Is Better: Cheshire or Laser?
A Cheshire is generally the more dependable primary-mirror reference, while a verified laser is convenient for setting the secondary tilt and working with long tubes.
| Situation | Better starting tool | Reason |
|---|---|---|
| First-time beginner | Combination sight tube/Cheshire | Shows secondary geometry and primary alignment without laser risk |
| Routine visual Dobsonian check | Cap or Cheshire | Simple and repeatable |
| Long Newtonian tube | Laser plus Cheshire | Laser is easy to see from the rear; Cheshire verifies the primary |
| Fast astrograph | Quality sight tube, laser, Cheshire, or advanced system specified by manufacturer | Tighter alignment and mechanical demands |
| Primary has no center mark | Model-specific manual or experienced help | Most common tools need an accurate center reference |
| Tool seating is inconsistent | Cheshire or corrected adapter fit | A tilted laser creates a false axis |
| Nighttime field adjustment | Dim laser or illuminated Cheshire used safely | Tool must remain visible without compromising safety |
The best tool is the one that gives a repeatable reading in the actual focuser.
How Do You Star-Test the Collimation?
Use a centered star at high power after the telescope is thermally stable and the atmosphere is reasonably steady.
Sky-Watcher manuals describe checking alignment by observing whether a slightly defocused star pattern is symmetrical. Celestron recommends nighttime star refinement after daylight collimation.
Star-test setup
- Place the telescope outside and allow its temperature to approach ambient conditions.
- Choose a moderately bright star high in the sky.
- Use a medium-power eyepiece to locate and center it.
- Increase to a high but usable magnification.
- Keep the star exactly in the center of the field.
- Focus carefully.
- Defocus only slightly inside and outside focus.
- Compare the pattern over several moments of steadier seeing.
What does good alignment look like?
A well-collimated telescope should show a centered pattern. The central obstruction shadow and rings should not be strongly displaced to one side when the star is centered.
Do not judge from a heavily defocused “large donut” alone. A large donut is useful for gross alignment but less sensitive to the final optical axis.
How do you make a final adjustment?
If the pattern is consistently asymmetric:
- Keep the star centered.
- Identify which primary adjustment moves the pattern toward symmetry.
- Make a very small change.
- Recenter the star after every adjustment.
- Refocus and compare again.
- Stop when the pattern is centered and the focused star is as compact as conditions permit.
Do not adjust the secondary during a routine star refinement unless daytime checks show that the focuser axis is wrong.
Real-World Example: Collimating an 8-Inch f/6 Dobsonian
Assume the telescope has:
- 200 mm primary mirror
- 1,200 mm focal length
- f/6 focal ratio
- Center-marked primary
- Three secondary tilt screws
- Three primary adjustment knobs
- Three primary locking screws
- 1.25-inch combination sight tube/Cheshire
Initial observation
Through the Cheshire:
- The secondary appears round and reasonably centered.
- The full primary mirror is visible.
- The crosshairs fall slightly beside the primary center mark.
- The primary center mark is also outside the Cheshire bright ring.
Adjustment sequence
- Leave the secondary center bolt and spider vanes alone because the secondary placement is already acceptable.
- Use two secondary tilt screws in small, opposing movements until the crosshairs meet the primary center mark.
- Loosen the primary locking screws slightly.
- Turn one primary adjustment knob and watch the center mark move.
- Use a second knob to place the center mark in the Cheshire bright ring.
- Tighten the locking screws gently and evenly.
- Recheck both crosshair and primary alignment.
- At night, center a bright star at high usable power and slightly defocus.
- Make no further adjustment when the pattern appears symmetrical during steady moments.
Why this example matters
The owner did not adjust the secondary center bolt, spider, focuser, or mirror clips because the observations did not indicate those changes were needed. Good collimation is usually a sequence of targeted corrections, not a complete optical rebuild.
How Accurate Does Collimation Need to Be?
Collimation should be accurate enough that the optical axes are aligned for the telescope’s focal ratio, intended magnification, and use. Faster imaging Newtonians generally demand more careful and repeatable alignment than slower visual instruments.
Avoid treating every slight visual asymmetry as an error.
A correctly offset secondary in some Newtonian designs may cause the reflection of the secondary and its holder to look displaced even when the optical axes are correct. The critical routine references are:
- Secondary appropriately positioned under the focuser
- Focuser axis meeting the primary center mark
- Primary axis returning to the tool’s reference
- Centered star pattern remaining symmetrical
For visual use, stable, repeatable alignment is more valuable than endlessly chasing tiny reflection differences caused by tool seating or perspective.
What Are the Most Common Collimation Mistakes?
| Mistake | Why it causes problems | Better approach |
|---|---|---|
| Adjusting every screw at once | Removes the ability to identify the original error | Diagnose position, tilt, and primary alignment separately |
| Loosening the secondary center bolt without support | The secondary can rotate, drop, or lose axial position | Support the holder and make only controlled changes |
| Centering every visible reflection | Some reflections are naturally offset | Use the correct reference for each stage |
| Trusting an unchecked laser | A misaligned laser creates false collimation | Rotate-test and reseat it before use |
| Using the laser to judge secondary position | A centered dot does not prove correct secondary placement | Use a sight tube for position and rotation |
| Overtightening primary locks | Can shift alignment or stress hardware | Tighten gently and recheck |
| Confusing mirror clips with collimation targets | Clips only show whether the primary edge is visible | Use the primary center mark for axial alignment |
| Performing the star test off-axis | Coma can imitate miscollimation | Recenter the star after every change |
| Star-testing in poor seeing | Turbulence makes patterns unstable | Average several steady moments |
| Adjusting a warm telescope | Tube currents imitate asymmetry | Allow thermal stabilization |
| Touching or cleaning mirrors during collimation | Risks coating damage | Keep optical surfaces untouched |
| Collimating toward open sky with a laser | A stray beam may escape | Use a horizontal tube and a beam stop |
How Do You Troubleshoot Collimation Problems?
Why can’t you see the full primary mirror?
Possible causes include:
- Focuser is racked too far in or out
- Sight tube is too long for the telescope geometry
- Secondary is too far toward or away from the primary
- Secondary rotation is wrong
- Secondary tilt is severe
- Tool is not centered or seated correctly
Change the focuser or tool position first. Adjust secondary placement only when the geometry remains wrong.
Why does the secondary look oval?
The secondary may be rotated incorrectly, viewed from the wrong tool position, or strongly tilted.
Correct position and rotation before final tilt. Do not try to make an offset secondary reflection look perfectly concentric with every other reflection.
Why does the laser dot move when the laser rotates?
The laser is misaligned, tilted in the focuser, or affected by an inconsistent adapter.
Try:
- Reseating it
- Tightening the clamp consistently
- Testing without the adapter when possible
- Checking the laser according to its manual
- Using a Cheshire until the mechanical problem is corrected
Why does alignment change when the locking screws are tightened?
The locking screws are shifting the primary cell.
Loosen them and repeat the primary adjustment. Tighten each lock in small, even increments while monitoring the reference.
Some cells hold alignment better when adjustment springs remain under moderate compression. Follow the model manual rather than modifying the cell immediately.
Why does collimation change as the telescope moves?
Possible causes include:
- Loose primary cell
- Weak or uneven springs
- Loose secondary holder
- Spider-vane flex
- Focuser sag
- Heavy accessory leverage
- Truss connectors not fully secured
- Mirror support movement
This is a mechanical stability problem. Repeated optical adjustment will not solve the underlying flexure.
Why is the star test asymmetric even though the Cheshire looks correct?
Check:
- Star is exactly centered
- Telescope is thermally stable
- Seeing is steady enough
- Eyepiece is seated correctly
- Focuser is not sagging
- Primary locking screws did not shift alignment
- Mirror is not pinched
- The optical center mark is accurate
- Coma corrector or camera adapters are not introducing tilt
Test the telescope in its normal observing orientation because gravity can affect loose components.
Why are stars sharp in the center but distorted at the edge?
This may be normal Newtonian coma, eyepiece astigmatism, field curvature, or a combination. Collimation is evaluated at the center of the field.
A coma corrector can improve off-axis performance in compatible systems, but it does not replace collimation.
Why does the laser return correctly but the Cheshire disagrees?
Likely causes include:
- Laser alignment error
- Laser seating error
- Adapter tilt
- Center-mark error
- Return-beam sensitivity
- Tool registration differences
Use the Cheshire as the primary alignment reference, verify the laser separately, and ensure both tools seat consistently.
How Often Should You Collimate a Reflector Telescope?
Check before observing and adjust only when the references show a meaningful error.
A solid-tube Dobsonian that stays assembled may hold alignment for many sessions. A truss telescope, fast astrograph, frequently transported Newtonian, or instrument with a heavy camera system may require more frequent checks.
Check after:
- Transport over rough roads
- Reassembly of a truss structure
- A bump or fall
- Mirror-cell maintenance
- Secondary removal
- Focuser replacement
- Major camera-train changes
- A noticeable loss of centered image quality
Frequent checking does not mean frequent adjustment.
Should You Center-Mark the Primary Mirror Yourself?
Only center-mark the mirror when the telescope lacks a usable mark and you can follow a reliable template-based procedure without touching or damaging the optical surface.
Many common Newtonians arrive center-marked. If yours does not:
- Check whether the manufacturer permits user marking.
- Confirm that the mirror can be safely removed and reinstalled.
- Use an accurate template.
- Use a marker material intended for telescope collimation.
- Avoid adhesive contact with the reflective area beyond the intended mark.
- Preserve the mirror’s orientation and support arrangement.
- Seek experienced help when uncertain.
Removing a primary mirror creates risks unrelated to routine collimation, including dropped hardware, coating damage, pinched reinstallation, and altered support.
Reflector Collimation Checklist
Before adjustment
- Confirm Newtonian or Dobsonian design
- Read the exact manual
- Stabilize the tube
- Identify every adjustment and locking screw
- Verify primary center mark
- Check focuser and adapter fit
- Remove eyepieces and optional accessories
- Set up adequate light
- Use a safe laser beam stop when applicable
Optical sequence
- Secondary appropriately centered under focuser
- Secondary appears round
- Primary reflection is reasonably framed
- Crosshairs or laser meet primary center mark
- Primary center mark meets Cheshire, cap, or Barlowed-laser reference
- Locks tightened gently
- Alignment rechecked after locking
Night verification
- Telescope thermally stable
- Star high enough for a useful test
- High but usable magnification
- Star centered
- Only slight defocus
- Pattern observed during steady moments
- Tiny primary correction only if needed
- Star recentered after every adjustment
How We Developed These Recommendations
This guide separates Newtonian collimation into four independent tasks:
- Secondary placement: ensuring the secondary is positioned to receive and redirect the primary mirror’s light.
- Focuser-axis alignment: using secondary tilt so the sight-tube crosshairs or verified laser point at the primary center mark.
- Primary-axis alignment: using a cap, Cheshire, Barlowed laser, or appropriate reference to return the primary axis toward the focuser.
- On-sky verification: checking a centered star after mechanical and thermal conditions are controlled.
The exact telescope and tool manuals remain the controlling references. Hardware, secondary offset, mirror-cell design, lock-screw behavior, and recommended tool use vary between models.
What Should You Do Next?
For a beginner using a solid-tube f/6 or slower visual Newtonian, learn a repeatable cap or Cheshire workflow before purchasing more complex tools.
For a long-tube Dobsonian, a verified laser can make secondary-tilt adjustments easier, but confirm the primary with a Cheshire or suitable Barlowed-laser method.
For a fast imaging Newtonian, evaluate focuser registration, camera-train tilt, secondary placement, and collimation repeatability as a complete mechanical system. Follow the astrograph manufacturer’s requirements.
For a telescope that will not hold alignment, stop repeating optical adjustments and investigate the mirror cell, spider, focuser, adapters, truss connections, and accessory weight.
Correct collimation is not the state in which every reflection looks perfectly concentric. It is the state in which the secondary is appropriately placed and the focuser and primary optical axes meet at the intended references.
Frequently Asked Questions
Can you collimate a reflector telescope without a laser?
Yes. A collimation cap, sight tube, Cheshire, or combination sight tube/Cheshire can collimate a Newtonian reflector. A laser is convenient but not required, and an unchecked laser can produce a worse result.
Should all circles look perfectly concentric?
No. The secondary mirror and its reflected silhouette may appear offset in a correctly configured Newtonian. Concentrate on appropriate secondary placement, the focuser axis meeting the primary center mark, and the primary axis meeting the tool reference.
Which mirror should you adjust first?
Correct the secondary’s position and rotation first if needed, then adjust secondary tilt to aim at the primary center mark. Adjust the primary mirror last. Routine sessions often require only a quick primary correction.
Can collimation damage a telescope?
Careful collimation should not damage a telescope, but overtightened screws, an unsupported secondary, dropped tools, forced threads, mirror contact, or incorrect disassembly can. Follow the exact manual and make small changes.
Why does collimation change after moving the telescope?
Transport, gravity, loose mirror-cell hardware, spider flex, truss reassembly, focuser sag, or heavy accessories can shift alignment. If changes are large or repeatable with tube angle, investigate mechanical stability.
Is a star test required every time?
No. A repeatable cap, Cheshire, or verified laser check is sufficient for many routine visual sessions. A star test is most useful after major adjustments, when diagnosing image quality, or when a fast or high-resolution system requires finer verification.
Sources
Sources were accessed July 30, 2026.
- Celestron — Aligning a Newtonian’s Mirrors in Daylight
- Celestron — Collimating a Telescope Using the Stars
- Celestron — Collimation Eyepiece for Newtonians
- Celestron — Manuals and Software
- Sky-Watcher — How to Collimate a Reflector Telescope
- Sky-Watcher — Product Manual Library
- Sky-Watcher — Newtonian Instruction Manual With Collimation and Star-Test Guidance
- Royal Astronomical Society of Canada — Beginner Telescopes and Accessories
- HOTECH — Laser Collimation for Newtonian Telescopes
- Baader Planetarium — Adjustment of Newtonian Telescopes With a Laser Collimator
- Starlight Instruments — Laser Collimator Instructions
- Farpoint Astro — Laser and Cheshire Two-Tool Newtonian Method
- Farpoint Astro — Newtonian Collimation Preparation
More from Setup Collimation & Maintenance
How to Store a Telescope Without Damaging the Optics
Safe telescope storage depends more on dryness, environmental stability, and secure support than on buying an expensive case. This guide explains how to dry a telescope after a damp observing session, when to install optical caps, and how to choose between assembled storage, a padded case, a closet, a garage, or an observatory. It provides separate recommendations for refractors, Schmidt-Cassegrains, Maksutovs, Newtonians, solid-tube and truss Dobsonians, mounts, eyepieces, filters, cameras, batteries, and solar equipment. Readers also receive a storage-location comparison, a three-home practical example, desiccant guidance, troubleshooting for condensation and musty cases, and a long-term checklist. The central recommendation is to keep equipment indoors when practical and never seal moisture inside caps, foam, bags, or covers.
How to Prevent Dew on a Telescope
Telescope dew is best prevented before condensation becomes visible. Check the air temperature and dew point, extend or install a correctly fitted dew shield, and apply gentle controlled heat to exposed lenses, corrector plates, finder scopes, eyepieces, guide scopes, or secondary mirrors when conditions require it. This guide explains why optics can cool below the surrounding air, how to use dew-point spread as a planning signal, and why a shield and heater often work better together. It provides the original CLEAR decision framework, telescope-specific recommendations, a step-by-step setup process, a hypothetical battery-runtime calculation, real-world observing scenarios, a decision tree, buying and setup checklists, common mistakes, drying and storage guidance, and a troubleshooting table. The article also explains why optics should not be wiped while wet or sealed in a case before fully drying.
How to Clean Telescope Lenses and Mirrors Safely
Safe telescope cleaning begins by deciding whether cleaning is needed at all. This guide explains why a few dust particles should usually be left alone, how to remove loose debris without scratching coatings, and how to clean accessible eyepiece lenses, refractor objectives, and corrector-plate exteriors with minimal contact. It separates lens care from Newtonian primary-mirror washing, secondary-mirror handling, diagonal-mirror instructions, dew management, and sealed optical assemblies that require professional service. Readers also receive a surface-by-surface comparison table, a clean-wait-service decision framework, three real-world contamination examples, troubleshooting guidance, and complete preparation and aftercare checklists. The central recommendation is to follow the exact manufacturer instructions and use the least invasive method that solves a genuine performance or contamination problem.
Explore More Topics
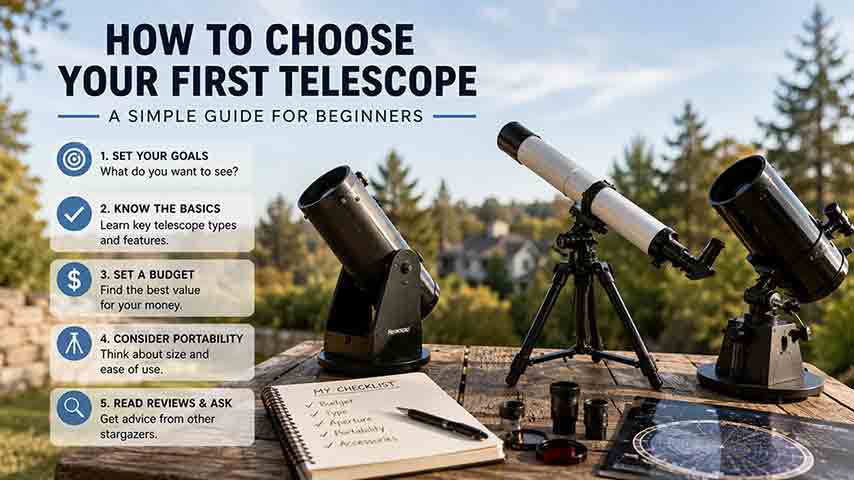
How to Choose Your First Telescope: A Beginner’s Buying Guide
Choosing a first telescope requires more than comparing aperture or advertised magnification. This practical beginner’s guide explains how to match a telescope to observing goals, light pollution, storage space, setup tolerance, and interest in visual observing or imaging. It compares refractors, Dobsonian reflectors, compound telescopes, and smart telescopes, then shows how aperture, focal length, focal ratio, magnification, and mount stability affect real use. Readers can use a quick-selection table, the original SPACE decision framework, a worked specification comparison, realistic household scenarios, new and used equipment checklists, and a troubleshooting chart. The guide also explains why a larger aperture cannot fully overcome bright urban skies, what to verify before buying a software-dependent smart telescope, and how to observe the Sun safely. Recommendations are based on authoritative guidance and published specifications rather than hands-on product testing or paid rankings
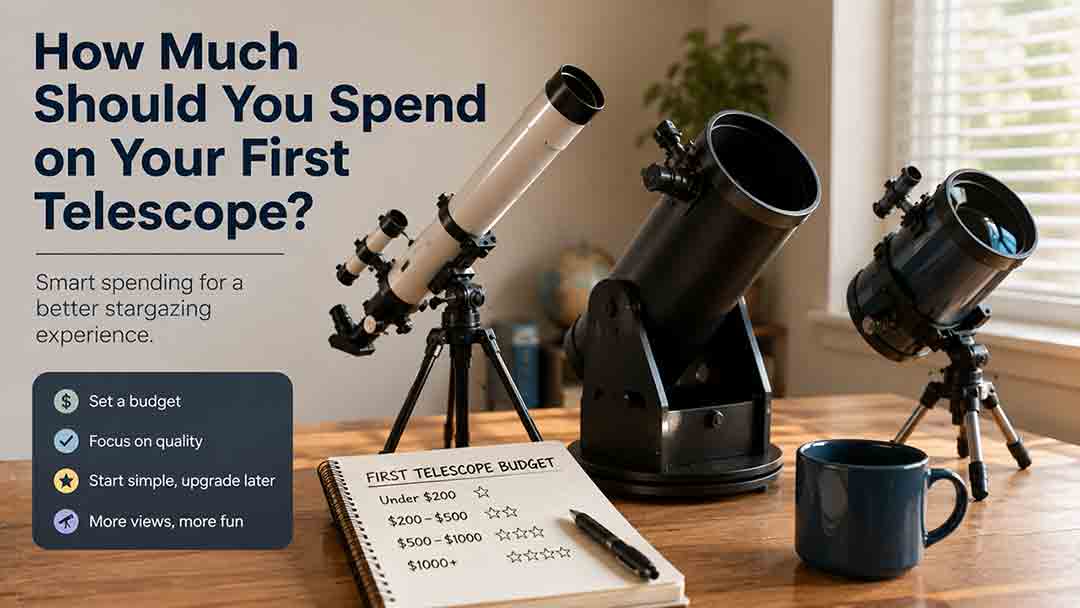
How Much Should You Spend on Your First Telescope?
Most beginners should plan a complete first-telescope budget of roughly $350–$700, although the right amount depends on observing goals, portability, automation, and whether the buyer wants direct eyepiece viewing or screen-based imaging. This guide explains what different budget ranges can realistically provide, why very low-cost telescope packages require caution, and when spending more for aperture, GoTo control, smart imaging, or compact optics is justified. It also separates visual astronomy from modular astrophotography, calculates total ownership cost, and shows how accessories, power, storage, shipping, and software can change the real price. The original FIRST Budget Test helps readers evaluate favorite targets, included equipment, real-world portability, desired skills, and total cost. Practical scenarios, a buying checklist, common mistakes, troubleshooting guidance, safety information, and current US market examples help beginners choose a stable, complete setup they are likely to use regularly.
Are Smart Telescopes Worth It for Beginners?
Smart telescopes can be worthwhile for beginners who want automated target finding, live-stacked deep-sky images, and a compact system controlled from a phone or tablet. However, they are not a universal replacement for traditional telescopes. Beginners who value direct eyepiece views, high-magnification planetary observing, manual sky navigation, or component-by-component upgrades may prefer a refractor, reflector, or catadioptric telescope. This guide explains how smart telescopes combine optics, cameras, motorized tracking, and image processing; compares them with traditional and modular imaging setups; and examines costs, software dependence, batteries, light pollution, target suitability, and long-term flexibility. It also provides the original WORTH decision framework, a hypothetical cost-per-session example, real-world beginner scenarios, a purchase checklist, common mistakes, and troubleshooting steps. The goal is to help readers choose based on their actual observing style rather than marketing claims or specifications alone