How to Set Up a Telescope for the First Time

How to Set Up a Telescope for the First Time
Set up a telescope for the first time in daylight: identify every part, stabilize the tripod or Dobsonian base, attach the mount and optical tube securely, install the finder and lowest-power eyepiece, and align the finder on a distant non-solar target. At night, begin with the Moon or a bright star, focus slowly, and add alignment, polar setup, or collimation only when your telescope design requires it.
Key Takeaways
- Complete the first assembly in daylight and follow the manual for the exact telescope and mount.
- Stabilize the mount before attaching the optical tube, and keep supporting the tube until every clamp is secure.
- Align the finder during daylight on a distant object far from the Sun, then refine the alignment on a star.
- Start every first-light session with the longest-focal-length eyepiece because it gives the widest field and easiest focus.
- Alt-azimuth, equatorial, Dobsonian, and computerized mounts require different setup steps; do not apply one mount’s instructions to another.
This guide walks through a safe first assembly, mount-specific setup, finder alignment, first focusing, basic collimation checks, computerized alignment, troubleshooting, and end-of-session care. It is designed to help a beginner achieve a useful first view without turning the first night into an unnecessary equipment test.
Editorial note: This guide is based on manufacturer manuals, professional astronomy guidance, and practical setup criteria rather than hands-on testing of a specific telescope model.
What Should You Do Before the First Night?
Unbox, inventory, and assemble the telescope in daylight before attempting nighttime observation.
Sky-Watcher’s telescope manuals repeatedly instruct users to read the model-specific manual and perform the first assembly in a bright, open area. Celestron and Sky-Watcher both maintain current manual libraries because mounting hardware, clamps, power requirements, alignment procedures, and software vary by model.
Before removing every wrapper, find the exact product name and download the latest manual from the manufacturer’s support page.
First-time inventory checklist
Lay the components on a clean floor or table and identify:
- Optical tube assembly
- Tripod, Dobsonian base panels, or tabletop base
- Mount head
- Dovetail bar, tube rings, or cradle
- Accessory tray or tripod spreader
- Slow-motion controls, hand controller, or control cables
- Counterweight shaft and counterweights, if supplied
- Finder scope or red-dot finder
- Star diagonal, if required by the telescope design
- Eyepieces
- Barlow lens or filters, if included
- Dust caps
- Power cable, battery holder, or rechargeable power system
- Required bolts, knobs, washers, and tools
- Printed safety warnings and instruction manual
Do not assume that a loose screw is spare hardware. Compare every part with the manual before continuing.
What should you avoid during unpacking?
Avoid:
- Touching mirrors, lenses, or coated filters
- Placing the optical tube where it can roll
- Lifting a heavy telescope by the focuser, finder, or motor housing
- Tightening knobs before confirming that the threads are correctly engaged
- Removing factory adjustment screws without a manual instruction
- Testing the telescope by pointing it toward the Sun
- Installing optional accessories before the basic telescope works
A simple first setup is easier to diagnose than a system already loaded with a Barlow, camera, filter wheel, heavy eyepiece, and phone adapter.
Where Should You Set Up the Telescope?
Choose firm, level ground with a clear view, enough working space, and no risk from traffic, sprinklers, doors, pets, or overhead branches.
A perfect dark-sky site is not required for the first setup. A nearby location is often better because the first goal is learning the equipment rather than finding the faintest target.
Good first-night location
Look for:
- A solid surface that will not shift under the tripod
- A clear view of the Moon, a bright star, or a distant daytime object
- Space to walk around the telescope without kicking a leg
- Protection from direct streetlights
- A location away from roads and bicycle paths
- A dry area away from irrigation systems
- A route that allows the equipment to be carried safely
- A horizon free from the Sun during daytime finder alignment
Concrete is stable but can release stored heat and worsen local image turbulence. Grass may reduce heat effects but can allow narrow tripod feet to sink. Use stable pads where needed without creating a tripping hazard.
Should the tripod be perfectly level?
Leveling is helpful and is required by some computerized alt-azimuth alignment procedures, but its importance depends on the mount.
- Manual alt-azimuth mount: reasonably level and stable is normally sufficient.
- Dobsonian mount: place the base on a firm surface so it rotates smoothly without rocking.
- Manual equatorial mount: polar-axis direction and latitude adjustment matter more than cosmetic tripod symmetry.
- Computerized mount: follow the model manual; some alignment systems expect a level base and a defined starting position.
- Astrophotography mount: leveling does not replace polar alignment, but a stable base makes adjustment more repeatable.
Use the tripod’s bubble level if supplied, but do not assume it is perfectly calibrated. Stability is more important than chasing a bubble while the ground remains soft.
How Does the Setup Sequence Change by Mount Type?
| Mount type | Essential first setup | Main advantage | Common beginner mistake |
|---|---|---|---|
| Manual alt-azimuth | Level tripod, attach mount and tube, adjust friction | Simple up-down and left-right motion | Overtightening axes until motion becomes jerky |
| Dobsonian | Assemble or position base, place tube in bearings, adjust balance or tension | Stable visual observing with simple motion | Carrying the tube by the focuser or placing the base on uneven ground |
| Manual equatorial | Orient polar axis, install counterweight system, attach and balance tube | Tracks by primarily moving the right-ascension axis after polar alignment | Unlocking an axis without supporting the tube or counterweight |
| Computerized alt-azimuth | Level base if instructed, attach tube, connect power, enter accurate setup data, align on stars | Automated pointing and tracking | Incorrect time, date, location, time zone, or starting position |
| Computerized equatorial | Assemble and balance, rough polar align, power on, complete star alignment | Tracking and pointing suitable for advanced visual use and imaging | Treating star alignment and polar alignment as the same procedure |
The exact order varies. A mount manual takes priority over a generic guide.
How Do You Assemble the Tripod and Mount Safely?
Build the support system first, verify that it cannot collapse, and attach the optical tube last.
Step 1: Spread and secure the tripod
Open the tripod legs fully. Install the accessory tray, center bolt, or spreader exactly as directed. On many tripods, the tray is a structural brace rather than a simple storage shelf.
Adjust the leg length before loading a heavy telescope. Make sure each clamp is locked and that no leg can slide under moderate downward pressure.
Step 2: Attach the mount head
Place the mount head on the tripod while supporting its full weight. Thread the center bolt or mounting hardware by hand before tightening.
Do not force a bolt that does not turn smoothly. Cross-threading can damage the tripod or mount base.
Step 3: Install slow-motion controls or electronics
Attach slow-motion cables where specified. For a computerized mount, route cables so they cannot wrap around the mount or pull from a connector during rotation.
Do not power the mount until the mechanical assembly is complete unless the manual specifically instructs otherwise.
Step 4: Check the mount’s locks and clutches
Learn which control releases each axis. Keep the axes locked or supported while attaching equipment.
A clutch is not a carrying handle. It is a controlled friction or locking mechanism for movement around an axis.
How Do You Install a Counterweight Safely?
On an equatorial mount, follow the manufacturer’s assembly order and keep one hand controlling the counterweight until its retaining stop is secure.
Many equatorial systems require the counterweight shaft and at least one counterweight before the optical tube is installed. The exact sequence is model-specific.
General safety rules:
- Point the counterweight shaft downward.
- Confirm that the shaft is fully threaded or locked.
- Install the safety stop at the end of the shaft.
- Hold the counterweight while loosening its clamp.
- Slide the weight only as far as needed.
- Tighten the counterweight clamp.
- Confirm that the safety stop cannot fall off.
- Keep feet away from the weight and shaft.
Never loosen the right-ascension clutch while an unbalanced tube and counterweight can swing freely.
How Do You Attach the Optical Tube?
Seat the dovetail or tube rings fully in the mount and keep supporting the tube until every clamp has been tightened and checked.
Sky-Watcher mount manuals explicitly warn users to support the telescope until the dovetail is firmly secured in the saddle.
Dovetail-mounted telescope
- Open the saddle clamp enough to accept the dovetail.
- Hold the tube with two hands or use a second person for a heavy system.
- Seat the dovetail fully against the saddle surface.
- Tighten the main clamp.
- Tighten the secondary safety clamp if present.
- Gently test whether the tube can slide or lift.
- Only then release your supporting hand.
Do not rely on the clamp tip touching the edge of the dovetail. The bar must be seated correctly.
Tube-ring telescope
- Attach the rings to the mounting plate if they are not already installed.
- Open the rings and place the tube inside.
- Close both rings without trapping cables.
- Tighten evenly enough to prevent slipping.
- Leave enough freedom for later tube rotation only if the design allows it.
Do not overtighten thin optical tubes.
Dobsonian telescope
Place the tube into the altitude bearings or cradle as instructed. Install springs, tension knobs, side bearings, or retaining hardware before letting go.
Check that the tube cannot leave the base when moved toward the horizon.
How Do You Balance the Telescope?
Balance allows smooth movement and reduces stress on gears, clutches, motors, and bearings.
A small manual alt-azimuth telescope may need only a tension adjustment. An equatorial mount normally requires balance in both right ascension and declination. Celestron and Sky-Watcher provide model-specific balancing procedures for equatorial mounts.
Balancing a manual alt-azimuth or Dobsonian mount
Install the accessories you expect to use:
- Finder
- Diagonal
- Typical eyepiece
- Dew shield
- Phone holder or camera only if it will be used
Move the tube from low to high altitude while supporting it. Adjust the tube position, sliding dovetail, bearing tension, or approved counterweight system until the telescope stays reasonably controlled.
A telescope does not need to remain perfectly motionless at every angle, but it should not drop suddenly when a clutch is released.
Balancing an equatorial mount
Follow the model manual. The general logic is:
- Balance the right-ascension axis by moving the counterweight.
- Lock right ascension.
- Balance declination by sliding the optical tube or dovetail.
- Recheck both axes after adding accessories.
- Tighten all clamps before observing.
Keep one hand near the tube while testing. Never allow a heavy instrument to swing uncontrolled.
How Do You Install the Finder and Eyepiece?
Install the finder in its dedicated bracket and begin with the eyepiece that has the largest focal-length number.
For example, use a 25 mm eyepiece before a 10 mm eyepiece. Celestron’s eyepiece guidance recommends beginning at the lowest power because the wider field is easier to aim and focus.
Refractor or Cassegrain optical path
A typical sequence is:
- Focuser or rear visual port
- Star diagonal
- Eyepiece
Some terrestrial configurations use an erecting prism, while some imaging configurations omit the diagonal. Follow the telescope manual.
Newtonian reflector optical path
The eyepiece goes directly into the focuser on the side of the tube. A star diagonal is not used.
Eyepiece installation
- Remove the focuser cap.
- Insert the diagonal if required.
- Insert the lowest-power eyepiece.
- Tighten the retaining screw or compression ring gently.
- Verify that the eyepiece cannot fall out.
- Remove the main aperture cap only when ready to observe.
Do not begin with a Barlow or the shortest eyepiece. Additional magnification makes finding and focusing harder.
How Do You Align the Finder Scope or Red-Dot Finder?
Align the finder in daylight on a distant stationary object that is well away from the Sun, then refine the alignment on a bright star at night.
Celestron’s finder-alignment guide recommends mounting the finder according to the telescope instructions and aligning its view with the main telescope.
Daylight finder-alignment steps
- Set the telescope outdoors where the Sun is behind you and cannot enter the telescope.
- Select a distant antenna, sign, tree top, or building detail.
- Insert the lowest-power eyepiece.
- Aim the main telescope at the object.
- Focus the main telescope.
- Center a small, recognizable detail in the eyepiece.
- Without moving the telescope, adjust the finder’s screws or red-dot controls until the same detail is centered.
- Recheck the main eyepiece.
- Repeat until both views agree.
Solar safety: Never point the telescope, finder, binoculars, or camera toward the Sun without a correctly installed, purpose-built solar system. For ordinary setup, keep the Sun well outside the working direction.
Nighttime refinement
Center a bright star in the low-power eyepiece. Adjust the finder until the star is centered there too.
Then insert a medium-power eyepiece, recenter the star in the telescope, and make a small final finder adjustment. Better finder alignment greatly improves every later session.
Do You Need to Collimate the Telescope Before First Use?
Only collimate when the telescope design requires it and there is evidence that alignment is poor. Do not turn optical adjustment screws simply because they are visible.
Collimation is the alignment of a telescope’s optical elements. Poor collimation can reduce sharpness and distort star images, but unnecessary adjustment can create a larger problem.
Refractor
Most beginner refractors are factory aligned and have no user collimation controls. If a non-adjustable refractor appears badly misaligned, contact the manufacturer or seller rather than disassembling the lens cell.
Newtonian reflector
A Newtonian may need a collimation check after shipping. Use the supplied collimation cap, Cheshire, or approved laser according to the manual.
For the first setup:
- Confirm that the secondary and primary reflections look broadly concentric.
- Do not remove the primary mirror.
- Do not loosen the central secondary-holder screw without understanding its function.
- Make small adjustments.
- Finish with a star test only after the telescope has reached outdoor temperature and the atmosphere is steady.
Schmidt-Cassegrain or EdgeHD
These telescopes are commonly factory collimated but may require a star-based adjustment after transport. Celestron’s SCT and EdgeHD guide recommends careful, small adjustments using a centered star.
Do not adjust the primary mirror mechanism or remove the corrector plate.
Maksutov-Cassegrain
Many beginner Maksutovs are factory set and not intended for casual user collimation. Consult the exact manual.
How Do You Set Up a Manual Alt-Azimuth Telescope?
A manual alt-azimuth telescope requires no polar alignment. Set it on stable ground, adjust axis tension, align the finder, and move in altitude and azimuth.
First-use procedure
- Level and secure the tripod.
- Attach the optical tube.
- Install the finder.
- Insert the lowest-power eyepiece.
- Adjust altitude and azimuth tension so movement is smooth.
- Align the finder in daylight.
- At night, aim at the Moon or a bright star.
- Focus and practice tracking by gently nudging both axes.
Advantages
- Fast setup
- Intuitive movement
- No counterweight on many models
- No polar alignment
- Good for visual observing
Limitations
- Tracking requires movement in two axes
- High-power tracking can be more demanding
- Some lightweight mounts vibrate easily
- Most are not intended for long-exposure deep-sky imaging
How Do You Set Up a Dobsonian Telescope?
A Dobsonian is a Newtonian reflector on a simple altitude-azimuth base. Its setup priority is a stable base, secure tube bearings, good balance, finder alignment, and a collimation check.
First-use procedure
- Assemble the base in daylight if required.
- Confirm that the ground board rotates smoothly.
- Place the base on firm ground.
- Install the optical tube in its altitude bearings.
- Attach springs, tension controls, or retainers.
- Install the finder and low-power eyepiece.
- Check balance from horizon to near zenith.
- Check collimation according to the manual.
- Align the finder.
- Begin with a bright target.
Advantages
- Strong stability for the cost
- Simple manual movement
- Comfortable visual observing
- Large aperture available without a complex tripod
Limitations
- Bulky components
- Manual tracking at high power
- Newtonian collimation may require learning
- Uneven ground can make motion unreliable
How Do You Set Up a Manual Equatorial Mount?
A manual equatorial mount must be assembled, balanced, and roughly polar aligned before its tracking advantage becomes intuitive.
Polar alignment means orienting the right-ascension axis approximately parallel to Earth’s rotation axis. Celestron notes that alt-azimuth mounts do not require polar alignment, while equatorial mounts do.
Rough polar-alignment steps
- Identify geographic north or south.
- Set the mount’s latitude scale approximately to the observing latitude.
- Point the polar axis north in the Northern Hemisphere or south in the Southern Hemisphere.
- Use Polaris for a basic Northern Hemisphere visual alignment where visible.
- Use the manufacturer’s Southern Hemisphere procedure rather than assuming Polaris instructions apply.
- Lock the mount adjustments after rough alignment.
For basic visual use, rough alignment is usually sufficient to practice tracking. Accurate astrophotography requires a more precise method and is outside a first-night setup.
Learning equatorial movement
An equatorial mount can feel awkward because its axes are tilted relative to the horizon.
Practice in daylight:
- Release one clutch at a time while supporting the tube.
- Learn right ascension and declination movement.
- Return the mount to a safe starting position.
- Confirm that the tube, counterweight, and tripod cannot collide.
- Rotate a Newtonian tube in its rings only when safely supported.
How Do You Set Up a Computerized GoTo Telescope?
A GoTo telescope still requires correct mechanical setup, finder alignment, power, date, time, location, and a model-specific star-alignment procedure.
Computerized pointing cannot compensate for an unsecured tube, slipping clutch, incorrect time, or badly misaligned finder.
Step 1: Prepare power
Use the power source specified by the manufacturer. Weak batteries can cause resets, erratic slewing, or failed alignment.
Secure the cable so it cannot wrap around the mount.
Step 2: Establish the required starting position
Some mounts require:
- Level base
- Index marks aligned
- Tube level
- Tube pointing north
- Counterweight down
- A defined home position
Other systems use different starting procedures. Follow the exact manual.
Step 3: Enter accurate data
Confirm:
- Date format
- Local time
- Time zone
- Daylight-saving setting
- Latitude and longitude or selected city
- Northern or Southern Hemisphere mode
Celestron’s SkyAlign system, for example, uses time, date, location, and three bright objects. Sky-Watcher’s SynScan systems offer their own model-specific alignment methods.
Step 4: Use well-separated alignment stars
Begin with the low-power eyepiece. Center each star in the finder, then in the eyepiece.
For greater centering accuracy:
- Use low power to locate the star.
- Defocus slightly if a larger symmetrical disk is easier to center.
- Finish using the hand-control directions recommended by the manufacturer to reduce backlash effects.
- Do not use a star you cannot identify unless the alignment method explicitly permits unknown bright objects.
Step 5: Test a nearby bright target
After alignment, command the mount to a bright target. If it misses by a small amount, center the target and use the model’s sync or calibration feature only as instructed.
If it misses badly, restart and check input data, starting position, finder alignment, and star identification.
How Do You Focus a Telescope for the First Time?
Begin with the lowest-power eyepiece, point at a distant object or bright astronomical target, and turn the focus knob slowly through the full useful range.
Daylight focus test
Use a distant terrestrial object away from the Sun. Nearby objects may be inside the telescope’s minimum focusing distance.
Image orientation may be inverted, mirrored, or rotated depending on the telescope and diagonal. That is normal for astronomical optics.
Night focus test
The Moon is an easy first target when visible. Otherwise use a bright star.
A properly focused star should appear as a small point, limited by atmospheric conditions and telescope optics. If the star becomes a large disk with a dark center, it is out of focus rather than a resolved view of the star.
What if focus cannot be reached?
Check:
- Dust cap removed from the main aperture
- Correct eyepiece location
- Diagonal installed where required
- Extension tube installed or removed as the manual requires
- Eyepiece fully seated
- Barlow removed
- Camera adapters removed
- Focuser lock released
- Focuser moving when the knob turns
Do not keep adding magnification to solve a focus problem.
What Should You Observe on the First Night?
Choose a bright, easy target and define success as learning the telescope rather than seeing many objects.
NASA’s skywatching resources recommend the Moon, bright planets, double stars, and star clusters as accessible targets for small telescopes.
First-night success plan
Goal 1: Center and focus one bright object
Use the Moon when available. Otherwise use a bright star.
Goal 2: Confirm finder alignment
Move away from the object, then return using the finder.
Goal 3: Change one eyepiece
Move from low power to medium power and refocus.
Magnification is calculated as:
Telescope focal length ÷ eyepiece focal length
A 650 mm telescope with a 25 mm eyepiece gives 26×. A 10 mm eyepiece gives 65×.
Goal 4: Practice tracking
Watch the target drift and learn which control returns it to the center.
Goal 5: End before frustration
Record what worked and what needs attention. A short successful session is more useful than changing every adjustment in the dark.
A Real-World Example: First Setup of a 130 mm f/5 Newtonian
Assume the package includes:
- 130 mm Newtonian optical tube
- 650 mm focal length
- Manual alt-azimuth mount
- Red-dot finder
- 25 mm and 10 mm eyepieces
Daylight preparation
- Assemble and stabilize the tripod.
- Attach the mount.
- Seat and clamp the optical tube.
- Install the red-dot finder.
- Insert the 25 mm eyepiece.
- Aim at a distant object away from the Sun.
- Focus the telescope.
- Align the red dot with the same detail.
- Check that the tube moves smoothly.
- Inspect collimation with the supplied tool without making unnecessary adjustments.
First-night powers
| Eyepiece | Calculation | Magnification | Best first use |
|---|---|---|---|
| 25 mm | 650 ÷ 25 | 26× | Finding and framing |
| 10 mm | 650 ÷ 10 | 65× | Closer lunar or planetary view |
| 10 mm with 2× Barlow | 650 ÷ 10 × 2 | 130× | Only after basic setup works and conditions support it |
Start at 26×. The wider field makes finder errors less frustrating. Move to 65× only after the object is centered.
The 130× combination is not part of the initial diagnosis. If the view is poor, determine whether the cause is focus, seeing, collimation, cooling, vibration, or excess magnification.
What Are the Most Common First-Setup Mistakes?
| Mistake | Why it causes problems | Better approach |
|---|---|---|
| Assembling for the first time in darkness | Parts and controls are difficult to identify | Complete a daylight dry run |
| Starting with the shortest eyepiece | Narrow field and high power make aiming difficult | Begin with the longest-focal-length eyepiece |
| Failing to align the finder | The finder points somewhere different from the telescope | Align in daylight, refine on a star |
| Adding every accessory immediately | Creates multiple possible failure points | Test the basic optical path first |
| Overtightening clutches and knobs | Causes rough motion or damaged threads | Tighten only enough to hold securely |
| Leaving a dovetail partly seated | The optical tube can slip or fall | Support and inspect the full saddle connection |
| Ignoring balance | Increases vibration, drift, and motor stress | Balance with normal accessories installed |
| Confusing polar alignment with star alignment | GoTo pointing and tracking remain inaccurate | Complete each model-specific procedure |
| Collimating without evidence | Good factory alignment may be lost | Check first and adjust only when required |
| Expecting a sharp view immediately after moving outdoors | Temperature differences and seeing can soften images | Allow the telescope to approach outdoor conditions |
| Observing through a closed window | Window glass and indoor-outdoor air currents distort the view | Observe outdoors |
| Pointing near the Sun during setup | Creates a serious eye-safety risk | Keep the Sun behind the setup and outside the aiming area |
How Do You Troubleshoot the First Session?
Why is the view completely black?
Check:
- Main aperture cap removed
- Eyepiece cap removed
- Correct optical port used
- Diagonal and eyepiece installed correctly
- Telescope aimed at a bright object
- Finder actually aligned
- Focuser moved through its range
- No camera cap or filter blocking the path
On some dust caps, a small removable opening may be visible while the full cap remains installed. Remove the main cap for normal nighttime observation unless the manual instructs otherwise.
Why is everything blurry?
Possible causes include:
- Not yet reaching focus
- Starting with too much magnification
- Atmospheric turbulence
- Telescope not near outdoor temperature
- Dew
- Poor collimation
- Viewing through a window
- Looking over a hot roof or pavement
- Touching the telescope and causing vibration
Return to the lowest-power eyepiece and a bright target.
Why is the image upside down or mirrored?
Astronomical telescopes often invert or mirror the image. The orientation depends on optical design and diagonal type.
This is not normally a defect. An erecting prism can provide a terrestrial orientation in compatible telescopes, but it may not be the best accessory for every astronomical observation.
Why can’t the telescope move smoothly?
Check:
- Axis locks
- Friction or tension controls
- Tube balance
- Cable snags
- Tripod interference
- Overtightened knobs
- Dobsonian bearings installed correctly
- Counterweight position
- Accessory tray or spreader tension
Do not force a motorized axis by hand unless the manual explicitly allows it.
Why does the telescope shake when focusing?
Possible causes include:
- Tripod legs extended farther than necessary
- Loose tray or center bolt
- Uneven ground
- Heavy accessory stack
- Unbalanced tube
- Wind
- Touching the eyepiece
- Lightweight mount near its practical limit
Use a gentle touch, retract legs where comfortable, and reduce accessory weight.
Why does GoTo point to the wrong place?
Check:
- Date
- Time
- Time zone
- Daylight-saving setting
- Location
- Hemisphere
- Home position
- Leveling requirement
- Correct alignment stars
- Finder alignment
- Tube or clutch slippage
- Adequate power
A repeated large error usually indicates setup data or mechanical movement rather than a defective object database.
Why do stars look like comets?
Possible causes include:
- Poor focus
- Star near the edge of the field
- Newtonian coma
- Eyepiece edge aberration
- Poor collimation
- Astigmatism
- Thermal currents
- Pinched optics
Center a bright star, use moderate power, focus carefully, and compare both sides of focus before adjusting optics.
Why is there dew on the optics?
Dew forms when an optical surface cools below the local dew point.
Stop observing if dew is obscuring the image. Use a proper dew shield or regulated dew-heater system approved for the telescope. Do not wipe a dewed corrector plate, lens, or mirror with clothing.
Allow the equipment to dry in a protected place before sealing it for storage.
How Should You Pack Up and Store the Telescope?
End the session by parking or locking the mount safely, disconnecting power, allowing damp equipment to dry, and replacing caps only when surfaces are dry.
Shutdown sequence
- Use the mount’s park or shutdown function if required.
- Return the tube and counterweight to a safe position.
- Switch off power.
- Disconnect cables without pulling on the wires.
- Remove heavy accessories.
- Support the optical tube while releasing its clamp.
- Carry the optical tube and mount using approved handles or support points.
- Account for every cap, knob, and tool.
- Let damp accessories dry indoors in a dust-protected area.
- Store the telescope where temperature, moisture, impact, and pests are controlled.
Do not seal visible moisture inside an optical tube or accessory case.
Should you clean the optics after the first use?
Usually not.
A small amount of dust rarely affects visual performance. Unnecessary cleaning can scratch coatings or move optical components.
Clean only when needed and follow the manufacturer’s optical-cleaning instructions. Never remove a primary mirror, corrector plate, or lens cell as routine first-use maintenance.
First-Time Telescope Setup Checklist
Before leaving indoors
- Read the exact model manual
- Inventory all parts
- Complete a daylight assembly
- Charge or test the power source
- Install fresh finder batteries if required
- Choose a low-power eyepiece
- Check the weather and observing location
- Pack a dim red light
- Bring caps, tools, and manual
- Confirm that no solar observation is planned without a purpose-built system
At the observing site
- Set the tripod or base on stable ground
- Secure the spreader or accessory tray
- Attach the mount
- Install the counterweight system safely if required
- Attach and secure the optical tube
- Balance the telescope
- Install the finder and low-power eyepiece
- Route cables safely
- Rough polar align if using an equatorial mount
- Enter correct data if using GoTo
- Complete finder and star alignment
- Start on a bright target
Before packing up
- Park or safely position the mount
- Turn off power
- Remove heavy accessories
- Support the tube before releasing clamps
- Check for dew
- Dry equipment before sealing
- Replace caps
- Record setup problems for the next session
How We Developed These Recommendations
This guide uses five setup priorities:
- Mechanical security: tripod, base, saddle, rings, clutches, counterweights, and cables must be safe before optical work begins.
- Optical simplicity: the basic telescope, finder, and lowest-power eyepiece are tested before optional accessories.
- Mount-specific operation: alt-azimuth, Dobsonian, equatorial, and computerized mounts are treated separately.
- Repeatable alignment: finder alignment, polar alignment, and computerized star alignment are distinguished from one another.
- Evidence-based adjustment: focus, balance, and collimation are changed only after identifying the likely source of a problem.
The exact manufacturer manual remains the controlling reference. Hardware, software, alignment routines, payload limits, and adjustment procedures can differ even between telescopes that look similar.
What Should You Do Next?
For a manual alt-azimuth telescope, practice finder alignment, low-power focusing, and smooth tracking.
For a Dobsonian, add a careful collimation check and learn how balance changes with heavier eyepieces.
For a manual equatorial mount, repeat rough polar alignment in daylight until the axes and locks feel familiar.
For a GoTo telescope, save the correct location and time settings, learn the required home position, and repeat the alignment process with well-separated stars.
Do not judge the telescope by the first few minutes outside. A secure mount, aligned finder, low-power eyepiece, and one sharply focused target are the foundation for every later observation.
Frequently Asked Questions
Can you set up a telescope indoors?
You can assemble and learn the controls indoors, but focus testing should use a distant outdoor object through an open view. Window glass and indoor-outdoor air currents can severely distort the image. Never aim near the Sun.
Which eyepiece should you use first?
Use the eyepiece with the largest focal-length number, such as 25 mm or 32 mm. It normally provides the lowest magnification and widest field, making targets easier to find and focus.
Does every telescope need polar alignment?
No. Polar alignment is required for an equatorial mount to track efficiently around its right-ascension axis. Manual alt-azimuth and standard Dobsonian mounts do not require polar alignment for normal visual use.
Does every new telescope need collimation?
No. Newtonian reflectors may need a check after shipping, while many refractors and Maksutov-Cassegrains are factory set and are not intended for routine user adjustment. Follow the exact model manual and adjust only when there is evidence of poor alignment.
Why can’t you see anything through a new telescope?
The most common causes are an aperture cap still installed, an unaligned finder, the wrong eyepiece position, failure to reach focus, or starting with excessive magnification. Return to the basic optical path and the longest-focal-length eyepiece.
How long should a telescope cool before observing?
There is no universal time. The required adjustment depends on telescope design, aperture, construction, storage temperature, outdoor temperature, and airflow. Set the telescope outside safely before high-power observing and judge readiness by whether star images and focus have become stable.
Sources
Sources were accessed July 30, 2026.
- Sky-Watcher — Manual-Operated Telescope and Mount Manuals
- Sky-Watcher — Product Manual Library
- Celestron — Manuals and Software
- Royal Astronomical Society of Canada — Telescope Basics
- Royal Astronomical Society of Canada — Beginner Telescopes and Accessories
- Celestron — Aligning Your Finderscope
- Celestron — How to Use Telescope Eyepieces
- Celestron — Balancing an Equatorial Mount
- Celestron — Manual Equatorial-Mount Polar Alignment
- Celestron — Newtonian Collimation in Daylight
- Celestron — SCT and EdgeHD Collimation Guide
- Celestron — SkyAlign Technology
- Sky-Watcher — SynScan Hand Control and App Manuals
- Celestron — Solar Safety Warning
- NASA Science — Skywatching Tips and Guides
- NASA Science — Moon Viewing Tips
More from Setup Collimation & Maintenance
How to Store a Telescope Without Damaging the Optics
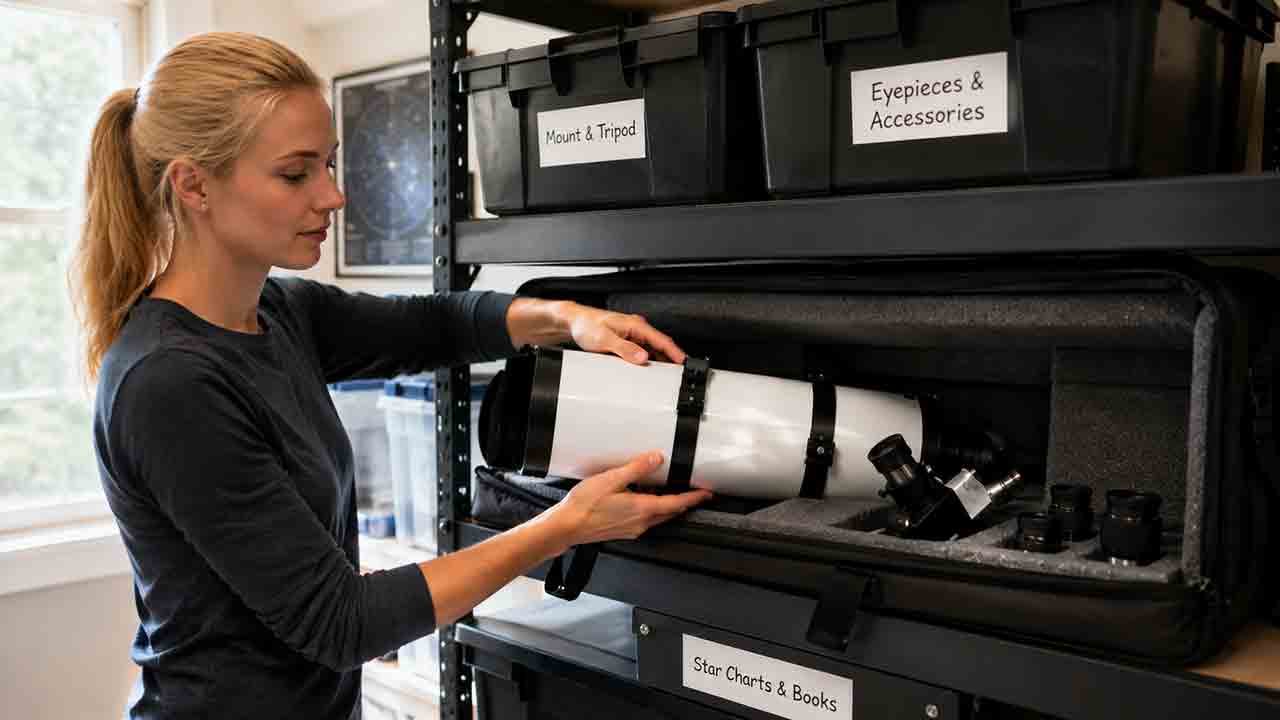
Safe telescope storage depends more on dryness, environmental stability, and secure support than on buying an expensive case. This guide explains how to dry a telescope after a damp observing session, when to install optical caps, and how to choose between assembled storage, a padded case, a closet, a garage, or an observatory. It provides separate recommendations for refractors, Schmidt-Cassegrains, Maksutovs, Newtonians, solid-tube and truss Dobsonians, mounts, eyepieces, filters, cameras, batteries, and solar equipment. Readers also receive a storage-location comparison, a three-home practical example, desiccant guidance, troubleshooting for condensation and musty cases, and a long-term checklist. The central recommendation is to keep equipment indoors when practical and never seal moisture inside caps, foam, bags, or covers.
How to Prevent Dew on a Telescope
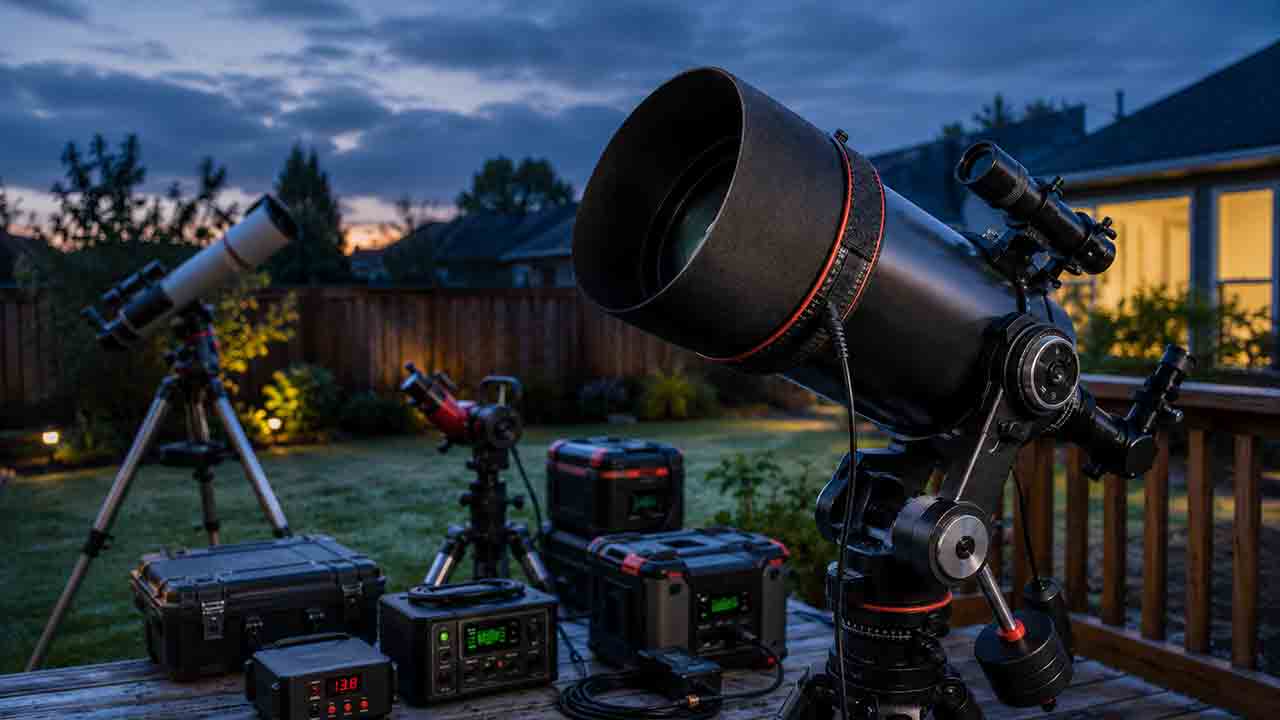
Telescope dew is best prevented before condensation becomes visible. Check the air temperature and dew point, extend or install a correctly fitted dew shield, and apply gentle controlled heat to exposed lenses, corrector plates, finder scopes, eyepieces, guide scopes, or secondary mirrors when conditions require it. This guide explains why optics can cool below the surrounding air, how to use dew-point spread as a planning signal, and why a shield and heater often work better together. It provides the original CLEAR decision framework, telescope-specific recommendations, a step-by-step setup process, a hypothetical battery-runtime calculation, real-world observing scenarios, a decision tree, buying and setup checklists, common mistakes, drying and storage guidance, and a troubleshooting table. The article also explains why optics should not be wiped while wet or sealed in a case before fully drying.
How to Clean Telescope Lenses and Mirrors Safely
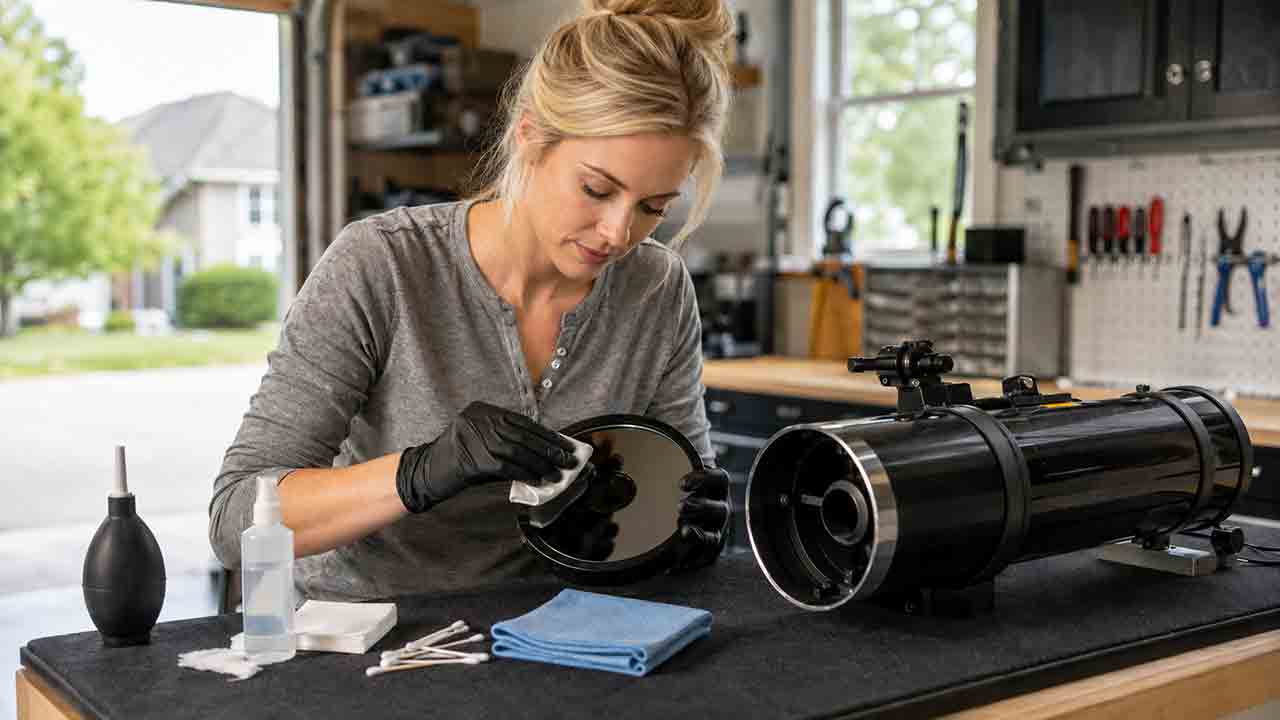
Safe telescope cleaning begins by deciding whether cleaning is needed at all. This guide explains why a few dust particles should usually be left alone, how to remove loose debris without scratching coatings, and how to clean accessible eyepiece lenses, refractor objectives, and corrector-plate exteriors with minimal contact. It separates lens care from Newtonian primary-mirror washing, secondary-mirror handling, diagonal-mirror instructions, dew management, and sealed optical assemblies that require professional service. Readers also receive a surface-by-surface comparison table, a clean-wait-service decision framework, three real-world contamination examples, troubleshooting guidance, and complete preparation and aftercare checklists. The central recommendation is to follow the exact manufacturer instructions and use the least invasive method that solves a genuine performance or contamination problem.
Explore More Topics
How to Choose Your First Telescope: A Beginner’s Buying Guide
Choosing a first telescope requires more than comparing aperture or advertised magnification. This practical beginner’s guide explains how to match a telescope to observing goals, light pollution, storage space, setup tolerance, and interest in visual observing or imaging. It compares refractors, Dobsonian reflectors, compound telescopes, and smart telescopes, then shows how aperture, focal length, focal ratio, magnification, and mount stability affect real use. Readers can use a quick-selection table, the original SPACE decision framework, a worked specification comparison, realistic household scenarios, new and used equipment checklists, and a troubleshooting chart. The guide also explains why a larger aperture cannot fully overcome bright urban skies, what to verify before buying a software-dependent smart telescope, and how to observe the Sun safely. Recommendations are based on authoritative guidance and published specifications rather than hands-on product testing or paid rankings
How Much Should You Spend on Your First Telescope?
Most beginners should plan a complete first-telescope budget of roughly $350–$700, although the right amount depends on observing goals, portability, automation, and whether the buyer wants direct eyepiece viewing or screen-based imaging. This guide explains what different budget ranges can realistically provide, why very low-cost telescope packages require caution, and when spending more for aperture, GoTo control, smart imaging, or compact optics is justified. It also separates visual astronomy from modular astrophotography, calculates total ownership cost, and shows how accessories, power, storage, shipping, and software can change the real price. The original FIRST Budget Test helps readers evaluate favorite targets, included equipment, real-world portability, desired skills, and total cost. Practical scenarios, a buying checklist, common mistakes, troubleshooting guidance, safety information, and current US market examples help beginners choose a stable, complete setup they are likely to use regularly.
Are Smart Telescopes Worth It for Beginners?
Smart telescopes can be worthwhile for beginners who want automated target finding, live-stacked deep-sky images, and a compact system controlled from a phone or tablet. However, they are not a universal replacement for traditional telescopes. Beginners who value direct eyepiece views, high-magnification planetary observing, manual sky navigation, or component-by-component upgrades may prefer a refractor, reflector, or catadioptric telescope. This guide explains how smart telescopes combine optics, cameras, motorized tracking, and image processing; compares them with traditional and modular imaging setups; and examines costs, software dependence, batteries, light pollution, target suitability, and long-term flexibility. It also provides the original WORTH decision framework, a hypothetical cost-per-session example, real-world beginner scenarios, a purchase checklist, common mistakes, and troubleshooting steps. The goal is to help readers choose based on their actual observing style rather than marketing claims or specifications alone