Finder Scope vs Red Dot Finder: Which One Should You Choose?

Finder Scope vs Red Dot Finder: Which One Should You Choose?
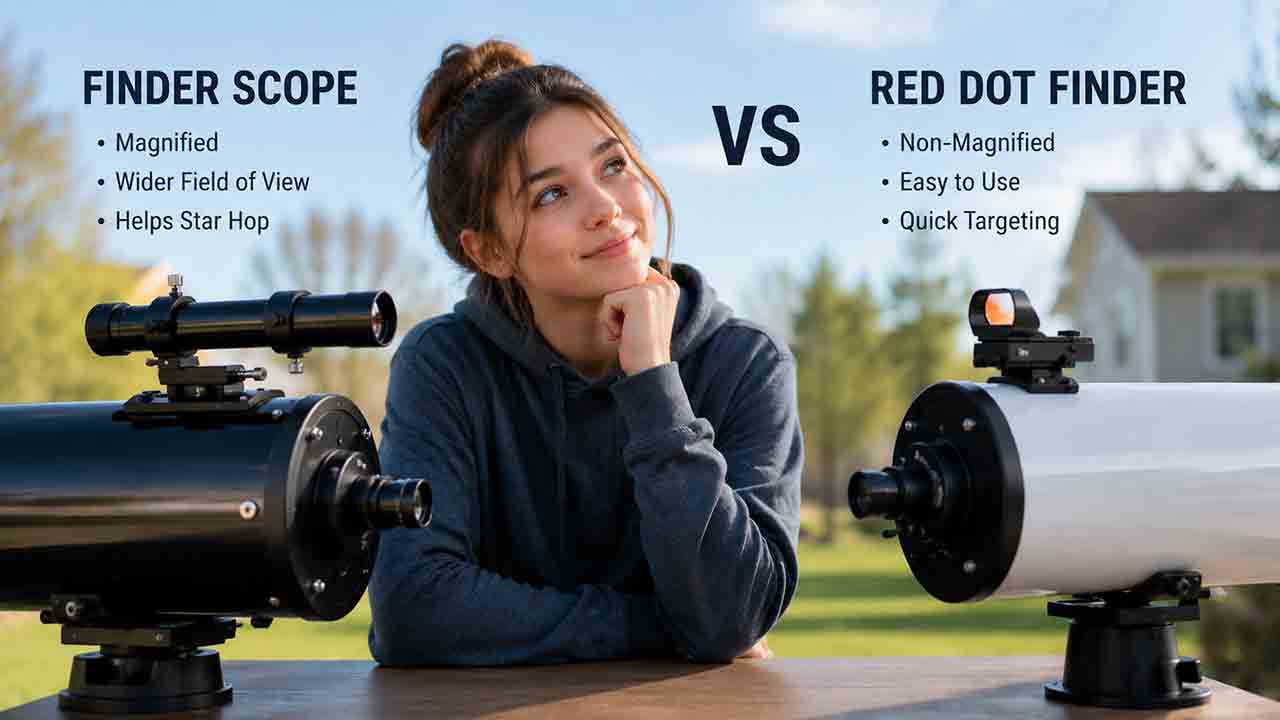
Choose a red dot finder when you want the quickest, most intuitive way to point at the Moon, planets, and bright stars. Choose an optical finder scope when you need magnification and extra light gathering to follow star patterns toward fainter targets. Many deep-sky observers benefit most from using both: a red dot for rough aim and a finder scope for precise star-hopping.
Key Takeaways
- A red dot finder provides an unmagnified, right-side-up view that matches the naked-eye sky, making it the easier first finder for many beginners.
- An optical finder scope magnifies the sky and can reveal stars that are difficult or impossible to see unaided, which helps with star-hopping to deep-sky objects.
- Straight-through optical finders, right-angle correct-image finders, and illuminated finders provide different image orientations and ergonomics; “finder scope” is not one uniform design.
- Alignment quality, mounting compatibility, brightness control, field of view, eye position, and access near the zenith can matter as much as finder type.
- A dual-finder arrangement can reduce frustration when the telescope is large, the sky is bright, or the observer frequently searches for faint targets.
This guide explains how finder scopes and red dot finders work, which targets suit each design, how image orientation and light pollution affect the choice, and how to align either finder safely. It also includes the original SIGHT decision framework, a field-of-view example, real-world scenarios, a decision tree, a buying checklist, common mistakes, and troubleshooting guidance.
Method note: This guide is based on NASA skywatching material, astronomy-organization guidance, official manufacturer documentation, and practical selection criteria rather than hands-on product testing. Specifications and mounting systems vary, so confirm the manual and compatibility information for the exact telescope and finder.
Quick Navigation
- How the Two Finder Types Differ
- Which Is Easier for Beginners
- Best Choice for Different Targets
- Straight-Through vs RACI Finders
- Using Both Finders
- Alignment Instructions
- SIGHT Decision Framework
- Buying Checklist
- Troubleshooting
- FAQ
How Do a Finder Scope and Red Dot Finder Differ?
A finder scope is a small auxiliary telescope attached to the main telescope. It normally provides low magnification, a wider field than the main telescope, and a crosshair or reticle for centering a target. Royal Astronomical Society of Canada Calgary Centre, “Choosing and Using a Telescope for Astronomy,” finder-scope and...
A red dot finder is a non-magnifying reflex sight. It reflects an illuminated dot onto a transparent window so the user sees the dot superimposed on the real sky. The dot is visible to the observer; the device does not place a visible red spot on the star or send a targeting beam across the sky. Royal Astronomical Society of Canada, “Insider’s Guide to the Galaxy — Beginner Telescopes and Accessories,” finder s... Celestron, “Finderscopes Explained: Making Astronomy Easier and More Fun,” updated December 23, 2024
Quick Comparison
| Decision factor | Optical finder scope | Red dot finder |
|---|---|---|
| View | Magnified | Unmagnified |
| Light gathering | Can reveal fainter stars | Limited to what the observer can see through the window |
| Image orientation | May be inverted, mirrored, or correct, depending on design | Usually upright and matches the naked-eye sky |
| Primary strength | Precise star-hopping and faint reference stars | Fast rough pointing at visible targets |
| Field awareness | Narrower than naked-eye view | Broad natural-sky context |
| Crosshair or aiming mark | Crosshair, double crosshair, or illuminated reticle | Dot, circle, or bullseye pattern |
| Battery requirement | None unless the reticle is illuminated | Usually requires a battery |
| Daytime use | Possible, but image orientation and focus matter | Usually intuitive when brightness is sufficient |
| Neck position | Straight-through or right-angle, depending on model | User usually looks along the telescope tube |
| Light-polluted sky | Can reveal additional reference stars | May struggle when few guide stars are visible |
| Dark-sky scanning | Useful for matching star fields | Excellent for initial orientation |
| Typical beginner learning curve | Moderate | Low |
| Best single-finder use | Star-hopping to fainter targets | Moon, planets, bright stars, and simple GoTo alignment |
The best finder is the one that consistently places the intended target inside the main telescope’s lowest-power field. A high-quality finder that is uncomfortable, misaligned, too bright, or incompatible with the mounting shoe may be less useful than a simpler device that fits the observer and telescope.
Which Finder Is Easier for a Beginner?
A red dot finder is usually easier for a beginner who starts with the Moon, planets, and bright stars. The user keeps both eyes open or looks through the window, moves the telescope until the dot appears over the target, and then checks the main eyepiece.
An optical finder scope requires the observer to interpret a magnified field. Depending on the design, the image may be upside down, reversed left-to-right, or viewed at a right angle. These differences can make the first session less intuitive.
The optical finder becomes easier when the desired target is not visible to the naked eye. Magnification and aperture may reveal guide stars that a red dot finder cannot show, allowing the observer to match the field with a chart and move step by step toward a faint object.
Which Part of the Task Needs to Be Easy?
| Finder task | Usually easier with | Reason |
|---|---|---|
| Pointing at the Moon | Red dot finder | The target is bright and directly visible |
| Centering a bright planet | Red dot finder | Unmagnified sky view preserves orientation |
| Aligning a computerized telescope on bright stars | Red dot finder | Fast placement on visible alignment stars |
| Locating a faint cluster or galaxy | Optical finder | Magnification reveals more guide stars |
| Matching a detailed star chart | RACI optical finder | Correct image can match charts more naturally |
| Roughly aiming a large Dobsonian | Red dot finder | The observer can sight along the tube |
| Working near the zenith | RACI optical finder may be more comfortable | Right-angle viewing reduces neck strain |
| Using the telescope without batteries | Non-illuminated optical finder | No powered dot or reticle is needed |
A beginner should therefore choose according to the intended target-finding method, not simply according to which accessory looks more advanced.
How Does an Optical Finder Scope Work?
An optical finder scope is a small refracting telescope with lower magnification and a wider field than the main instrument. A crosshair or reticle marks the center of the field.
Finder labels commonly combine magnification and aperture. For example, “9×50” means approximately 9× magnification with a 50 mm objective lens. A current official 9×50 right-angle correct-image finder example specifies a five-degree field of view, but specifications vary by model. Celestron, “Right Angle Correct Image Finderscope,” official 9×50 specifications and design description
Why Can a Finder Scope Show Fainter Stars?
The objective lens gathers light over a larger area than the unaided pupil and concentrates it into a magnified image. The result can include stars that are difficult to see with the naked eye, especially under light pollution or when the observer is following a chart through a crowded field.
This advantage does not make every faint deep-sky object visible in the finder. Surface brightness, finder aperture, magnification, sky quality, transparency, target altitude, reticle illumination, and observer adaptation all matter.
NASA has described using binoculars or a finder scope to sweep for the globular cluster M3 after locating the appropriate region between bright reference stars. That example illustrates the finder scope’s role as an intermediate step between naked-eye orientation and the narrower main-telescope view. NASA Science, “What’s Up: April 2025 Skywatching Tips,” example of using binoculars or a finder scope to sweep for Me...
What Does Finder Magnification Change?
Higher finder magnification can make star patterns and compact targets easier to recognize, but it also narrows the field and makes rough pointing more difficult.
Lower magnification shows a broader region and is easier to orient, but may reveal less detail. The useful balance depends on the main telescope’s focal length, the observer’s chart scale, and whether a separate red dot sight handles the initial aim.
What Does Finder Aperture Change?
A larger finder objective can collect more light and make faint stars easier to detect, but it adds mass, cost, mounting load, and bulk. A large finder may also require a stronger bracket to hold alignment.
Aperture alone does not determine usefulness. Poor focus, a bright reticle, narrow eye relief, unstable adjustment screws, or an awkward viewing angle can erase the practical benefit of a larger lens.
How Does a Red Dot Finder Work?
A red dot finder uses a small light source and an optical window to create the appearance of a floating dot, ring, or bullseye against the sky. The view is normally unmagnified, so constellations and horizon directions appear as they do to the unaided eye. Royal Astronomical Society of Canada, “Insider’s Guide to the Galaxy — Beginner Telescopes and Accessories,” finder s... Celestron, “StarPointer Red-dot Finderscope,” official specifications and operating features
A current official red dot finder example uses an adjustable dot, includes a CR2032 battery, and is designed for both daytime and nighttime visibility. Other models use different batteries, windows, brightness controls, reticles, and mounting bases. Celestron, “StarPointer Red-dot Finderscope,” official specifications and operating features
Why Is a Red Dot Finder Fast?
The observer does not need to translate an inverted or magnified star pattern. A visible star remains in the same relationship to nearby constellations, buildings, and the horizon.
This makes a red dot finder particularly useful for:
- The Moon.
- Venus, Jupiter, Saturn, and Mars when visible.
- Bright alignment stars.
- Naked-eye double stars or star groups.
- Moving between large sky regions.
- Roughly pointing before switching to an optical finder.
What Are the Main Red Dot Limitations?
A red dot finder does not magnify the sky or materially increase the number of visible stars. If the target and nearby guide stars are hidden by light pollution, haze, moonlight, trees, or poor eyesight, the dot alone does not reveal them.
Other limitations may include:
- A battery that is flat or installed incorrectly.
- A dot that is too bright and hides the target.
- A dot that is too dim for daylight.
- Dew or fingerprints on the viewing window.
- Limited adjustment range.
- Parallax or apparent dot shift when the eye moves far from the intended position.
- A mounting base that does not fit the telescope.
- Accidental activation during storage.
A red dot finder is therefore simple, but it is not maintenance-free.
Which Finder Is Better for Different Targets?
The finder choice should follow the target and the available reference stars.
| Observing target or task | Better starting choice | Why |
|---|---|---|
| Moon | Red dot finder | Bright, large, and visible directly |
| Bright planets | Red dot finder | Easy to place the dot on a visible target |
| GoTo alignment stars | Red dot finder | Fast centering of bright reference stars |
| Bright open clusters | Either | Red dot for rough aim; finder scope for confirmation |
| Globular clusters | Optical finder often helps | Magnification can reveal the object or surrounding guide stars |
| Galaxies | Optical finder or dual-finder setup | Most are not visible through a red dot window |
| Planetary nebulae | Optical finder plus chart | Small target and precise star field are important |
| Double stars | Red dot for bright pairs; optical finder for fainter pairs | Depends on naked-eye visibility |
| Comets | Optical finder or binocular-style scanning | Broad search and faint appearance may favor optical aid |
| Daytime terrestrial target | Red dot or correct-image finder | Orientation and brightness matter |
| Public outreach | Red dot finder | Easy to explain and quickly repoint |
| Manual star-hopping | RACI finder or dual finders | Chart matching and faint guide stars matter |
Which Finder Is Better Under Light Pollution?
An optical finder scope often has the advantage because it can reveal stars hidden from naked-eye view. A red dot finder may still bring the telescope to the correct general area, but star-hopping can stall when the next guide star is invisible.
A finder scope does not remove skyglow. Faint extended objects may remain difficult, and additional magnification can darken the background differently from the naked-eye view. The observer should choose bright reference stars, shield direct lights, use a low-power main eyepiece, and travel to darker skies when practical.
Which Finder Is Better Under Dark Skies?
Both become more useful. A red dot finder can use many more naked-eye stars for orientation, while an optical finder reveals dense fields suitable for detailed star-hopping.
Under very dark skies, the number of stars in an optical finder can initially become confusing. A correct-image finder, a chart with an appropriate limiting magnitude, and a known field diameter can make pattern matching easier.
Which Type of Optical Finder Scope Should You Choose?
“Optical finder scope” includes several designs with different ergonomics and image orientations.
Straight-Through Finder
A straight-through finder places the observer’s eye behind the finder, generally along the telescope tube.
Advantages:
- Rough aiming is easier because the observer can look in the same direction as the telescope.
- The design can be compact.
- No battery is needed unless the reticle is illuminated.
Limitations:
- The view may be inverted or mirrored depending on the optical path.
- Looking near the zenith can strain the neck.
- A straight-through position may be difficult on a low Dobsonian or short tripod.
Right-Angle Correct-Image Finder
A right-angle correct-image finder, commonly called a RACI finder, presents an upright, left-to-right correct view through a 90-degree eyepiece position. Official 9×50 examples are marketed for more comfortable viewing and easier chart matching. Celestron, “Right Angle Correct Image Finderscope,” official 9×50 specifications and design description
Advantages:
- More comfortable when the telescope points high.
- Correct orientation can match many printed or digital charts.
- Larger models can reveal useful faint guide stars.
- The eyepiece may be rotatable on some designs.
Limitations:
- Initial rough aiming can be difficult because the observer is not looking along the tube.
- A large RACI finder adds weight.
- The mounting bracket may not fit every telescope.
- Non-illuminated crosshairs can become difficult to see against a dark sky.
A RACI finder works especially well when paired with a red dot finder that handles the first rough pointing step.
Right-Angle Finder With Reversed Image
Not every right-angle finder is correct-image. A diagonal or prism may create a mirrored view, so the observer should confirm the actual orientation rather than infer it from the housing shape.
The product description or manual should state whether the image is:
- Inverted.
- Mirror-reversed.
- Upright but reversed.
- Right-angle correct-image.
Illuminated-Reticle Finder
An illuminated reticle makes crosshairs visible against a dark field. Brightness should be reduced until the lines are just visible; excessive illumination can hide faint stars and impair dark adaptation.
An illuminated finder adds a battery, switch, and brightness-control requirement. Check the battery type and turn the illuminator off before storage.
Does Field of View Matter More Than Magnification?
Field of view and magnification work together. The finder must show enough sky for orientation while providing enough scale to recognize the intended star pattern.
A Practical Field-of-View Example
An official 9×50 RACI finder example specifies a five-degree field. Celestron, “Right Angle Correct Image Finderscope,” official 9×50 specifications and design description NASA notes that the full Moon spans approximately half a degree in the sky. NASA Science, “XDF Moon Comparison,” full Moon angular diameter of approximately one-half degree
The comparison is:
5° finder field ÷ 0.5° Moon diameter = about 10 Moon diameters across
This does not mean ten full Moons will fit without gaps under every real optical condition. It is an angular-scale illustration that helps the observer compare a finder chart with the view.
A red dot finder does not have a magnified circular field in the same sense. The observer sees a broad natural-sky view through and around the window, although the window size, housing, head position, and brightness can affect usable visibility.
How Can You Use a Known Finder Field?
If the finder shows a five-degree circle, the observer can use a chart with one-, two-, or five-degree reference rings to estimate star-hop distances.
For example:
- Place the red dot on a bright naked-eye star.
- Look through the optical finder.
- Identify the chart pattern within the known field.
- Move approximately one finder-field width toward the next pattern.
- Center the final location on the crosshair.
- Confirm it in the main telescope with the lowest-power eyepiece.
This method is an observing workflow, not a guarantee that the target itself will be visible in the finder.
How Does Image Orientation Affect Star-Hopping?
Image orientation can determine whether a finder feels logical or confusing.
A red dot finder usually preserves the naked-eye orientation. A RACI finder also presents an upright, left-to-right correct view. These designs are easy to compare with many star charts.
A straight-through optical finder may invert the field. Another design may mirror left and right. Neither orientation is optically “wrong,” but the observer must transform the chart mentally or configure a digital chart to match.
A Simple Orientation Test
During daylight, aim safely at a distant terrestrial object away from the Sun, such as a building edge or sign.
Check:
- Is the object upright?
- Does moving the telescope left make the object move right in the finder?
- Is text readable or mirrored?
- Does the crosshair center correspond to the main telescope?
- Does the digital chart offer the same rotation or mirror setting?
Do not point the telescope or finder near the Sun during this test.
Should You Use a Red Dot Finder and Optical Finder Together?
Using both can be the most efficient choice for observers who frequently locate faint objects manually.
The typical workflow is:
- Use the red dot finder to place the telescope near a visible reference star.
- Use the optical finder to identify fainter guide stars and complete the star hop.
- Use the main telescope’s lowest-power eyepiece to confirm and center the target.
- Increase magnification only after the target is secure.
This combination is particularly useful on:
- Large Dobsonian telescopes.
- Long-focal-length telescopes with narrow low-power fields.
- Telescopes used under suburban light pollution.
- Manual mounts without computerized pointing.
- Public or shared instruments used by observers with different skill levels.
When Is a Dual-Finder Setup Unnecessary?
A second finder may add little value when:
- The telescope has a very wide main field.
- The observer mainly views the Moon and bright planets.
- A computerized pointing system reliably handles target acquisition.
- The telescope is too small to carry additional weight comfortably.
- The mounting surface cannot accept two accessories safely.
- The user already finds targets consistently with one device.
More accessories do not automatically make a telescope easier. Each finder must have a clear role.
How Do You Align a Finder Correctly?
A finder must point at the same location as the main telescope. Alignment should be checked after installation, transport, removal, or accidental impact.
Manufacturer and astronomy-organization guidance commonly recommends starting in daylight on a distant stationary object and using the main telescope’s lowest-power eyepiece. Celestron, “Aligning Your Celestron Finderscope: A Step-by-Step Guide,” updated December 23, 2024 Royal Astronomical Society of Canada, “Observing Tips & Expectations,” finder alignment and red dot finder guidance
Step-by-Step Alignment
- Choose a safe distant target. Use a stationary object well away from the Sun, such as a building corner, antenna, or sign.
- Install the lowest-power eyepiece. A wider main-telescope field makes the target easier to locate.
- Center the target in the main telescope. Lock or stabilize the mount without changing the aim.
- Adjust the finder, not the telescope. Turn the finder’s screws or knobs until its crosshair or dot rests on the same target.
- Check a second distant target. This helps reveal loose mounting or large parallax errors.
- Refine at night. Center a bright star in the main telescope and make a small final adjustment.
- Recheck with higher magnification when needed. Precise alignment is more important when the main telescope has a narrow field.
How Bright Should the Red Dot Be?
Use the lowest brightness that remains easy to see. A bright dot can cover a star and reduce dark adaptation.
Daylight may require a higher setting. At night, reduce the brightness after alignment. Turn the finder off at the end of the session to preserve the battery.
How Tight Should Finder Adjustment Screws Be?
The bracket should hold the finder securely without deforming the tube or forcing the adjustment mechanism beyond its range.
If the screws reach their limits before alignment is achieved, check:
- Whether the finder is seated correctly.
- Whether a spring-loaded pin is engaged.
- Whether the base is installed in the correct orientation.
- Whether the bracket matches the telescope.
- Whether the main dovetail shoe is loose.
- Whether an adapter is required.
Do not force screws or modify the telescope tube without manufacturer approval.
What Solar Safety Rules Apply to Finders?
Never use an ordinary finder to aim a telescope at the Sun.
The American Astronomical Society advises that an auxiliary finder should be capped, removed, or safely filtered just like the main telescope during solar observing. A safe solar filter for the main telescope must be secured over the front aperture; an eyepiece-end filter is unsafe. American Astronomical Society Solar Eclipse Task Force, “Solar Filters for Optics: Telescopes, Binoculars & Cameras,”...
Use only a purpose-built solar finder or a solar-pointing method specifically approved for the equipment. Do not look toward the Sun through a red dot window, optical finder, telescope, binoculars, or camera. Do not improvise with sunglasses, photographic filters, smoked glass, exposed film, or homemade materials.
How Can You Use the SIGHT Decision Framework?
The SIGHT framework is an original way to choose a finder according to the actual target-finding workflow.
S — Sky Visibility
Ask how many useful guide stars are normally visible from the observing site.
- A red dot finder works well when the target or nearby reference star is visible.
- An optical finder becomes more valuable when light pollution hides guide stars.
- A dark site supports both methods but may make optical star fields more crowded.
I — Image Orientation
Choose an orientation that matches the observer’s chart-reading habits.
- Red dot: normally naked-eye orientation.
- RACI finder: upright and correct left-to-right.
- Straight-through optical finder: may be inverted.
- Other right-angle finders: may be mirrored.
Do not assume that “right-angle” means “correct-image.”
G — Geometry and Ergonomics
Consider where the finder sits when the telescope points low, high, and near the zenith.
Check:
- Neck and back position.
- Whether glasses fit behind the finder.
- Whether the observer can use both eyes.
- Whether the finder collides with a camera or eyepiece.
- Whether a child or seated observer can reach it.
- Whether the bracket blocks tube rotation or balance.
H — Hardware and Power
Verify:
- Mounting shoe or base.
- Bracket footprint.
- Adjustment range.
- Finder weight.
- Battery type.
- Brightness control.
- Reticle focus.
- Dew resistance.
- Replacement parts.
A finder advertised as “universal” may still require a different base or adapter.
T — Targeting Method
Decide how the telescope will normally find objects:
- Direct pointing at visible objects.
- Manual star-hopping.
- GoTo alignment.
- Push-to guidance.
- Plate solving.
- Shared public observing.
- Daytime terrestrial use.
The finder should complement this method rather than duplicate equipment that already solves the same task.
What Does the Finder Decision Tree Recommend?
Use this sequence:
Are most targets visible to the naked eye?
- Yes: begin with a red dot finder.
- No: continue.
Do you manually star-hop to galaxies, nebulae, or faint clusters?
- Yes: choose an optical finder or dual-finder setup.
- No: continue.
Is neck comfort near the zenith a major concern?
- Yes: consider a RACI finder.
- No: a straight-through finder may remain practical.
Do you struggle to aim a RACI finder at the first reference star?
- Yes: add a lightweight red dot finder if mounting and balance permit.
- No: the RACI finder may be sufficient alone.
Does the telescope already use reliable GoTo or plate solving?
- Yes: a simple red dot finder may be enough for initial alignment and recovery.
- No: compare the full manual star-hopping workflow.
Is battery-free operation essential?
- Yes: choose a non-illuminated optical finder.
- No: either design remains available.
Is the finder mounting system compatible?
- No: choose the correct base or another model before purchasing.
- Yes: decide by visibility, ergonomics, and target method.
What Do Real-World Scenarios Suggest?
Scenario 1: A Family Observes the Moon and Planets
The telescope is used for short backyard sessions. The main targets are easy to see, and several people may reposition the telescope.
A red dot finder is usually the simpler choice. The observer can explain “place the dot on the target” without teaching inverted fields or detailed star charts.
Scenario 2: A Suburban Observer Wants Galaxies
The user can see only a limited number of stars unaided and plans to star-hop manually.
An optical finder, especially a RACI design, can reveal more guide stars and make chart matching easier. A small red dot finder can still help with the initial jump to the first bright reference star.
Scenario 3: A Dobsonian Points Near the Zenith
The observer finds it uncomfortable to crouch behind a straight-through finder.
A RACI finder may improve posture, but the user may struggle to aim it roughly because the line of sight turns 90 degrees. A dual-finder arrangement can solve both stages.
Scenario 4: A Computerized Telescope Needs Alignment Stars
The mount asks the user to center two or three bright stars before tracking.
A red dot finder is often sufficient because the alignment stars are deliberately bright. Precise final centering should occur in the main eyepiece or camera according to the mount’s instructions.
Scenario 5: A Beginner Uses Printed Star Charts
The observer finds it difficult to translate an upside-down finder view.
A correct-image finder can reduce mental rotation. Before buying, the observer should confirm that the chart scale and limiting magnitude resemble the finder’s actual field.
Scenario 6: An Observer Wants Battery-Free Reliability
The telescope is used in cold conditions or remote locations where replacement coin cells may be inconvenient.
A non-illuminated optical finder avoids battery dependence. The crosshair must still remain visible against the sky, and a red flashlight should not be shone into the finder while observing.
What Common Finder Mistakes Should Beginners Avoid?
Aligning Only at High Magnification
A narrow main-telescope field makes initial alignment unnecessarily difficult. Start with the lowest-power eyepiece and refine later.
Moving the Telescope While Adjusting the Finder
The main telescope must remain centered on the reference target. If it moves, the finder will be aligned to the wrong position.
Turning the Red Dot Too Bright
An oversized bright dot can hide the reference star and reduce dark adaptation. Use the dimmest practical setting.
Assuming a RACI Finder Aims Itself
The correct-image view helps chart matching, but the right-angle geometry can make rough pointing difficult. Start with a visible reference star or pair the finder with a reflex sight.
Ignoring Image Orientation
A finder can be mechanically aligned yet still feel confusing when the observer expects an upright chart view. Test the orientation before the first dark-sky session.
Buying by Aperture Alone
A larger finder may reveal more stars but also adds weight and demands a stronger bracket. Ergonomics, field width, crosshair visibility, and alignment stability matter.
Ignoring the Mounting Base
Finder shoes and dovetail standards are not completely universal. Confirm the base, screw spacing, adapter, and tube clearance before ordering.
Leaving the Red Dot Switched On
A depleted battery can make the finder appear broken at the next session. Turn it off and carry an appropriate spare when practical.
Expecting the Finder to Replace a Low-Power Eyepiece
The finder gets the telescope close. The main telescope’s widest useful field remains important for confirming and centering targets.
Forgetting Solar Finder Safety
A finder must be capped, removed, or safely filtered for approved solar observing. Never leave an ordinary optical finder available for accidental viewing of the Sun.
What Should You Check Before Buying?
Target and Observing Style
- I know whether I mainly observe visible objects or star-hop to faint targets.
- I know whether the finder supports visual observing, GoTo alignment, or both.
- I have considered light pollution and the number of visible guide stars.
- I understand whether a second finder would solve a separate task.
Optical Characteristics
- Magnification and aperture are stated for an optical finder.
- The actual field of view is published or can be estimated reliably.
- Image orientation is clearly described.
- The crosshair or reticle can be focused or seen comfortably.
- The finder has enough eye relief for the intended observer.
- Illumination can be dimmed sufficiently at night.
Ergonomics
- The finder remains reachable from horizon to zenith.
- The viewing angle is comfortable for the telescope and mount height.
- Glasses, seating position, and dominant eye have been considered.
- The finder does not collide with the eyepiece, camera, handle, or tube rings.
- Added weight will not create balance or vibration problems.
Mounting and Support
- The finder base matches the telescope or a suitable adapter exists.
- Screw spacing and tube curvature are compatible.
- The bracket provides enough adjustment range.
- Replacement batteries, caps, brackets, and adjustment parts are available.
- Removing and reinstalling the finder does not cause unacceptable alignment loss.
- The warranty and return policy are acceptable.
Safety
- The finder will never be used to aim at the Sun.
- The finder can be capped, removed, or safely filtered during approved solar observing.
- The bracket and screws hold the finder securely.
- Coin-cell batteries are stored away from children and handled according to the product warning.
- The telescope will not be drilled or modified without manufacturer approval.
How Can You Troubleshoot Common Finder Problems?
| Problem | Likely causes | First checks |
|---|---|---|
| Target is in finder but not main telescope | Finder misalignment, high-power eyepiece, loose bracket | Install the lowest-power eyepiece, recenter the main telescope, and realign the finder |
| Red dot is not visible | Finder off, dead battery, incorrect battery orientation, brightness too low | Check the switch, brightness control, battery type, polarity, and contacts |
| Dot is too large or hides the star | Brightness too high, eye far from intended position, window contamination | Dim the dot, reposition the eye, and clean only as instructed |
| Finder loses alignment after transport | Loose shoe, bracket movement, finder removed and reinstalled | Tighten approved fasteners and realign on a distant target |
| Optical finder shows no sharp stars | Finder focus incorrect, dew, missing cap removal, eye not at focus | Adjust objective or eyepiece focus as documented and check for moisture |
| Crosshair is invisible | Dark reticle, illumination off, brightness too low | Adjust the illuminator or use a brighter reference star |
| Crosshair hides faint stars | Illumination too bright | Reduce reticle brightness until it is barely visible |
| RACI finder is hard to aim initially | Right-angle geometry provides no direct sight line | Use a bright reference star, sight along the tube, or add a red dot finder |
| Star chart does not match finder | Image rotation, inversion, mirror reversal, wrong chart scale | Identify finder orientation and configure or rotate the chart accordingly |
| Adjustment screws reach their limits | Finder incorrectly seated, wrong bracket, spring pin not engaged | Reinstall according to the manual and verify base compatibility |
| Finder window dews over | Humidity, cold glass, no dew protection | Use approved dew control or a shield and keep optical surfaces capped when not in use |
| Few guide stars are visible | Light pollution, haze, moonlight, dot too bright | Dim the finder, shield direct lights, use an optical finder, or choose brighter guide stars |
Stop using the finder if the window, bracket, battery compartment, adjustment mechanism, or mounting shoe is damaged. Do not force adjustment screws or place expensive equipment under an unsecured finder.
Which Finder Should You Choose?
Choose a red dot finder when speed, natural orientation, visible targets, GoTo alignment, or beginner simplicity matters most.
Choose an optical finder scope when manual star-hopping, faint guide stars, chart matching, or precise positioning matters more than immediate pointing simplicity.
Choose a RACI finder when optical assistance and neck comfort are priorities, but remember that right-angle viewing can make the first rough aim less intuitive.
Choose a dual-finder setup when one device can handle naked-eye orientation and the other can handle magnified star patterns without creating unacceptable weight, balance, or mounting problems.
The practical next step is to list the targets normally observed, count the useful naked-eye guide stars at the observing site, identify the telescope’s mounting base, and decide whether the finder must solve rough pointing, detailed star-hopping, or both.
Frequently Asked Questions
Can a red dot finder show stars that I cannot see with my eyes?
Generally, no. A red dot finder provides an unmagnified view and does not gather additional light like an optical finder. Window transmission, brightness, and eyesight may actually make very faint naked-eye stars harder to see.
Is a 9×50 finder better than a 6×30 finder?
Not automatically. A 9×50 finder can provide more light gathering and image scale, while a smaller finder may be lighter, wider, and easier to balance. Compare actual field of view, image orientation, bracket strength, ergonomics, and telescope size.
Why is my finder image upside down?
Many straight-through astronomical finders produce an inverted image because of their optical design. The finder can still work accurately, but the observer must rotate the chart mentally or use chart software configured to match. A RACI finder provides an upright, correct left-to-right view.
Can I use only a RACI finder?
Yes, especially after learning to aim the telescope near a bright reference star. Some users prefer adding a red dot finder because a RACI finder’s 90-degree viewing angle can make the initial rough aim difficult.
Do red dot finders work in daylight?
Many do when the brightness is high enough, but performance depends on the model, battery, target contrast, and ambient light. Reduce the brightness again before nighttime observing.
Should I remove the finder when observing the Sun?
An ordinary auxiliary finder must be capped, removed, or safely filtered according to approved solar-observing instructions. Never look through an unfiltered finder or use it to aim at the Sun. A front-aperture solar filter is required on the main telescope, and a purpose-built solar finder is the safer pointing tool.
Sources
The following sources were accessed on July 30, 2026. Product specifications, availability, manuals, and accessory compatibility can change.
- Royal Astronomical Society of Canada, “Insider’s Guide to the Galaxy — Beginner Telescopes and Accessories,” finder s...
- Celestron, “Finderscopes Explained: Making Astronomy Easier and More Fun,” updated December 23, 2024
- Celestron, “Right Angle Correct Image Finderscope,” official 9×50 specifications and design description
- NASA Science, “What’s Up: April 2025 Skywatching Tips,” example of using binoculars or a finder scope to sweep for Me...
- Celestron, “StarPointer Red-dot Finderscope,” official specifications and operating features
- NASA Science, “XDF Moon Comparison,” full Moon angular diameter of approximately one-half degree
- Celestron, “Aligning Your Celestron Finderscope: A Step-by-Step Guide,” updated December 23, 2024
- American Astronomical Society Solar Eclipse Task Force, “Solar Filters for Optics: Telescopes, Binoculars & Cameras,”...
- Royal Astronomical Society of Canada, “Observing Tips & Expectations,” finder alignment and red dot finder guidance
- Royal Astronomical Society of Canada Calgary Centre, “Choosing and Using a Telescope for Astronomy,” finder-scope and...
Editorial Method
Editorial method: Technical claims were checked against the sources listed above. No hands-on finder testing is claimed.
More from Eyepieces Mounts & Accessories
Telescope Filters Explained: Moon, Planetary, Solar, and Nebula Filters
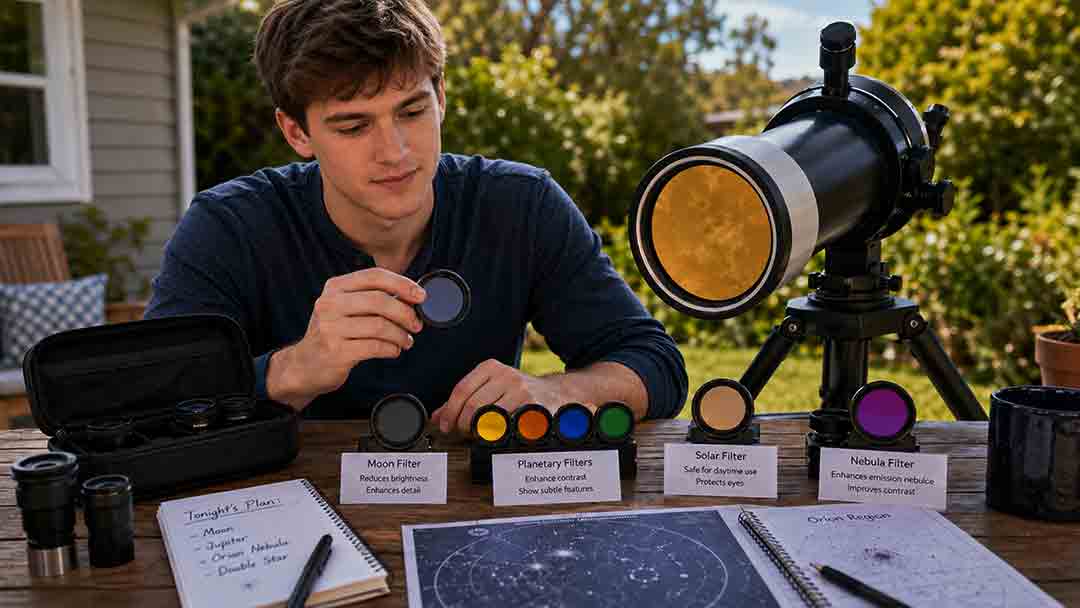
Telescope filters solve different observing problems and should never be treated as interchangeable accessories. This guide explains how neutral-density and variable polarizing filters can improve lunar comfort, how colored planetary filters selectively change contrast, why telescope solar filters require strict front-aperture safety, and how UHC, OIII, H-beta, and broadband filters affect selected deep-sky targets. It also clarifies why nebula filters usually do not improve galaxies, star clusters, or reflection nebulae. Readers receive a target-based comparison framework, an 8-inch Dobsonian example, visual-versus-imaging guidance, 1.25-inch and 2-inch compatibility checks, troubleshooting steps, solar-safety rules, and a detailed buying checklist. The central recommendation is to choose filters by target, transmission behavior, optical system, and intended use rather than by darkness, marketing name, or price
Alt-Azimuth vs Equatorial Mounts: Which Is Easier to Use?
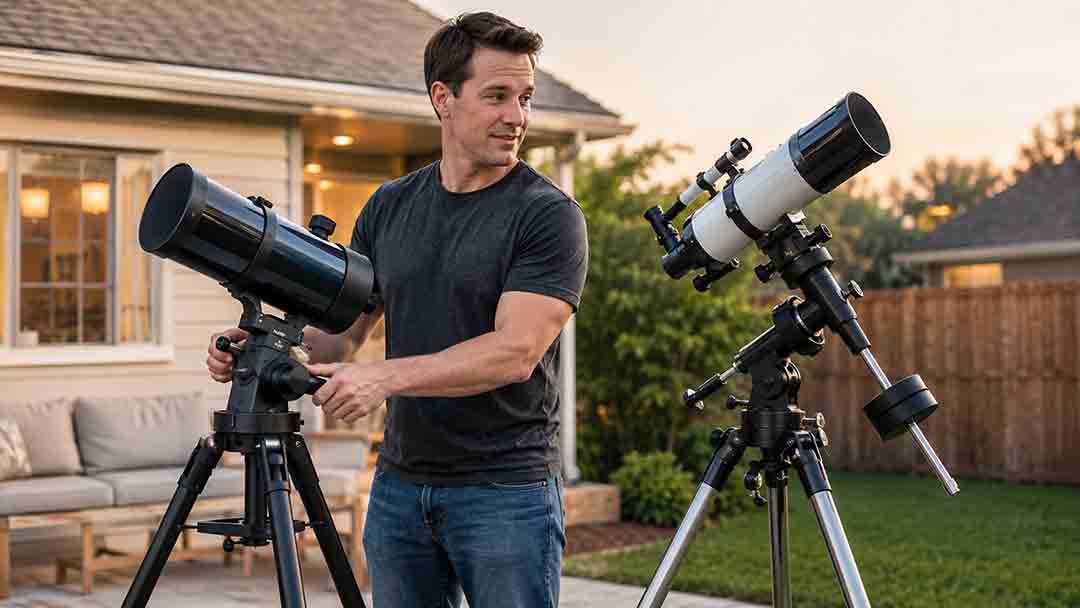
An alt-azimuth mount is usually easier for beginners because it moves naturally up–down and left–right, sets up quickly, and works well for visual or daytime observing. An equatorial mount requires polar alignment, balancing, and more equipment, but it becomes easier for sustained celestial tracking and is generally the practical choice for long-exposure deep-sky astrophotography. This guide explains how both axis systems work, why motorized alt-azimuth tracking still creates field rotation, and when one-axis right ascension tracking becomes useful. It also provides the original TRACK decision framework, a complete payload calculation, setup workflows, real-world user scenarios, a mount-selection decision tree, a buying checklist, common mistakes, and troubleshooting guidance. Readers can compare portability, counterweights, eyepiece position, meridian flips, software requirements, and upgrade plans before choosing a mount
Do You Need a Barlow Lens? Benefits, Limits, and Buying Tips
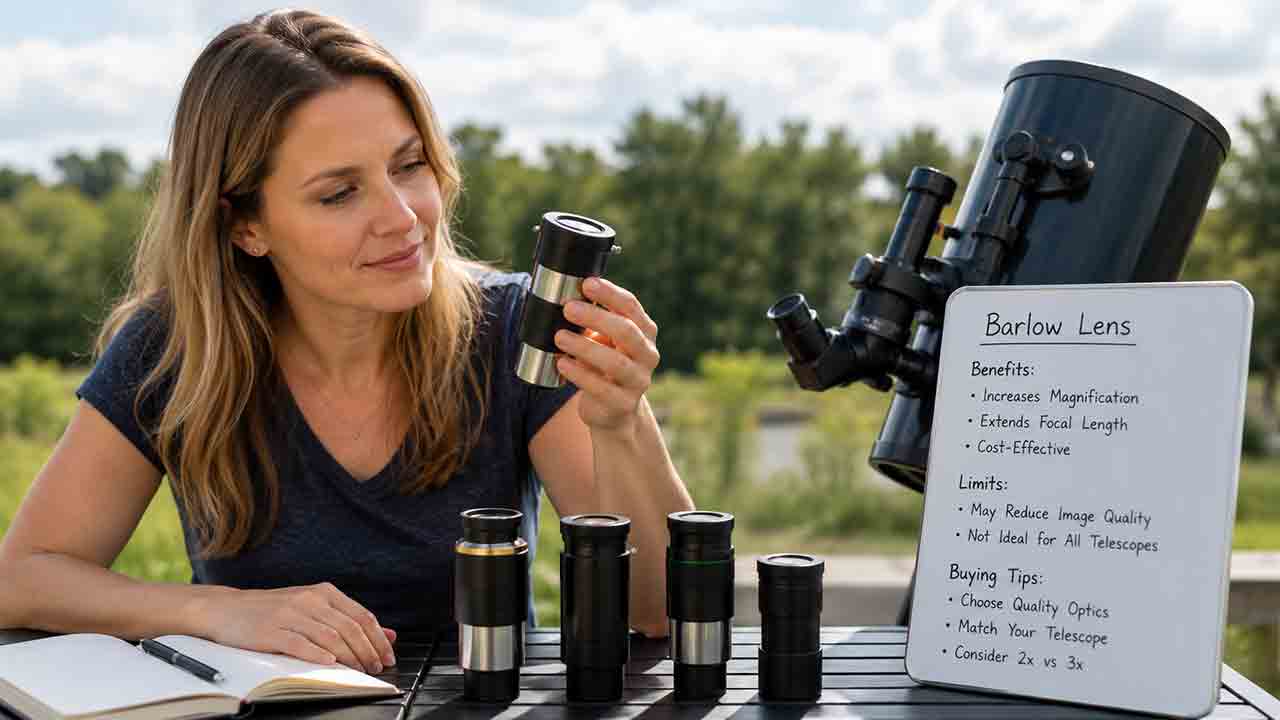
Telescope eyepiece sizes describe two different specifications: focal length in millimeters and barrel diameter in inches. This guide explains both, then shows readers how to calculate magnification, exit pupil, and true field before purchasing an accessory. It compares common focal-length ranges from 3 mm to 40 mm, identifies practical uses for the Moon, planets, star clusters, nebulae, galaxies, double stars, and wide-field scanning, and clarifies when a 1.25-inch or 2-inch eyepiece is appropriate. Readers also receive focal-ratio and magnification tables, a worked 200 mm f/6 Dobsonian example, a three-eyepiece decision framework, fixed-versus-zoom and Barlow guidance, compatibility checks, troubleshooting steps, and a buying checklist. The central recommendation is to build a small set of distinct low-, medium-, and high-power options rather than purchasing overlapping focal lengths."
Explore More Topics
How to Choose Your First Telescope: A Beginner’s Buying Guide
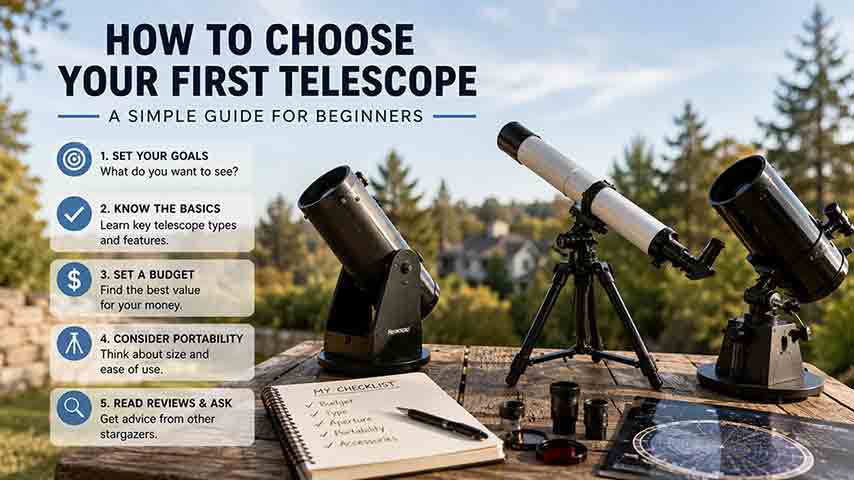
Choosing a first telescope requires more than comparing aperture or advertised magnification. This practical beginner’s guide explains how to match a telescope to observing goals, light pollution, storage space, setup tolerance, and interest in visual observing or imaging. It compares refractors, Dobsonian reflectors, compound telescopes, and smart telescopes, then shows how aperture, focal length, focal ratio, magnification, and mount stability affect real use. Readers can use a quick-selection table, the original SPACE decision framework, a worked specification comparison, realistic household scenarios, new and used equipment checklists, and a troubleshooting chart. The guide also explains why a larger aperture cannot fully overcome bright urban skies, what to verify before buying a software-dependent smart telescope, and how to observe the Sun safely. Recommendations are based on authoritative guidance and published specifications rather than hands-on product testing or paid rankings
How Much Should You Spend on Your First Telescope?
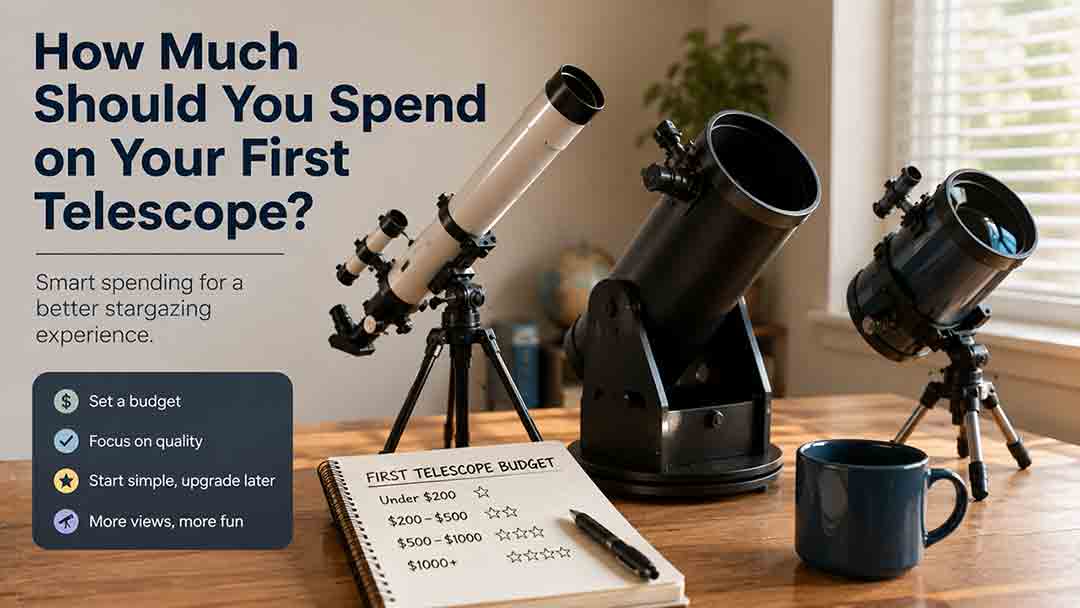
Most beginners should plan a complete first-telescope budget of roughly $350–$700, although the right amount depends on observing goals, portability, automation, and whether the buyer wants direct eyepiece viewing or screen-based imaging. This guide explains what different budget ranges can realistically provide, why very low-cost telescope packages require caution, and when spending more for aperture, GoTo control, smart imaging, or compact optics is justified. It also separates visual astronomy from modular astrophotography, calculates total ownership cost, and shows how accessories, power, storage, shipping, and software can change the real price. The original FIRST Budget Test helps readers evaluate favorite targets, included equipment, real-world portability, desired skills, and total cost. Practical scenarios, a buying checklist, common mistakes, troubleshooting guidance, safety information, and current US market examples help beginners choose a stable, complete setup they are likely to use regularly.
Are Smart Telescopes Worth It for Beginners?
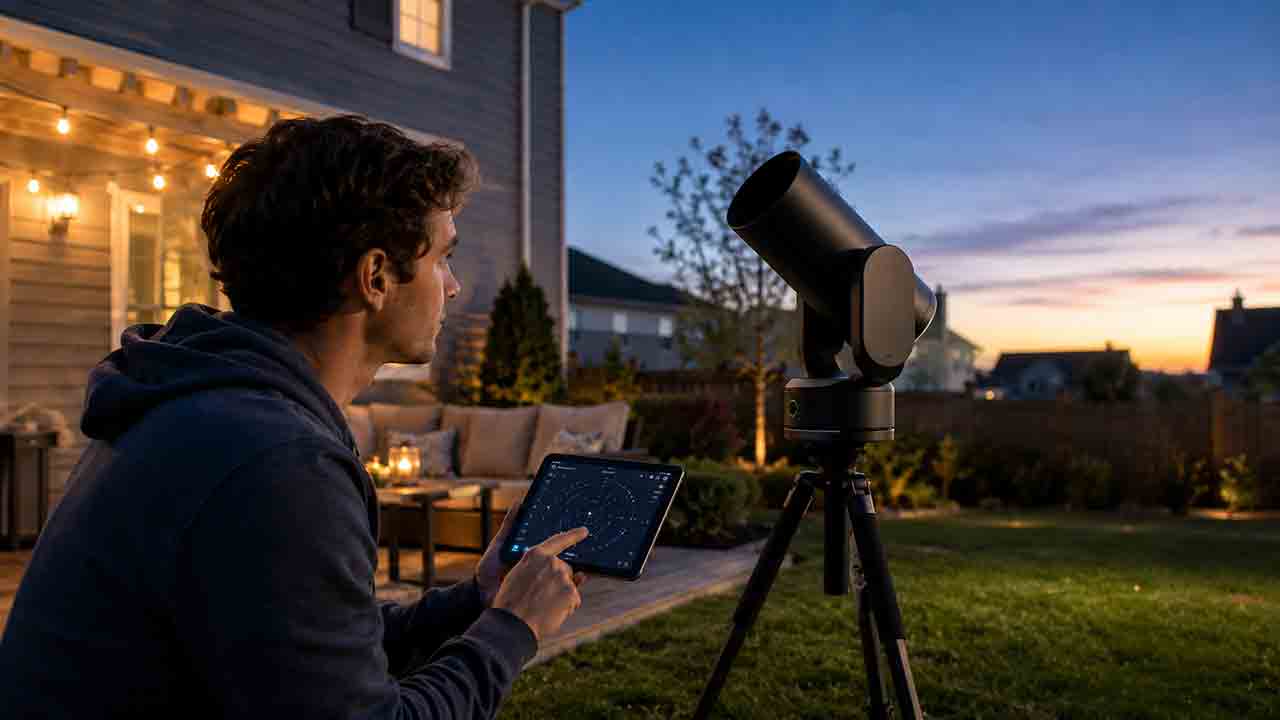
Smart telescopes can be worthwhile for beginners who want automated target finding, live-stacked deep-sky images, and a compact system controlled from a phone or tablet. However, they are not a universal replacement for traditional telescopes. Beginners who value direct eyepiece views, high-magnification planetary observing, manual sky navigation, or component-by-component upgrades may prefer a refractor, reflector, or catadioptric telescope. This guide explains how smart telescopes combine optics, cameras, motorized tracking, and image processing; compares them with traditional and modular imaging setups; and examines costs, software dependence, batteries, light pollution, target suitability, and long-term flexibility. It also provides the original WORTH decision framework, a hypothetical cost-per-session example, real-world beginner scenarios, a purchase checklist, common mistakes, and troubleshooting steps. The goal is to help readers choose based on their actual observing style rather than marketing claims or specifications alone