Telescope Filters Explained: Moon, Planetary, Solar, and Nebula Filters

Telescope Filters Explained: Moon, Planetary, Solar, and Nebula Filters
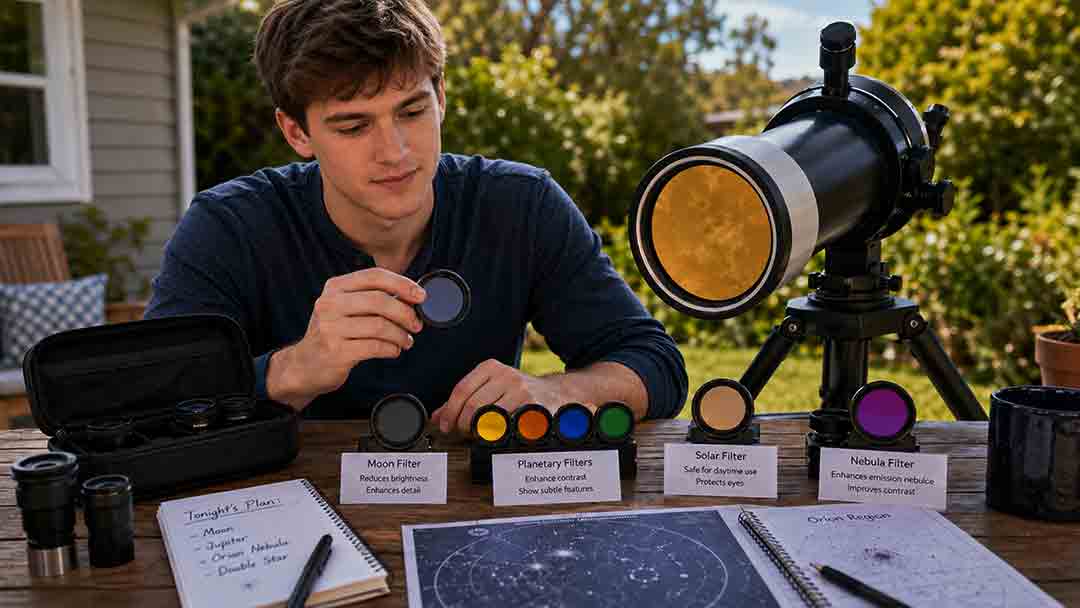
Moon filters reduce glare, planetary color filters selectively change contrast, solar filters make properly equipped daytime observation possible, and nebula filters suppress selected wavelengths to improve the contrast of certain emission nebulae. No single telescope filter works for every target. Choose by object type, telescope aperture, observing conditions, barrel size, and whether the filter is designed for visual use, imaging, or safe solar observation.
Key Takeaways
- A Moon filter is optional; it can make a bright lunar view more comfortable but does not increase telescope resolution.
- Planetary color filters can emphasize selected features, although their effects are often subtle and depend on aperture, target, and observer preference.
- A solar filter must be a special-purpose aperture filter securely mounted over the front of the telescope. Never use an eyepiece solar filter.
- UHC, OIII, and H-beta filters are specialized nebula filters. They do not generally improve galaxies, star clusters, or reflection nebulae.
- Filter size and thread compatibility matter, but optical purpose matters more than buying the largest or darkest filter.
This guide explains what each telescope filter type is best for, what it cannot do, how to choose a useful first filter, and how to avoid unsafe or incompatible purchases.
Editorial note: This guide is based on published guidance from astronomy organizations, solar-safety authorities, independent astronomy resources, and current manufacturer documentation rather than hands-on testing of individual filter models.
Which Telescope Filter Do You Need at a Glance?
| Observing goal | Filter type to consider | Main benefit | Important limitation |
|---|---|---|---|
| Make a bright Moon more comfortable | Neutral-density Moon filter or variable polarizer | Reduces brightness | Optional; does not reveal detail beyond the telescope’s optical capability |
| Increase contrast in selected planetary features | Colored planetary filter | Separates or darkens certain colors | Effect can be subtle and aperture-dependent |
| Observe the Sun through a telescope | Certified special-purpose front-aperture solar filter or a purpose-built solar telescope | Reduces solar energy to a safe observing level when correctly used | Safety-critical; ordinary Moon, planetary, nebula, photographic, or eclipse-viewer material is not a substitute |
| Improve contrast in many emission nebulae | Narrowband/UHC-style visual filter | Passes important nebular emission bands while suppressing much background light | Does not work equally well on every nebula |
| Emphasize planetary nebulae and supernova remnants | OIII visual filter | Strong contrast on many oxygen-emitting targets | Can darken stars and be too aggressive for some targets or small apertures |
| Target a limited group of hydrogen-beta nebulae | H-beta visual filter | Strong specialization for selected H-beta objects | Narrow use; usually not a first filter |
| Reduce broad skyglow | Broadband/light-pollution filter | Mild contrast improvement in some conditions | Modern broadband LED lighting reduces effectiveness |
| Photograph emission nebulae | Imaging narrowband or multiband filter | Isolates selected emission lines for a camera | Imaging filters and visual filters are not automatically interchangeable |
The best first purchase depends on what you actually observe. A lunar observer, planetary observer, solar observer, and deep-sky observer need different products.
How Do Telescope Filters Work?
A telescope filter transmits some wavelengths of light and reduces or blocks others. The result can lower brightness, change color balance, or improve the contrast between a target and the background.
A filter cannot add photons, increase aperture, repair poor optics, or overcome atmospheric turbulence. It changes the light that reaches the eye or camera.
Three concepts are useful when comparing filters:
Transmission
Transmission describes how much light passes through the filter at a given wavelength. A neutral-density filter reduces much of the visible spectrum relatively evenly, while a colored or nebula filter transmits selected regions more strongly.
Bandpass
Bandpass describes the wavelength range a filter allows through. Broad filters pass a large portion of visible light. Narrow filters pass smaller wavelength regions.
A narrower bandpass is not automatically better. It may increase contrast for one target while removing too much useful light from another.
Optical density and attenuation
Moon and solar filters reduce brightness, but they are not interchangeable.
A Moon filter is designed for comfortable nighttime observation of a bright lunar image. A safe solar system must reduce intense visible, ultraviolet, and infrared energy before concentrated sunlight enters the telescope. The safety requirement is fundamentally different.
Are Moon Filters Necessary?
No. A Moon filter is optional, but some observers find it more comfortable when viewing a bright lunar phase at low or moderate magnification.
The Moon will not damage a healthy eye through an ordinary amateur telescope. Its brightness can still feel uncomfortable, temporarily affect dark adaptation, or make a long observing session tiring.
A Moon filter may help when:
- The Moon is near full phase.
- The telescope has a relatively large aperture.
- Low magnification produces a large exit pupil.
- The observer is switching between lunar and deep-sky targets.
- Public-observing visitors find the view too bright.
- The observer prefers a dimmer image for sketching.
A Moon filter is usually less important when:
- The Moon is a thin crescent.
- High magnification already dims the view.
- The telescope has a small aperture.
- The observer is comfortable without it.
- Maximum color neutrality is preferred.
What does a neutral-density Moon filter do?
A neutral-density filter reduces brightness across the visible spectrum as evenly as its design allows.
Its advantages include:
- Simple operation
- Fixed brightness reduction
- Minimal intentional color change
- Lower cost than some variable systems
Its limits include:
- One fixed transmission level
- Possible color cast or scatter in lower-quality products
- No adjustment for lunar phase, aperture, or magnification
Do not assume that a filter labeled “Moon” has the same transmission as another model. Check the manufacturer’s transmission specification.
What does a variable polarizing filter do?
A variable polarizing filter uses two polarizing elements whose relative rotation changes the transmitted brightness.
It can be useful because the observer can adjust the image for:
- Lunar phase
- Telescope aperture
- Magnification
- Personal comfort
- Public outreach
Potential disadvantages include:
- More optical surfaces
- Added thickness
- Possible reflections or unevenness in lower-quality units
- The need to remove or rotate components for adjustment
- Mechanical interference in a short accessory stack
A variable polarizer should not be confused with a solar filter. It is not safe for direct solar observation.
Can a Moon filter reveal more detail?
A Moon filter can make bright features easier or more comfortable to inspect, but it does not increase the telescope’s resolution.
Lunar detail is usually improved more by:
- Observing near the terminator
- Waiting for steady atmospheric seeing
- Using appropriate magnification
- Allowing the telescope to reach outdoor temperature
- Checking collimation where required
- Shielding the observing eye from nearby lights
The Royal Astronomical Society of Canada’s lunar programs emphasize observing conditions, magnification, and systematic recording. A lunar filter is an optional aid rather than a requirement.
Do Planetary Color Filters Really Help?
Planetary color filters can increase contrast between selected features, but the effect is usually target-specific and may be subtle.
The Association of Lunar and Planetary Observers and the British Astronomical Association describe colored filters as tools that can separate differently colored features, reduce scattered light, and emphasize selected atmospheric or surface structures.
A color filter works mainly by darkening colors that it transmits poorly while allowing other colors to remain comparatively brighter.
Common visual planetary filters
| Filter color | Common Wratten example | Often tried on | Possible visual effect | Main limitation |
|---|---|---|---|---|
| Light yellow | #8 or #12 | Moon, Jupiter, Saturn, Mars | Mild contrast enhancement; may reduce blue scatter | Effect may be small |
| Orange | #21 | Mars, Jupiter, Saturn | Can strengthen contrast between reddish and bluish/greenish features | Can dim small telescopes |
| Red | #23A or #25 | Mars, Mercury, Venus daylight work by experienced observers | Can emphasize some Martian surface contrast and reduce shorter-wavelength scatter | Strong filters may be too dark for small apertures |
| Light green | #56 | Moon, Jupiter, Saturn, Mars | Can increase contrast in selected belts, polar regions, or atmospheric features | Produces an unnatural color |
| Blue | #80A | Jupiter, Saturn, Mars, Venus | Often used for cloud and atmospheric contrast | Reduces overall brightness |
| Violet | #47 | Venus and specialized planetary work | Can emphasize limited features under suitable conditions | Very low visual transmission; unsuitable for many small telescopes |
| Neutral density | No color number required | Moon and bright planets | Reduces glare without intentionally selecting a color | Does not isolate a specific feature |
This table is a starting point, not a guarantee. Planet altitude, atmospheric dispersion, telescope design, aperture, observer color sensitivity, and feature visibility all affect the result.
Which planetary filter should a beginner buy first?
Most beginners do not need a full colored-filter set immediately.
A practical sequence is:
- Observe the planet without a filter.
- Record which feature is difficult to see.
- Try a mild filter associated with that feature.
- Compare filtered and unfiltered views repeatedly.
- Keep the filter only if it improves detection rather than merely changing color.
A light yellow or light blue filter is often easier to use than a very dark red or violet filter in a small telescope.
Do planetary filters improve seeing?
A colored filter does not stabilize the atmosphere. By restricting wavelengths and reducing glare, it may make an unstable image appear easier to interpret or reduce the visual effects of atmospheric dispersion and chromatic aberration.
The underlying turbulence remains. Good planetary observation still depends on:
- Target altitude
- Atmospheric seeing
- Telescope cooling
- Collimation
- Focus
- Appropriate magnification
- Patient observation
Are imaging planetary filters the same?
Not necessarily.
Visual colored filters are selected for the human eye. Camera filters may include:
- LRGB sets
- UV-pass filters
- IR-pass filters
- UV/IR-cut filters
- Methane-band filters
- Specialized near-infrared filters
A filter that is useful to a camera can be ineffective or unsafe for visual use. For example, the human eye cannot use ultraviolet details captured by specialized imaging systems.
Only use a filter visually when the manufacturer explicitly identifies it as suitable for visual observation.
What Is the Safest Way to Use a Solar Filter?
Use only a special-purpose solar filter securely mounted over the front aperture of the telescope, binoculars, or camera lens, or use a purpose-built solar telescope exactly as instructed by its manufacturer.
The American Astronomical Society states that a solar filter for magnifying optics must be attached to the front of the instrument. NASA likewise warns that viewing the bright Sun through unfiltered magnifying optics can cause severe eye injury.
Critical solar-safety rules
- Never observe the Sun through an unfiltered telescope, binocular, camera lens, finder scope, or spotting scope.
- Never place eclipse glasses or a handheld solar viewer between your eye and an unfiltered telescope.
- Never use a Moon filter, neutral-density filter, polarizer, photographic ND filter, nebula filter, colored planetary filter, smoked glass, exposed film, or improvised material for solar observation.
- Never use a solar filter that threads into the eyepiece. Concentrated sunlight can overheat and crack an eyepiece-end filter.
- Cover or remove the finder scope unless it has its own correctly fitted front-aperture solar filter.
- Inspect the solar filter before every session. Discard it if torn, punctured, scratched, loose, delaminated, or otherwise damaged.
- Secure the filter so wind, accidental contact, or a child cannot remove it while the telescope is pointed at the Sun.
- Follow the exact instructions supplied by the filter or solar-telescope manufacturer.
- Supervise children continuously.
- When uncertain, do not observe.
Solar safety: A Moon, planetary, nebula, polarizing, photographic, or ordinary light-pollution filter is never a substitute for a telescope solar filter.
Should a telescope solar filter be labeled ISO 12312-2?
ISO 12312-2 is widely associated with direct-view solar viewers such as eclipse glasses. The American Astronomical Society notes that the standard’s current wording does not straightforwardly apply to filters mounted over the apertures of telescopes, binoculars, or camera lenses.
For optical solar filters, do not rely only on an ISO number printed in a marketplace listing. Buy from an established solar-filter or astronomy supplier, confirm that the product is intended for magnifying optics, follow the AAS solar-safety guidance, and use a securely mounted front-aperture design.
What can a white-light solar filter show?
A properly designed white-light solar filter can show the Sun’s bright visible surface, including:
- Sunspots
- Sunspot groups
- Umbrae and penumbrae
- Limb darkening
- Faculae near the solar limb under favorable conditions
- Partial phases of a solar eclipse
The appearance depends on filter material and telescope design. Some filters produce a neutral-white image, while others produce a yellow, orange, or bluish-white image.
Color is not a safety indicator.
Is a hydrogen-alpha solar telescope the same as an H-alpha imaging filter?
No. A dedicated H-alpha solar telescope or properly engineered solar H-alpha system is fundamentally different from an ordinary nighttime H-alpha imaging filter.
A solar H-alpha system controls intense solar energy and uses specialized narrowband components designed for direct observation of the Sun. A nighttime photographic H-alpha filter alone is not a safe solar filter.
Do not assemble a solar H-alpha system from unrelated filters unless using a complete manufacturer-approved configuration with the required energy-rejection and blocking components.
Which Nebula Filter Is Best for Visual Observing?
A narrowband/UHC-style visual filter is often the most versatile first nebula filter, while OIII and H-beta filters are more specialized.
Nebula filters improve contrast by transmitting selected emission wavelengths while suppressing part of the sky background. They do not make the target generate more light.
The best result usually comes from:
- A dark-adapted observer
- Low to moderate magnification
- An exit pupil large enough to preserve image brightness
- The correct filter for the target’s emission
- Shielding from nearby lights
- A target high above the horizon
- Dark skies whenever possible
How do broadband light-pollution filters work?
Broadband filters remove selected portions of the visible spectrum while passing a relatively broad range of starlight and nebular light.
They can provide a mild improvement in some observing environments, but their effect varies greatly.
Broadband filters may help with:
- Mild skyglow
- Some emission nebulae
- Preserving a more natural star field
- Wide-field observation where a narrow filter is too aggressive
They are less effective when:
- The sky is dominated by broadband LED lighting
- The target is a galaxy or star cluster
- The Moon is bright
- Local lights enter the eyepiece
- Atmospheric haze scatters broad-spectrum light
The British Astronomical Association notes that broad-spectrum LED street lighting can reduce the effectiveness of filters originally designed to reject narrower mercury- and sodium-lamp emissions.
A darker location remains more effective than any general light-pollution filter.
What is a UHC or narrowband nebula filter best for?
A visual UHC-style narrowband filter is a strong general-purpose choice for many emission and planetary nebulae.
The term “UHC” is not governed by one universal transmission standard. Two filters carrying the same label can have different passbands.
A good visual narrowband filter commonly transmits important H-beta and OIII emission regions while blocking much of the surrounding background.
Targets that may respond well include:
- Orion Nebula
- Lagoon Nebula
- Swan/Omega Nebula
- Trifid Nebula, with mixed results because it contains both emission and reflection components
- North America Nebula
- Many planetary nebulae
- Portions of the Veil Nebula
Results depend on aperture, magnification, sky darkness, and the exact transmission curve.
What is an OIII filter best for?
An OIII filter strongly emphasizes doubly ionized oxygen emission and is especially useful for many planetary nebulae and supernova remnants.
Common visual targets include:
- Veil Nebula
- Ring Nebula
- Dumbbell Nebula
- Helix Nebula
- Many small planetary nebulae
- Selected regions of larger emission nebulae
An OIII filter often darkens stars more strongly than a broader narrowband filter. This can make star hopping more difficult and can make a rich field look sparse.
Use low power to locate and frame the target before deciding whether greater magnification helps.
What is an H-beta filter best for?
An H-beta filter is a specialist filter for a limited set of hydrogen-beta-dominant nebulae.
Targets commonly associated with H-beta observation include:
- Horsehead Nebula
- California Nebula
- Cocoon Nebula
- Selected hydrogen-rich emission regions
An H-beta filter is usually not the best first nebula filter. It can make the overall field very dark and may require:
- Dark skies
- Large exit pupil
- Careful dark adaptation
- Correct target choice
- Shielding from stray light
- Patient averted vision
Do nebula filters work on galaxies and star clusters?
Usually not.
Galaxies and star clusters emit light across a broad spectrum. A narrowband nebula filter removes much of that light along with the sky background.
For galaxies and clusters, better improvements usually come from:
- Darker skies
- Observing when the target is highest
- Avoiding moonlight
- Using an appropriate exit pupil
- Improving dark adaptation
- Shielding stray light
- Increasing aperture when practical
A nebula filter may isolate emission regions inside a galaxy, but it is not a general galaxy-enhancement filter.
Do nebula filters work on reflection nebulae?
Usually not as well as on emission nebulae.
Reflection nebulae shine mainly by reflecting broadband starlight. A narrow emission-line filter removes much of that light. Dark skies and careful observation are generally more important.
How Should You Match a Filter to the Target?
Use this decision framework.
Step 1: Identify how the target produces light
- Bright reflected sunlight: Moon or planet
- Direct solar energy: Sun
- Ionized gas emission: emission or planetary nebula
- Broadband starlight: galaxy, star cluster, or reflection nebula
Step 2: Define the problem
- Too bright or uncomfortable
- Low contrast in a specific colored feature
- Unsafe solar energy
- Sky background overwhelming an emission nebula
- Local light entering the eyepiece
Step 3: Choose the least aggressive filter that solves the problem
Examples:
- Bright Moon: try higher magnification or ambient light before buying; then consider neutral density or a variable polarizer.
- Jupiter feature: try unfiltered observation first; then a mild blue or yellow filter.
- Orion Nebula: compare unfiltered and narrowband/UHC views.
- Veil Nebula: compare narrowband and OIII.
- Horsehead Nebula: use dark skies and H-beta with realistic expectations.
- Sun: use only a verified front-aperture solar system.
Step 4: Compare filtered and unfiltered views
Filters change the image. A colored or narrowband view may make one feature easier while hiding another.
Alternate between views and record:
- Magnification
- Exit pupil
- Filter
- Sky conditions
- Feature visibility
- Overall brightness
- Comfort
- Whether the filter produced a repeatable improvement
Worked Example: Choosing Filters for an 8-Inch f/6 Dobsonian
Assume the telescope has:
- 200 mm aperture
- 1,200 mm focal length
- f/6 focal ratio
Available eyepieces:
- 30 mm: 40×, 5 mm exit pupil
- 18 mm: 67×, 3 mm exit pupil
- 12 mm: 100×, 2 mm exit pupil
- 8 mm: 150×, 1.3 mm exit pupil
Moon
At 40×, a bright gibbous or full Moon may feel intense. A neutral-density or variable polarizing filter can improve comfort.
At 150×, the smaller exit pupil already reduces brightness, so the observer may prefer no filter.
Jupiter
At 100× or 150×, the observer should first study the unfiltered image. A mild blue or yellow filter may make selected belts or atmospheric features easier to compare.
A dark violet filter may remove too much light for comfortable routine use.
Orion Nebula
At 40× or 67×, a UHC-style narrowband filter can improve contrast in the bright emission regions while preserving a relatively usable field.
An OIII filter may increase contrast in selected structures but can make stars and some portions of the nebula look dimmer.
Veil Nebula
At 40× with a wide field, an OIII filter is often a strong choice. The large exit pupil helps maintain brightness, and the filter suppresses much of the background.
Galaxy
For the Andromeda Galaxy, a nebula filter is unlikely to improve the galaxy as a whole. Dark skies and a wide unfiltered view are better starting points.
This example shows why one filter set cannot be rated from “weakest” to “strongest.” Each filter solves a different problem.
Should You Buy 1.25-Inch or 2-Inch Filters?
Buy the size that fits the location where the filter will be mounted and the eyepieces you actually use.
Common nominal mounted-filter sizes include:
- 1.25-inch filters, often using M28.5×0.6 threads
- 2-inch filters, often using M48×0.75 threads
However, manufacturers have not always used identical thread pitches or tolerances. Confirm actual compatibility rather than assuming every nominally matched product will screw together smoothly.
Advantages of 1.25-inch filters
- Lower cost
- Lower weight
- Suitable for many planetary and high-power eyepieces
- Compact storage
- Practical for small focusers and diagonals
Advantages of 2-inch filters
- Compatible with 2-inch low-power eyepieces
- Can sometimes be mounted on a 2-inch diagonal, adapter, coma corrector, or filter wheel
- May allow both 2-inch and 1.25-inch eyepieces to use one filter when the optical train supports it
- Useful for wide-field nebula observation
Check for lens contact
A filter screwed onto an eyepiece, adapter, coma corrector, Barlow, or diagonal must not contact an internal lens, mirror, or prism.
Check:
- Thread depth
- Filter-cell height
- Insertion depth
- Adapter instructions
- Clearance from optical surfaces
Never force a filter thread. Cross-threading can damage both parts.
Are Visual and Imaging Filters Interchangeable?
Sometimes physically, but not necessarily optically or safely.
Imaging filters may be optimized for:
- Camera sensor response
- Fast focal ratios
- Narrow emission lines
- UV/IR blocking
- Color-camera band separation
- A specific incidence angle
- Photometric standards
Visual filters are optimized for the human eye and often prioritize field brightness, contrast, and comfortable transmission.
Important distinctions include:
- A nighttime H-alpha imaging filter is not a solar filter.
- A UV-pass planetary imaging filter is not intended for visual observation.
- A dual-band imaging filter may produce an unnatural or excessively dark visual view.
- A visual nebula filter may create halos or color balance issues in imaging.
- Narrowband interference filters can shift bandpass in very fast optical systems.
Use each filter only for applications identified by the manufacturer.
What Should You Check Before Buying a Telescope Filter?
Transmission curve
A name such as UHC, light pollution, Moon, or OIII does not fully define performance.
Look for a published transmission curve or at least clear information about:
- Passed wavelengths
- Blocked wavelengths
- Peak transmission
- Bandwidth
- Out-of-band blocking
- Intended visual or imaging use
Optical quality
Check for:
- Optically polished substrate
- Uniform coatings
- Controlled reflections
- Secure mounting
- Blackened cell interior
- Clean edges
- Resistance to moisture
- Warranty and support
Aperture and target suitability
A very dark filter can be difficult in a small telescope. The result depends on exit pupil and target brightness as much as aperture alone.
Thread and mounting location
Confirm whether the filter fits:
- Eyepiece
- Diagonal
- Adapter
- Filter wheel
- Coma corrector
- Camera nosepiece
- Telescope aperture, for solar filters only
Safety documentation
For solar filters, look for:
- Explicit use with magnifying optics
- Front-aperture mounting instructions
- Secure attachment method
- Inspection and replacement instructions
- Established manufacturer or supplier
- Clear warnings against eyepiece-end use
Common Telescope Filter Buying Mistakes
| Mistake | Why it causes problems | Better approach |
|---|---|---|
| Buying one “universal” filter | Different targets emit different light | Choose by target type |
| Using a Moon filter for the Sun | It cannot safely reject concentrated solar energy | Use a verified front-aperture solar system |
| Assuming darker means better | Excess attenuation can hide the target | Use the least aggressive useful filter |
| Buying a full color set immediately | Many filters may never be used | Test one or two mild colors first |
| Expecting a nebula filter to improve galaxies | Galaxies emit broadband light | Seek darker skies and optimize exit pupil |
| Treating every UHC filter as identical | The label does not define one transmission curve | Compare published bandpasses |
| Ignoring modern LED lighting | Broadband skyglow is harder to reject selectively | Keep expectations realistic |
| Using an imaging filter visually without approval | Sensor-optimized filters may be unsuitable for eyes | Follow manufacturer-use guidance |
| Ignoring thread compatibility | Nominal sizes can still bind or mismatch | Verify thread and mounting instructions |
| Stacking many filters | Can cause reflections, dimming, tilt, and contact problems | Stack only when the combination has a defined purpose |
| Cleaning filters aggressively | Coatings can be scratched or damaged | Follow manufacturer cleaning instructions |
| Buying from an unknown solar-filter listing | Safety claims may be unverifiable | Use established solar-safety sources and suppliers |
How Do You Use and Maintain Telescope Filters?
Installing a nighttime eyepiece filter
- Remove the eyepiece from the telescope.
- Hold the filter by its metal cell.
- Align the threads carefully.
- Turn gently until secure; do not overtighten.
- Check that the filter cannot contact another optical surface.
- Insert the eyepiece and refocus.
- Compare the filtered view with the unfiltered view.
Do not attempt to screw a filter onto an eyepiece while it is positioned above an open telescope tube where it could be dropped onto the primary mirror.
Installing a front-aperture solar filter
- Inspect the filter material and cell in bright indirect light.
- Confirm that it is the correct size for the instrument.
- Remove or securely cover the finder scope.
- Attach the filter over the front aperture according to the manufacturer’s instructions.
- Test that it cannot be removed by a light pull, wind, or normal telescope movement.
- Point the telescope toward the Sun using a safe alignment method.
- Supervise the instrument continuously.
- Remove the telescope from the Sun before removing the filter.
When any step is uncertain, stop.
Cleaning filters
Dust often has little visual effect. Avoid unnecessary cleaning.
When cleaning is needed:
- Follow the manufacturer’s instructions.
- Blow away loose particles with an appropriate air blower.
- Use only approved optical-cleaning materials.
- Avoid household glass cleaner.
- Do not rub dry dust across a coated surface.
- Do not disassemble a solar-filter cell.
- Replace a damaged solar filter rather than attempting a repair.
Troubleshooting Telescope Filter Problems
Why does a nebula filter make everything too dark?
Possible reasons include:
- The target is not an emission nebula.
- The filter is too narrow for the target.
- Magnification is too high.
- Exit pupil is too small.
- The telescope aperture is modest.
- The observer is not dark adapted.
- The Moon or local lighting is bright.
- The wrong side of a complex optical stack is being used.
Try a longer-focal-length eyepiece, a broader filter, a darker location, or an unfiltered view.
Why does the filter not improve a galaxy?
The filter is probably working as designed. A galaxy emits broadband light, so the filter removes galaxy light along with background light.
Use no filter and improve sky darkness, target altitude, dark adaptation, and stray-light control.
Why does a planetary filter produce no obvious improvement?
Possible causes include:
- The feature is not currently visible.
- Atmospheric seeing is poor.
- The filter is too dark.
- Magnification is inappropriate.
- The planet is low.
- The observer has not compared views long enough.
- The effect is genuinely too subtle for that setup.
Planetary color filters are optional tools, not guaranteed upgrades.
Why are there reflections or halos?
Check:
- Filter cleanliness
- Bright nearby lights
- Coating quality
- Filter stacking
- Placement before or after a reducer or corrector
- Tilt
- Dew
- Camera-sensor reflections
Test one filter at a time.
Why will the filter not screw into the eyepiece?
Stop before damaging the threads.
Possible causes include:
- Different thread pitch
- Cross-threading
- Damaged threads
- Paint or debris
- A retaining ring mistaken for a filter thread
- A proprietary accessory standard
Confirm compatibility with both manufacturers.
Why does an OIII or H-beta filter work better at low power?
Low power generally produces a larger exit pupil, preserving more apparent image brightness. The filter darkens the field, so a larger exit pupil can make the target easier to inspect.
Higher magnification may still help compact planetary nebulae, but the best balance must be tested.
Telescope Filter Buying Checklist
Before purchasing, confirm:
- Primary target type
- Visual or imaging use
- Telescope aperture
- Telescope focal ratio
- Typical eyepiece and exit pupil
- Filter category: Moon, planetary, solar, broadband, UHC, OIII, or H-beta
- Published transmission information
- 1.25-inch, 2-inch, camera, or aperture mounting
- Exact thread compatibility
- Clearance from lenses, mirrors, and prisms
- Weight and accessory-stack impact
- Whether the filter is suitable for the telescope’s focal ratio
- Whether it duplicates a filter already owned
- Manufacturer warranty
- Return policy
- Cleaning instructions
- For solar filters: front-aperture design, secure retention, inspection instructions, and an established safety source
- For visual use: explicit confirmation that the filter is intended for viewing through an eyepiece
How We Developed These Recommendations
This guide separates filters by the physical problem they solve:
- Brightness control: neutral-density and polarizing filters for lunar comfort.
- Color contrast: visual planetary filters that selectively transmit wavelengths.
- Energy rejection and safety: specialized front-aperture solar filters and purpose-built solar telescopes.
- Emission-line contrast: broadband, UHC-style, OIII, and H-beta filters for selected deep-sky targets.
- System compatibility: barrel size, thread fit, exit pupil, focal ratio, optical clearance, and visual-versus-imaging use.
Recommendations are practical selection guidance rather than performance guarantees. No individual filter model was hands-on tested for this article. Transmission curves, optical quality, thread specifications, and safety instructions should be confirmed using current manufacturer documentation before purchase.
Which Telescope Filter Should You Buy First?
Choose based on your main observing goal:
- Buy a Moon filter or variable polarizer only if lunar brightness is uncomfortable.
- Try a mild planetary color filter only after learning the unfiltered planetary view.
- Buy a verified front-aperture solar filter only when you intend to observe the Sun and are prepared to follow every safety instruction.
- Choose a visual narrowband/UHC-style filter as a versatile first nebula filter for many emission nebulae.
- Add an OIII filter when planetary nebulae and supernova remnants are priorities.
- Add an H-beta filter when specific H-beta targets justify a specialized purchase.
- Skip a nebula filter when your main targets are galaxies, star clusters, or reflection nebulae.
A telescope filter is useful when it solves a defined optical or safety problem. Buying by target and transmission curve is more reliable than buying by marketing name, darkness, or price alone.
Frequently Asked Questions
Is a Moon filter necessary for a telescope?
No. A Moon filter is optional. It can reduce brightness and improve viewing comfort, especially near full Moon or at low power, but higher magnification, ambient lighting, and observer preference may make a filter unnecessary.
Can you use a Moon filter to look at the Sun?
No. A Moon filter cannot safely reduce the concentrated energy from the Sun. Solar observation requires a special-purpose filter securely mounted over the front aperture or a purpose-built solar telescope.
Is UHC or OIII better for the Orion Nebula?
A UHC-style narrowband filter is often the more balanced first choice because it preserves multiple important nebular emission bands and a brighter overall field. An OIII filter can emphasize selected structures but may darken stars and some regions more strongly. Compare both at low to moderate power.
Do nebula filters work in small telescopes?
Yes, when the target, filter, magnification, and sky conditions are suitable. Small telescopes often benefit from low power and a large exit pupil. Very narrow filters can make the view too dark for some target-and-aperture combinations.
Which color filter is best for Jupiter?
There is no universal best filter. Light blue filters are often tried for cloud belts and selected atmospheric features, while yellow or green filters may emphasize different details. Start unfiltered, use a mild filter, and compare repeatably.
Can telescope filters be stacked?
Some nighttime filters can be stacked, but stacking increases light loss, reflections, thickness, and mechanical risk. Only stack filters for a defined purpose and verify optical clearance. Never construct a solar filter by stacking ordinary nighttime filters.
Sources
Sources were accessed July 30, 2026.
- American Astronomical Society — Solar Filters for Optics: Telescopes, Binoculars, and Cameras
- American Astronomical Society — How to View a Solar Eclipse Safely
- American Astronomical Society — Suppliers of Safe Solar Viewers and Filters
- American Astronomical Society — About the ISO 12312-2 Standard for Solar Viewers
- NASA Science — Eclipse Viewing Safety
- Royal Astronomical Society of Canada — Explore the Moon
- Royal Astronomical Society of Canada — The Moon at Noon
- Association of Lunar and Planetary Observers — Observing the Planets With Color Filters
- British Astronomical Association — Filters for Visual Observing of the Moon and Planets
- British Astronomical Association — Using Filters for Visual Planetary Observations
- British Astronomical Association — Filters for Visual Observations of Deep-Sky Objects
- British Astronomical Association — A Brief Primer on Filters
- Astronomik — Filters in Threaded Cells
- Astronomik — UHC Visual Filter
- Astronomik — OIII Visual Filter
- British Astronomical Association — A Brief Primer on Filters
More from Eyepieces Mounts & Accessories
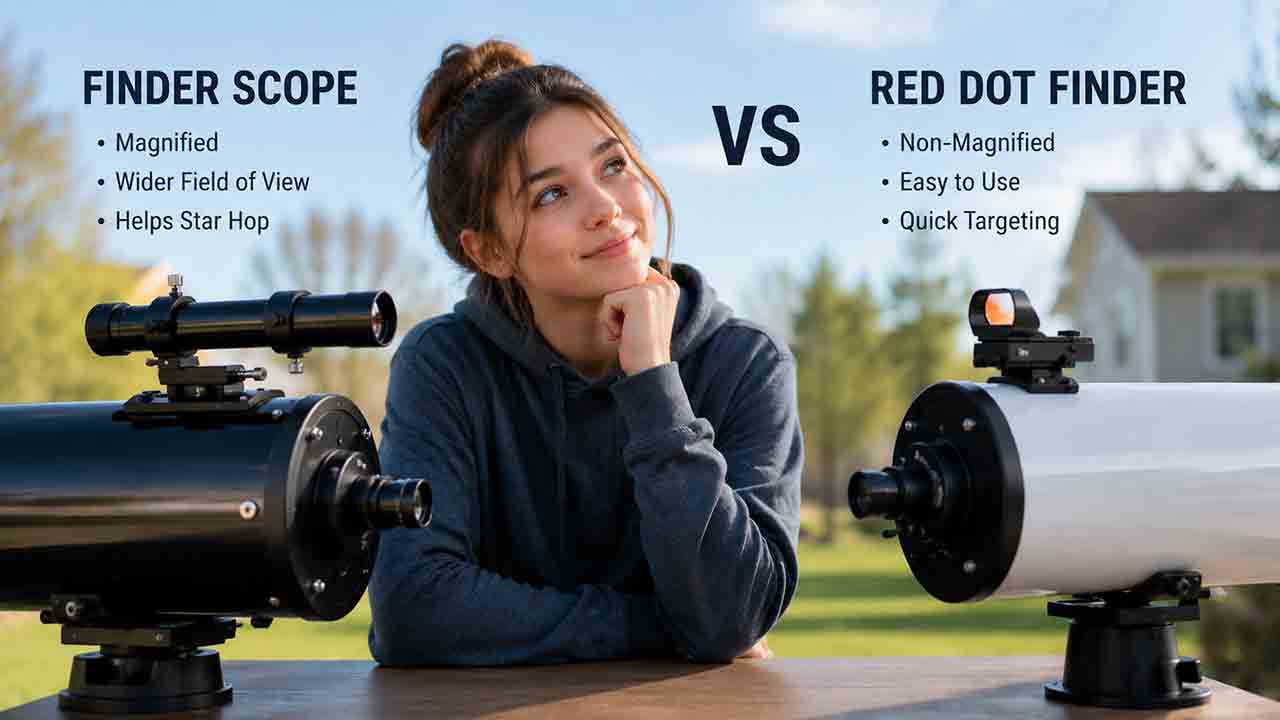
Finder Scope vs Red Dot Finder: Which One Should You Choose?
A red dot finder is usually the easier choice for quickly pointing a telescope at the Moon, planets, bright stars, or computerized-mount alignment targets. An optical finder scope is more useful when the observer needs magnification, additional light gathering, and detailed star patterns to locate faint clusters, nebulae, or galaxies. This guide compares unmagnified red dot sights with straight-through, right-angle, correct-image, and illuminated optical finders. It explains field of view, image orientation, light-pollution performance, batteries, ergonomics, mounting compatibility, alignment, and solar safety. The original SIGHT decision framework helps readers evaluate sky visibility, image orientation, geometry, hardware, and targeting method. A field-of-view calculation, dual-finder workflow, real-world scenarios, decision tree, buying checklist, common mistakes, and troubleshooting table help beginners choose a finder that matches their telescope and observing style
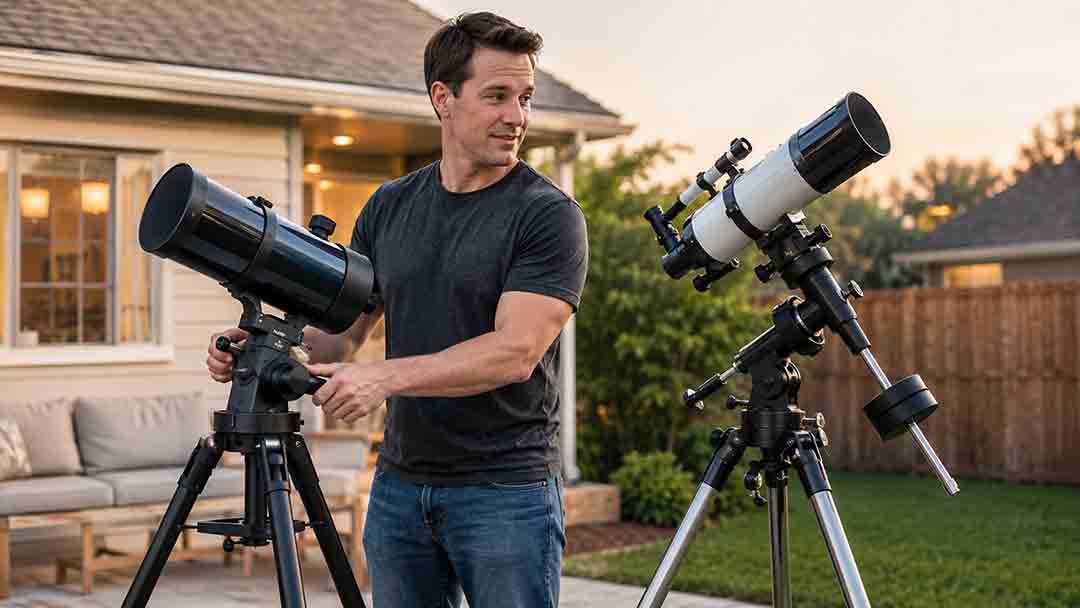
Alt-Azimuth vs Equatorial Mounts: Which Is Easier to Use?
An alt-azimuth mount is usually easier for beginners because it moves naturally up–down and left–right, sets up quickly, and works well for visual or daytime observing. An equatorial mount requires polar alignment, balancing, and more equipment, but it becomes easier for sustained celestial tracking and is generally the practical choice for long-exposure deep-sky astrophotography. This guide explains how both axis systems work, why motorized alt-azimuth tracking still creates field rotation, and when one-axis right ascension tracking becomes useful. It also provides the original TRACK decision framework, a complete payload calculation, setup workflows, real-world user scenarios, a mount-selection decision tree, a buying checklist, common mistakes, and troubleshooting guidance. Readers can compare portability, counterweights, eyepiece position, meridian flips, software requirements, and upgrade plans before choosing a mount
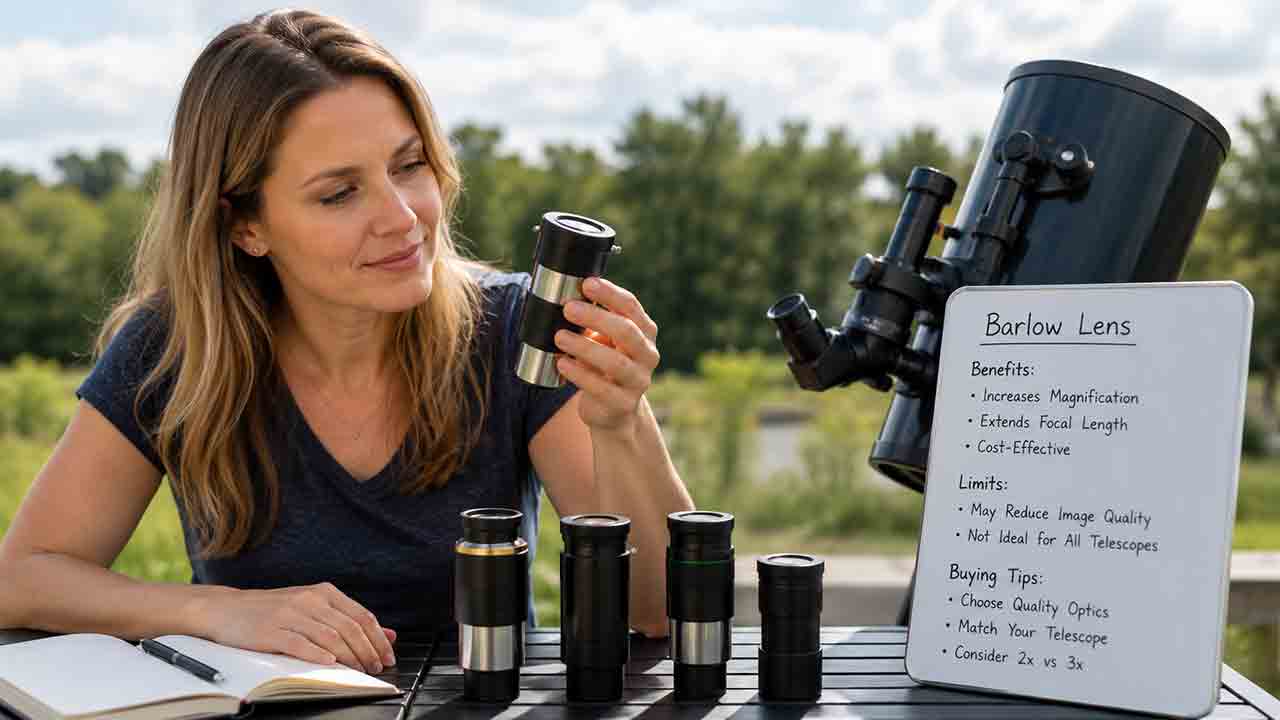
Do You Need a Barlow Lens? Benefits, Limits, and Buying Tips
Telescope eyepiece sizes describe two different specifications: focal length in millimeters and barrel diameter in inches. This guide explains both, then shows readers how to calculate magnification, exit pupil, and true field before purchasing an accessory. It compares common focal-length ranges from 3 mm to 40 mm, identifies practical uses for the Moon, planets, star clusters, nebulae, galaxies, double stars, and wide-field scanning, and clarifies when a 1.25-inch or 2-inch eyepiece is appropriate. Readers also receive focal-ratio and magnification tables, a worked 200 mm f/6 Dobsonian example, a three-eyepiece decision framework, fixed-versus-zoom and Barlow guidance, compatibility checks, troubleshooting steps, and a buying checklist. The central recommendation is to build a small set of distinct low-, medium-, and high-power options rather than purchasing overlapping focal lengths."
Explore More Topics
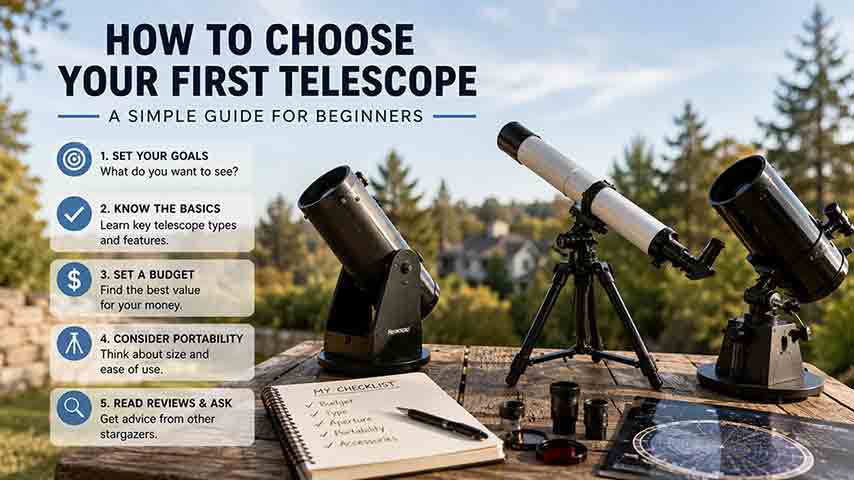
How to Choose Your First Telescope: A Beginner’s Buying Guide
Choosing a first telescope requires more than comparing aperture or advertised magnification. This practical beginner’s guide explains how to match a telescope to observing goals, light pollution, storage space, setup tolerance, and interest in visual observing or imaging. It compares refractors, Dobsonian reflectors, compound telescopes, and smart telescopes, then shows how aperture, focal length, focal ratio, magnification, and mount stability affect real use. Readers can use a quick-selection table, the original SPACE decision framework, a worked specification comparison, realistic household scenarios, new and used equipment checklists, and a troubleshooting chart. The guide also explains why a larger aperture cannot fully overcome bright urban skies, what to verify before buying a software-dependent smart telescope, and how to observe the Sun safely. Recommendations are based on authoritative guidance and published specifications rather than hands-on product testing or paid rankings
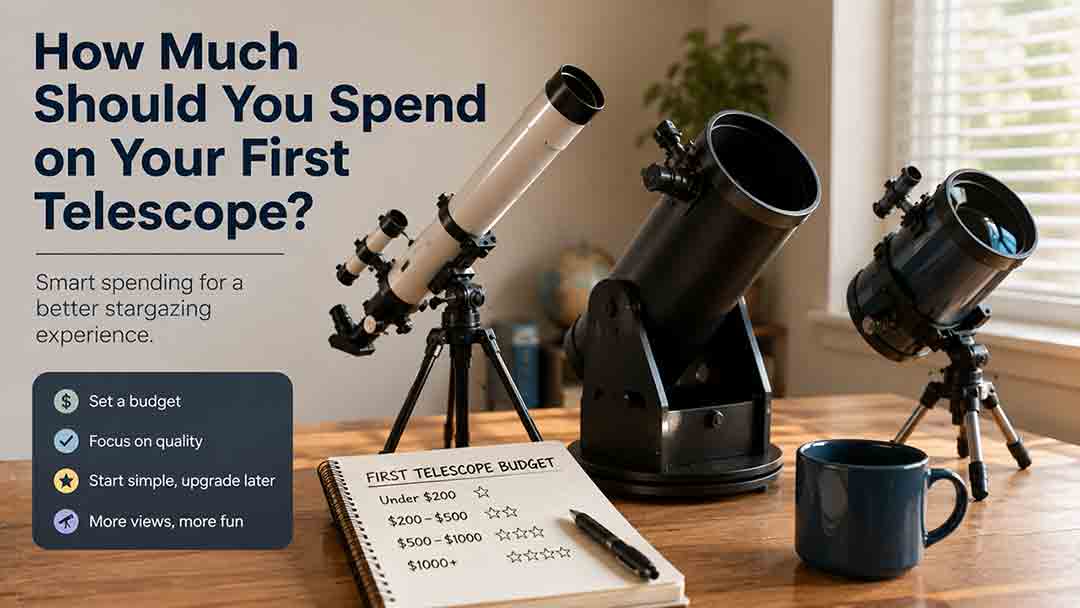
How Much Should You Spend on Your First Telescope?
Most beginners should plan a complete first-telescope budget of roughly $350–$700, although the right amount depends on observing goals, portability, automation, and whether the buyer wants direct eyepiece viewing or screen-based imaging. This guide explains what different budget ranges can realistically provide, why very low-cost telescope packages require caution, and when spending more for aperture, GoTo control, smart imaging, or compact optics is justified. It also separates visual astronomy from modular astrophotography, calculates total ownership cost, and shows how accessories, power, storage, shipping, and software can change the real price. The original FIRST Budget Test helps readers evaluate favorite targets, included equipment, real-world portability, desired skills, and total cost. Practical scenarios, a buying checklist, common mistakes, troubleshooting guidance, safety information, and current US market examples help beginners choose a stable, complete setup they are likely to use regularly.
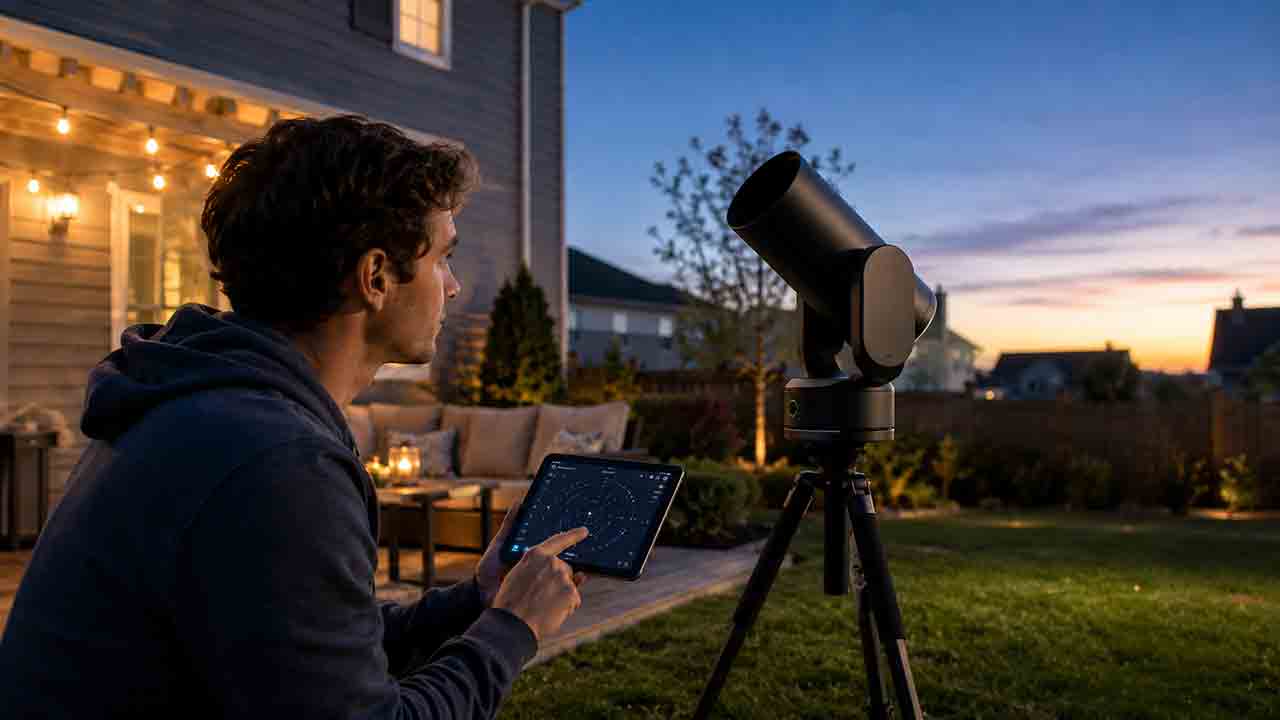
Are Smart Telescopes Worth It for Beginners?
Smart telescopes can be worthwhile for beginners who want automated target finding, live-stacked deep-sky images, and a compact system controlled from a phone or tablet. However, they are not a universal replacement for traditional telescopes. Beginners who value direct eyepiece views, high-magnification planetary observing, manual sky navigation, or component-by-component upgrades may prefer a refractor, reflector, or catadioptric telescope. This guide explains how smart telescopes combine optics, cameras, motorized tracking, and image processing; compares them with traditional and modular imaging setups; and examines costs, software dependence, batteries, light pollution, target suitability, and long-term flexibility. It also provides the original WORTH decision framework, a hypothetical cost-per-session example, real-world beginner scenarios, a purchase checklist, common mistakes, and troubleshooting steps. The goal is to help readers choose based on their actual observing style rather than marketing claims or specifications alone