Alt-Azimuth vs Equatorial Mounts: Which Is Easier to Use?

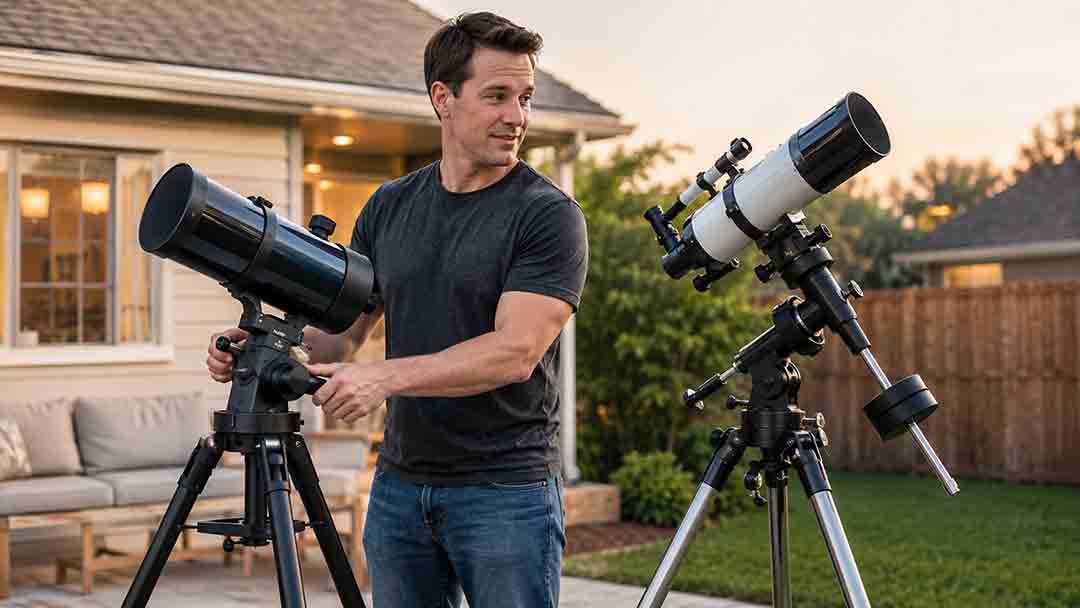
Alt-Azimuth vs Equatorial Mounts: Which Is Easier to Use?
For most beginners, an alt-azimuth mount is easier to use because it moves in the same intuitive directions people naturally point: left–right and up–down. An equatorial mount takes longer to learn and must be polar-aligned, but it becomes easier for sustained astronomical tracking because a properly aligned mount can follow the sky mainly through its right ascension axis.
Key Takeaways
- Choose an alt-azimuth mount for fast setup, visual observing, daytime use, portability, and intuitive pointing.
- Choose an equatorial mount when accurate celestial tracking or long-exposure astrophotography is the main goal.
- A motorized alt-azimuth mount can track objects, but the camera field normally rotates during longer imaging sequences unless the system uses a wedge, equatorial mode, or field derotator.
- Mount stability, payload, balance, ergonomics, and setup weight often matter more than the axis labels alone.
- Beginners should compare the complete observing workflow, not assume that automation automatically makes either mount simple.
This guide explains how both mount types move, which one is easier for different observing goals, how polar alignment changes the experience, and what hidden tradeoffs buyers often miss. It also includes the original TRACK decision framework, setup workflows, a load calculation, real-world scenarios, a decision tree, a buying checklist, and a troubleshooting table.
Method note: This guide is based on authoritative astronomy resources, university material, official manufacturer documentation, and practical selection criteria rather than hands-on product testing. Features vary by model, so always follow the instructions and payload limits for the exact mount being used.
How Do Alt-Azimuth and Equatorial Mounts Differ?
An alt-azimuth mount, often shortened to alt-az, moves around two axes: altitude for up–down motion and azimuth for left–right motion. NASA uses the same basic definition for an altitude-azimuth telescope mount. NASA Science, Exoplanet Watch Glossary, definition of an alt-azimuth mount
An equatorial mount has one axis aligned parallel to Earth’s rotational axis. Its two principal movements are right ascension, or RA, and declination, or Dec. Once the RA axis is aligned with the appropriate celestial pole, the mount can follow the apparent motion of the sky mainly by rotating that axis. NASA Science, Basics of Space Flight, “Chapter 2: Reference Systems,” explanation of equatorial and altitude-azimuth... Celestron, “Should I Use an Alt-Az or Equatorial Mount?” official knowledgebase
The optical tube does not determine the mount type. A refractor, reflector, or catadioptric telescope may be sold on either an alt-azimuth or equatorial mount if the mounting hardware, balance, and payload are compatible.
Quick Comparison
| Decision factor | Alt-azimuth mount | Equatorial mount |
|---|---|---|
| Basic motion | Up–down and left–right | Right ascension and declination |
| First-night learning curve | Usually lower | Usually higher |
| Typical setup | Level or stabilize, attach telescope, point | Assemble, balance, set latitude, polar-align, then point |
| Manual visual observing | Intuitive and convenient | Effective after the user understands the axes |
| Daytime or terrestrial use | Usually easier | Often awkward because the axes are tilted |
| High-power tracking | Requires corrections on two axes unless motorized | Mainly one-axis correction after adequate polar alignment |
| Long-exposure deep-sky imaging | Limited by field rotation unless special hardware or software is used | The standard practical approach when accurately polar-aligned and motorized |
| Counterweights | Not required on every design | Common on German equatorial mounts |
| Packed weight | Often lower for comparable light-duty systems | Often higher because of head, counterweights, and tripod |
| Tube and eyepiece position | Usually predictable | Can become awkward as the mount changes orientation |
| Near-zenith behavior | Manual movement can become awkward directly overhead | Movement is possible, but tube, tripod, and counterweight clearance must be checked |
| Beginner recommendation | Best default for simple visual use | Best when tracking or imaging requirements justify the extra setup |
The table describes common patterns, not universal rules. A poorly designed alt-azimuth mount may be harder to use than a well-engineered equatorial mount, and computerized systems can add alignment, software, and power requirements to either design.
Which Mount Is Easier for a Complete Beginner?
An alt-azimuth mount is usually easier during the first few sessions. The user can loosen or move the axes, point the telescope toward a visible target, and make corrections in directions that match the view of the surrounding landscape.
An equatorial mount may initially feel less intuitive because its axes are tilted relative to the horizon. Moving one control does not necessarily make the telescope travel horizontally or vertically from the observer’s perspective.
The answer changes after setup. Once an equatorial mount is adequately polar-aligned and a target is centered, the observer can usually follow the object by adjusting only the RA axis. That is often easier than repeatedly correcting both altitude and azimuth at high magnification.
Ease Depends on Which Part of the Session Matters
| Part of the session | Usually easier with | Why |
|---|---|---|
| Carrying equipment outside | Alt-azimuth | Often fewer heavy parts and no counterweights |
| Pointing at the Moon or a landscape object | Alt-azimuth | Movement matches up–down and left–right |
| Following a planet at high power | Equatorial after alignment | Mainly one-axis tracking |
| Sharing short visual sessions | Alt-azimuth | Faster explanation and repositioning |
| Long-exposure deep-sky imaging | Equatorial | Polar alignment prevents normal alt-az field rotation |
| Learning celestial coordinates | Equatorial | RA and Dec axes correspond to the equatorial coordinate system |
| Observing without electricity | Either manual design | Simplicity depends on the specific mount, not only the axis type |
A beginner should therefore ask, “Which workflow do I want to make easier?” rather than treating ease of use as one universal quality.
How Does an Alt-Azimuth Mount Work?
An alt-azimuth mount changes the telescope’s altitude, its angle above the horizon, and azimuth, its compass direction around the horizon. This movement is similar to a photographic tripod head or a camera pan-and-tilt system.
Manual versions may use a simple pivot, friction bearings, slow-motion controls, or a geared head. Computerized versions use motors on both axes to locate and track targets.
Why Does Alt-Azimuth Movement Feel Natural?
The observer sees the target move left, right, up, or down and corrects in the corresponding direction. This is especially convenient when locating the Moon, bright planets, birds, ships, mountains, or other visible subjects.
The main complication is that astronomical objects do not move across the sky in straight horizontal or vertical lines. Earth’s rotation makes them appear to follow curved paths. A manual alt-azimuth user must therefore make corrections on both axes as the target moves.
Does an Alt-Azimuth Mount Track the Sky?
A computerized alt-azimuth mount can track a target by operating both motors continuously. Tracking is useful for visual observing, planetary video, electronically assisted astronomy, and short-exposure imaging when the system is designed for those tasks.
However, keeping a target centered does not keep the camera’s orientation fixed relative to the stars. The field rotates during tracking because the mount remains aligned with the local horizon rather than Earth’s rotational axis. New Mexico State University, “Telescope Design Considerations,” explanation of field rotation on altitude-azimuth mounts Celestron, “Understanding Wedges for Alt-Az Telescopes,” official explanation of alt-az tracking, equatorial wedge mo...
Some advanced alt-azimuth systems address field rotation through a field derotator, a wedge, equatorial mode, or software that aligns and crops short frames. These solutions are model-specific and should not be assumed from the word “tracking” alone.
How Does an Equatorial Mount Work?
An equatorial mount tilts its RA axis so that it is parallel to Earth’s rotational axis. In the Northern Hemisphere, the axis is aimed toward the north celestial pole; in the Southern Hemisphere, it is aimed toward the south celestial pole.
The process of orienting the mount this way is called polar alignment. NASA explains that an equatorial telescope mount tracks by rotating around a tilted polar axis as Earth turns. NASA Science, Basics of Space Flight, “Chapter 2: Reference Systems,” explanation of equatorial and altitude-azimuth...
After polar alignment, the declination axis moves north or south across the celestial sphere, while the RA axis follows the apparent east-to-west motion caused by Earth’s rotation.
Why Is One-Axis Tracking Useful?
A centered star or planet drifts because Earth rotates. On an adequately aligned manual equatorial mount, the observer can compensate mainly with the RA slow-motion control.
A motorized equatorial mount can rotate the RA axis at a tracking rate. More accurate imaging may also require careful polar alignment, suitable gearing, autoguiding, calibration, and corrections for mechanical error. Equatorial geometry solves field rotation, but it does not guarantee perfect tracking.
What Is a German Equatorial Mount?
A German equatorial mount, or GEM, places the telescope on one side of the declination axis and counterweights on the other. This design can support many interchangeable optical tubes, but it adds balancing steps and collision considerations.
As a target crosses the meridian, some German equatorial systems must reposition the telescope to keep the tube, camera, or counterweight assembly from contacting the tripod or mount. This repositioning is called a meridian flip. The exact behavior depends on mount design, automation settings, tube length, and clearance. Celestron, CGX telescope system documentation, explanation of meridian-flip and clearance behavior on German equatori...
Which Mount Is Better for Visual Observing?
For casual and wide-field visual observing, an alt-azimuth mount is usually easier. It is quick to point, easy to explain to another person, and practical for sessions in which the observer moves among many targets.
For sustained high-magnification observation, an equatorial mount can be easier after polar alignment. Keeping Jupiter, Saturn, the Moon, or a double star centered requires mainly RA correction instead of coordinated two-axis movement.
Choose Alt-Azimuth for Visual Observing When:
- Setup time needs to remain short.
- The telescope must be carried through stairs, doors, or a small apartment.
- Several people will take turns pointing the telescope.
- Wide-field scanning is a priority.
- Daytime nature viewing is also planned.
- The observer prefers direct, intuitive movement.
- Long-exposure deep-sky imaging is not a goal.
Choose Equatorial for Visual Observing When:
- High-magnification tracking is a priority.
- The observer wants to learn RA and Dec coordinates.
- Motorized sidereal tracking may be added later.
- The additional tripod, head, and counterweight burden is acceptable.
- The user is willing to learn polar alignment and balancing.
- The telescope and accessories remain comfortably within the manufacturer’s payload and clearance limits.
A manual equatorial mount does not automatically locate targets. Setting circles, slow-motion controls, GoTo electronics, and tracking motors are separate features that vary by model.
Which Mount Is Better for Astrophotography?
For conventional long-exposure deep-sky astrophotography, a motorized equatorial mount is generally the more practical choice. A properly polar-aligned equatorial mount follows the sky without the normal field rotation produced by alt-azimuth tracking. New Mexico State University, “Telescope Design Considerations,” explanation of field rotation on altitude-azimuth mounts Celestron, “What Is Field Rotation? How Does It Affect My Scope’s Viewing and Imaging?” official knowledgebase
This conclusion applies specifically to long-exposure imaging of stars, nebulae, and galaxies. It does not mean an alt-azimuth mount is useless for every type of photography.
What Can an Alt-Azimuth Mount Photograph?
Depending on the telescope, camera, tracking accuracy, and software, an alt-azimuth mount can support:
- Lunar photographs.
- Short planetary videos.
- Bright-object snapshots.
- Short-exposure electronically assisted astronomy.
- Live stacking that aligns many brief frames.
- Some deep-sky imaging with cropping, frame rejection, or a derotator.
- Daytime photography.
Exposure limits cannot be reduced to one universal number. Field rotation changes with target position, latitude, field of view, sensor size, image scale, and the acceptable level of trailing.
Why Does Field Rotation Matter?
Imagine that a motorized alt-azimuth mount keeps the center of a star cluster in exactly the same location on the sensor. Stars near the edge still rotate around that center as the sky’s orientation changes.
A single brief exposure may hide the effect. During a longer exposure or a sequence covering more time, stars near the edge can trail or the stacking software may need to rotate and crop frames. The result is often uneven edges and reduced usable area.
Does Every Equatorial Mount Work for Deep-Sky Imaging?
No. Equatorial geometry is necessary for the standard long-exposure workflow, but mount quality and capacity still matter.
An imaging mount must carry the complete system with adequate stability and tracking performance, including:
- Optical tube or camera lens.
- Tube rings and dovetail.
- Main camera.
- Guide scope and guide camera, when used.
- Focuser and adapters.
- Filter wheel or drawer.
- Dew-control equipment.
- Cables that do not pull during movement.
A lightweight manual equatorial mount may be excellent for visual observation but unsuitable for a heavy long-exposure imaging system.
How Difficult Is Polar Alignment?
Polar alignment ranges from a rough visual orientation to a precise imaging procedure. For visual observing, a basic alignment is often enough to make one-axis tracking convenient. Sky-Watcher’s official guidance distinguishes rough visual alignment from the more accurate alignment required for astrophotography. Sky-Watcher, official FAQ, visual and imaging polar-alignment guidance
Accurate imaging alignment may use:
- A polar scope.
- A camera-based alignment routine.
- A mount’s software-assisted procedure.
- Plate solving.
- Drift alignment.
- A view of stars away from the pole when Polaris is blocked.
Polaris is close to the north celestial pole but is not exactly on it. Southern Hemisphere observers use the south celestial pole and different reference stars or software procedures.
A General Visual Polar-Alignment Workflow
The exact sequence varies by mount. Follow the manufacturer’s manual when it differs from this overview.
- Choose firm ground. Extend tripod legs only as much as necessary and secure every clamp.
- Set the mount for the observing latitude. Use the latitude scale as a starting point, not as a precision guarantee.
- Aim the polar axis toward the correct celestial pole. Use true north or true south rather than assuming a magnetic compass points directly at the pole.
- Attach and balance the equipment safely. Follow the specified order for the mount and keep control of the telescope and counterweights whenever an axis is unlocked.
- Center a low-power target. Confirm that the finder is aligned with the telescope.
- Track using the RA control. If the target rapidly drifts north or south, improve polar alignment.
A rough alignment can be sufficient for visual use. Long-exposure imaging requires a procedure appropriate to the focal length, exposure plan, and mount.
Is an Equatorial Mount Hard to Balance?
Balancing adds work, but it becomes routine when the same equipment is used repeatedly. The goal is to prevent the telescope or counterweight from swinging strongly when an axis is carefully unlocked.
A German equatorial mount must normally be balanced around both RA and Dec axes. Camera rotation, heavy eyepieces, filter wheels, guide scopes, and changing focus positions can alter balance.
Safety Rules for Balancing
- Follow the mount’s assembly order exactly.
- Keep one hand controlling the load before releasing an axis clutch.
- Never place fingers where a moving counterweight, shaft, saddle, or tube could pinch them.
- Confirm that the dovetail is fully seated and secured.
- Use safety stops where the hardware provides them.
- Do not balance on a sloped or unstable surface.
- Do not exceed the published payload.
- Recheck clearance through the full intended movement range.
Payload capacity is not the only stability factor. A long telescope tube can place more leverage on a mount than a compact tube of the same mass.
How Should You Compare Mount Capacity?
Add the mass of everything the mount must move, then compare the total with the manufacturer’s stated payload and intended use. Do not count only the bare optical tube.
Hypothetical Load Calculation
Suppose a beginner plans to mount:
| Component | Hypothetical mass |
|---|---|
| Optical tube | 4.5 kg |
| Tube rings and dovetail | 0.6 kg |
| Diagonal and eyepiece | 0.5 kg |
| Finder | 0.3 kg |
| Dew shield and small accessories | 0.2 kg |
| Total moving load | 6.1 kg |
If a mount is rated for 6 kg, this combination already exceeds the stated capacity. Even a rating slightly above 6.1 kg would not automatically guarantee satisfactory imaging because tube length, wind, tripod stiffness, balance, focusing force, and tracking expectations also matter.
The example is a calculation method, not a universal recommendation. Some manufacturers publish different visual and imaging limits, while others provide only one payload figure.
How Can You Use the TRACK Decision Framework?
The TRACK framework is an original decision tool for choosing a mount according to the full observing experience.
T — Type of Observing
Define the primary activity before comparing hardware:
- Casual visual observing.
- High-magnification visual tracking.
- Terrestrial viewing.
- Planetary video.
- Electronically assisted astronomy.
- Long-exposure deep-sky imaging.
An alt-azimuth mount is usually the simpler starting point for the first and third activities. An equatorial mount becomes more valuable as accurate celestial tracking matters more.
R — Readiness for Alignment
Ask whether you are willing to:
- Identify the correct celestial pole.
- Set the mount latitude.
- Learn the RA and Dec axes.
- Balance the telescope.
- Repeat alignment after moving the tripod.
- Use software or a polar scope when greater accuracy is required.
If these steps would prevent regular use, choose a simpler alt-azimuth system unless imaging requirements make an equatorial mount necessary.
A — Added Equipment
List every additional item created by the mount choice:
- Counterweights.
- Power supply.
- Hand controller or mobile device.
- Polar scope.
- Extra cables.
- Wedge or field derotator.
- Carrying case.
- Heavier tripod.
- Guiding equipment.
A mount that appears compact in a product image may become a multi-piece system after required components are included.
C — Carrying and Clearance
Measure the complete route from storage to observing location.
Check:
- Heaviest individual part.
- Total number of trips.
- Tripod footprint.
- Counterweight handling.
- Tube-to-tripod clearance.
- Eyepiece position.
- Balcony railing clearance.
- Meridian-flip clearance for a GEM.
- Cable movement across the full tracking range.
A mount is not easy to use if it fits the observing goal but remains too difficult to transport safely.
K — Keep-or-Grow Plan
Decide whether the mount is:
- A simple visual platform intended to remain simple.
- A mount for several optical tubes.
- A future GoTo or motorized system.
- A long-exposure imaging platform.
- A travel mount.
- A permanent or semi-permanent installation.
Avoid buying a complex equatorial mount only because astrophotography is a vague future possibility. Also avoid buying an undersized mount when a defined imaging system will be assembled soon.
What Does the TRACK Decision Tree Recommend?
Use this sequence:
Is long-exposure deep-sky imaging a defined goal?
- Yes: begin by evaluating a motorized equatorial mount with suitable capacity and tracking support.
- No: continue.
Is direct visual observing the main goal?
- Yes: continue.
- No: compare the requirements of the specific activity, such as EAA, planetary video, or terrestrial use.
Do you prioritize fast setup and intuitive pointing?
- Yes: start with an alt-azimuth mount.
- No: continue.
Do you frequently observe planets or double stars at high magnification?
- Yes: compare a tracked alt-azimuth system with an equatorial mount.
- No: an alt-azimuth mount is usually the simpler choice.
Are weight, stairs, or storage major constraints?
- Yes: compare complete packed systems; a light alt-azimuth mount will often be easier.
- No: choose according to tracking, ergonomics, and future plans.
Are you comfortable with polar alignment, counterweights, and possible meridian flips?
- Yes: an equatorial mount may provide useful long-term flexibility.
- No: do not add those steps unless the observing goal requires them.
What Do Real-World Scenarios Suggest?
Scenario 1: A Family Observes the Moon From a Backyard
The family wants ten- to thirty-minute sessions and several people will take turns pointing the telescope. Long-exposure imaging is not planned.
A stable alt-azimuth mount is usually easier because setup and explanation are simple. Slow-motion controls can help keep the Moon or a planet centered without adding polar alignment and counterweights.
Scenario 2: A Beginner Mainly Observes Saturn at High Power
The observer does not mind a longer setup and wants Saturn to remain centered while studying fine detail.
A manual equatorial mount with adequate stability can be convenient because the observer mainly turns the RA control after alignment. A motorized alt-azimuth mount can also work well, so the decision should include power, alignment software, portability, and mount quality.
Scenario 3: An Apartment Resident Carries Equipment Down Stairs
The user must carry every component alone and has a narrow storage closet.
A lightweight alt-azimuth mount may be more practical than a German equatorial mount with a separate head, tripod, and counterweight. The buyer should compare the heaviest component and number of trips, not only total system mass.
Scenario 4: A Beginner Wants Long-Exposure Galaxy Images
The planned system includes a camera, guiding, filters, and repeated multi-minute or stacked exposures.
A motorized equatorial mount is the coherent starting point. The buyer should choose the mount around the complete imaging load and focal length rather than spending the budget primarily on telescope aperture.
Scenario 5: A User Wants Both Birding and Astronomy
The telescope will be used on daytime landscape and wildlife targets, then on the Moon and bright deep-sky objects at night.
An alt-azimuth mount is usually more intuitive because it sweeps naturally along the horizon and upward. An equatorial mount can be repositioned for terrestrial use, but its tilted axes are generally less convenient. Celestron, “Should I Use an Alt-Az or Equatorial Mount?” official knowledgebase
Scenario 6: A Classroom Needs Shared Screen Viewing
The instructor wants automated target finding, tracking, and a camera display but does not plan long single exposures.
A computerized alt-azimuth system may offer faster group setup and comfortable screen sharing. The school should still check field rotation, image-export limits, power, network restrictions, App support, and safe supervision.
What Common Mount-Buying Mistakes Should Beginners Avoid?
Assuming GoTo and Tracking Mean the Same Thing
GoTo moves the telescope to a selected target. Tracking keeps following the target after it is centered. A mount may support one, both, or neither depending on its motors and controller.
Assuming Every Equatorial Mount Is an Imaging Mount
A light manual equatorial mount may track visually but lack the stiffness, motors, payload, guiding support, or accuracy required for a particular camera system.
Comparing Payload by Telescope Weight Alone
The complete moving load includes rings, dovetails, eyepieces, cameras, focusers, filters, guide equipment, and cables. Tube length and wind exposure also affect stability.
Ignoring the Tripod
A strong mount head on a weak tripod can still vibrate. Tripod stiffness, leg extension, ground contact, and accessory-tray bracing affect focusing and high-power viewing.
Buying for an Undefined Future
“Maybe I will do astrophotography” is not a complete equipment plan. Define the targets, camera, focal length, exposure style, portability, and processing expectations before accepting the weight and cost of an imaging mount.
Forgetting Eyepiece Position
A refractor diagonal may rotate into a comfortable position, while a Newtonian reflector on a German equatorial mount can place the focuser at awkward angles. Rotating tube rings may help, but they add cost and setup considerations.
Confusing Polar Alignment With GoTo Alignment
Polar alignment physically points the RA axis toward the celestial pole. GoTo or star alignment teaches the computerized mount how its pointing model relates to the sky. Some systems require both.
Expecting Polar Alignment to Fix Every Tracking Error
Polar alignment reduces drift and field rotation, but gear error, flexure, balance, wind, cable drag, guiding, and tripod movement can still affect images.
What Should You Check Before Buying a Mount?
Observing Goals
- I know whether my main goal is visual observing, planetary video, EAA, terrestrial use, or long-exposure imaging.
- I understand whether I need direct manual pointing, GoTo, tracking, or all three.
- I know whether field rotation matters for my planned imaging workflow.
- I have considered trying both mount types at an astronomy club or public observing event.
Capacity and Compatibility
- The saddle and dovetail standards match the telescope or an approved adapter is available.
- The published payload covers the complete moving load.
- The telescope length does not create unacceptable leverage or collision risk.
- The tripod and mount head are suitable for the intended magnification or imaging scale.
- The focuser and eyepiece remain reachable through the observing range.
Setup and Portability
- I can safely lift the heaviest component.
- Counterweights, tripod, head, telescope, power, and accessories fit the storage route.
- The tripod footprint fits the balcony, yard, or observing pad.
- I can complete the normal setup within the time available.
- The mount remains stable on the intended surface.
Tracking and Software
- I know whether motors are included or optional.
- I know the required power voltage, current, connector, and polarity.
- The controller or App supports my current device.
- Firmware and driver support are available for the intended computer system.
- GoTo alignment, polar alignment, and tracking requirements are understood.
- The mount supports guiding or computer control if the imaging plan requires them.
Safety and Support
- The mounting hardware has safety stops or secondary retention where specified.
- The counterweight shaft and telescope cannot strike people, furniture, railings, or tripod legs.
- The return policy accounts for heavy-item shipping.
- Warranty and repair locations are acceptable.
- Replacement cables, controllers, clutches, and adapters remain available.
- I will not open or modify the mount unless the manufacturer authorizes the work.
How Can You Troubleshoot Common Mount Problems?
| Problem | Likely causes | First checks |
|---|---|---|
| Telescope shakes during focusing | Weak tripod, extended legs, loose hardware, wind, overloaded mount | Shorten the legs, tighten fittings, reduce wind exposure, and verify the complete load |
| Alt-az target quickly leaves the field | High magnification, no tracking, stiff motion, poor balance | Use lower power, adjust friction or balance as instructed, and practice coordinated two-axis corrections |
| Equatorial target drifts north or south | Polar alignment error | Recheck latitude and pole direction, then use a more accurate procedure if needed |
| RA motor runs but target still drifts | Wrong tracking rate, poor alignment, low power, slipping clutch, excessive load | Confirm rate and hemisphere, check power and clutches, then verify polar alignment |
| Telescope swings when an axis is released | Unsafe imbalance | Secure the axis, control the load by hand, and rebalance according to the manual |
| GoTo misses targets | Incorrect time, location, alignment stars, home position, leveling, or mode | Verify settings and repeat the exact alignment procedure for the mount |
| Stars rotate around the frame | Alt-azimuth field rotation | Shorten exposures, use live stacking, crop the result, or use supported equatorial/derotation hardware |
| Stars trail in one direction on an equatorial mount | Tracking, polar alignment, periodic error, guiding, flexure, or vibration | Test shorter exposures, inspect balance and cables, and separate alignment error from gear or guiding error |
| Tube or camera approaches the tripod | Clearance or meridian-flip issue | Stop movement, review slew limits and cable routing, and never allow unattended collision |
| Controls feel reversed or diagonal | Unfamiliar axis orientation, diagonal image, or controller settings | Practice on a bright target at low power and confirm direction settings in the manual |
Stop using the mount if a clamp, saddle, tripod leg, counterweight shaft, power connector, or structural part appears damaged. Do not place expensive equipment on hardware that cannot securely retain it.
Which Mount Is the Practical Choice?
Choose an alt-azimuth mount when simplicity, portability, natural pointing, daytime use, and visual observing are the priorities.
Choose an equatorial mount when one-axis celestial tracking, coordinate learning, or long-exposure deep-sky imaging justifies polar alignment, balancing, counterweights, and additional setup.
Choose a motorized alt-azimuth mount when easy GoTo visual observing, planetary video, or short-exposure live stacking matters more than conventional long-exposure imaging.
The easiest mount is not always the one with the fewest controls. It is the mount whose complete setup, movement, tracking behavior, weight, and software match the way the owner will actually observe.
Frequently Asked Questions
Can an alt-azimuth mount follow planets?
Yes. A manual alt-azimuth mount follows a planet through repeated altitude and azimuth corrections, while a motorized model can track on both axes. Tracking quality and setup requirements depend on the mount.
Do I need an equatorial mount for photographing the Moon?
Not necessarily. The Moon is bright enough for short exposures, so many alt-azimuth mounts can support lunar snapshots or video. An equatorial mount becomes more important for longer deep-sky exposures and workflows where field rotation must be controlled.
Is a manual equatorial mount easier than a computerized alt-azimuth mount?
It depends on the task. The manual equatorial mount may be easier for one-axis tracking after polar alignment, while the computerized alt-azimuth mount may be easier for automatic target finding. The computerized system also adds power, alignment, controller, and software requirements.
Can I convert an alt-azimuth mount into an equatorial mount?
Some fork or integrated alt-azimuth systems can operate on a compatible wedge, which tilts the tracking axis toward the celestial pole. Compatibility, payload, clearance, alignment procedure, and imaging performance are model-specific. Celestron, “Understanding Wedges for Alt-Az Telescopes,” official explanation of alt-az tracking, equatorial wedge mo...
Does an equatorial mount need Polaris?
No. Northern Hemisphere users often use Polaris as a convenient reference, but software-assisted, plate-solving, or drift-alignment procedures can work when Polaris is blocked. Southern Hemisphere users align to the south celestial pole.
Which mount is better for a Dobsonian telescope?
A traditional Dobsonian base is an alt-azimuth mount optimized for stable visual movement and aperture-efficient design. Equatorial platforms can add limited tracking to some Dobsonians, but compatibility, duration, reset procedure, and stability should be checked for the exact telescope.
Sources
The following sources were accessed on July 30, 2026. Product features and support procedures can change.
- NASA Science, Exoplanet Watch Glossary, definition of an alt-azimuth mount
- NASA Science, Basics of Space Flight, “Chapter 2: Reference Systems,” explanation of equatorial and altitude-azimuth...
- Celestron, “Should I Use an Alt-Az or Equatorial Mount?” official knowledgebase
- New Mexico State University, “Telescope Design Considerations,” explanation of field rotation on altitude-azimuth mounts
- Celestron, “Understanding Wedges for Alt-Az Telescopes,” official explanation of alt-az tracking, equatorial wedge mo...
- Celestron, CGX telescope system documentation, explanation of meridian-flip and clearance behavior on German equatori...
- Celestron, “What Is Field Rotation? How Does It Affect My Scope’s Viewing and Imaging?” official knowledgebase
- Sky-Watcher, official FAQ, visual and imaging polar-alignment guidance
- Michigan State University Abrams Planetarium, “Telescope Guide,” explanation of sky motion and equatorial-mount count...
- University of Nebraska–Lincoln, Nebraska Astronomy Applet Project, “Two Systems: Celestial, Horizon,” celestial and h...
- BBC Sky at Night Magazine, “What’s the Difference Between an Equatorial Mount and an Altazimuth Mount?” specialist ov...
- Sky-Watcher, official EQ5 mount specifications, example of payload, counterweights, slow-motion controls, and polar-a...
Editorial Method
Editorial method: Technical claims were checked against the sources listed above. No hands-on mount testing is claimed.
More from Eyepieces Mounts & Accessories
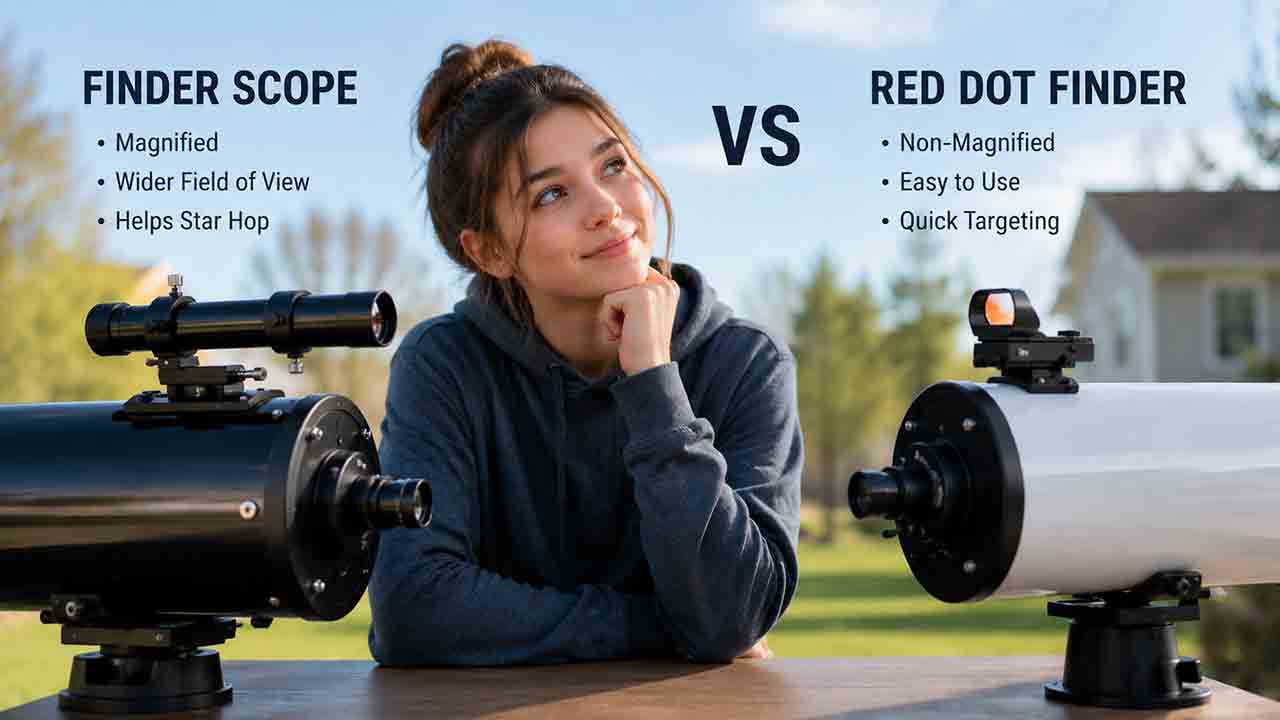
Finder Scope vs Red Dot Finder: Which One Should You Choose?
A red dot finder is usually the easier choice for quickly pointing a telescope at the Moon, planets, bright stars, or computerized-mount alignment targets. An optical finder scope is more useful when the observer needs magnification, additional light gathering, and detailed star patterns to locate faint clusters, nebulae, or galaxies. This guide compares unmagnified red dot sights with straight-through, right-angle, correct-image, and illuminated optical finders. It explains field of view, image orientation, light-pollution performance, batteries, ergonomics, mounting compatibility, alignment, and solar safety. The original SIGHT decision framework helps readers evaluate sky visibility, image orientation, geometry, hardware, and targeting method. A field-of-view calculation, dual-finder workflow, real-world scenarios, decision tree, buying checklist, common mistakes, and troubleshooting table help beginners choose a finder that matches their telescope and observing style
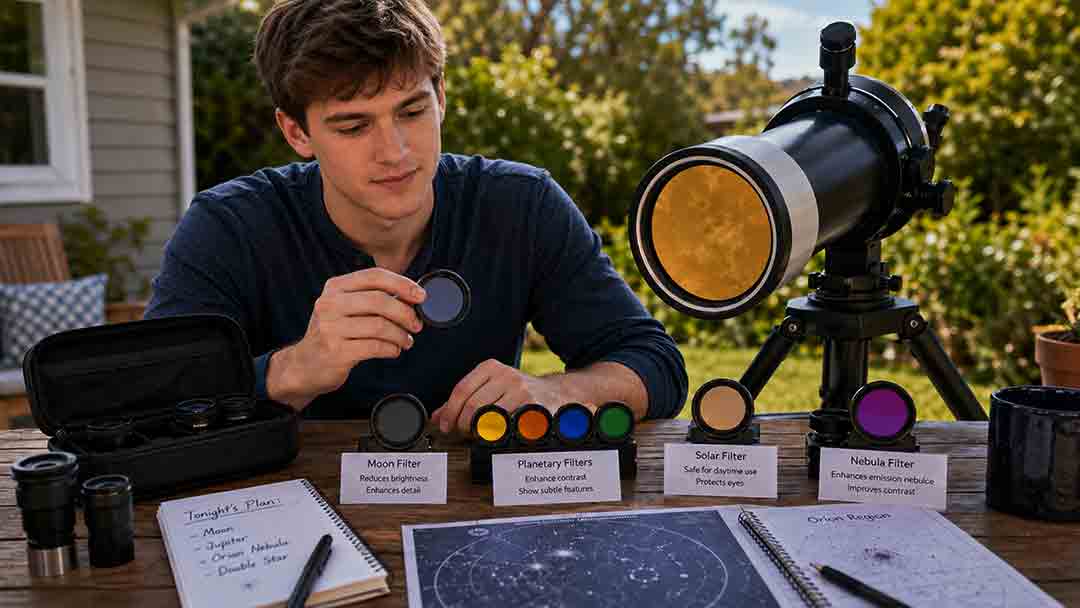
Telescope Filters Explained: Moon, Planetary, Solar, and Nebula Filters
Telescope filters solve different observing problems and should never be treated as interchangeable accessories. This guide explains how neutral-density and variable polarizing filters can improve lunar comfort, how colored planetary filters selectively change contrast, why telescope solar filters require strict front-aperture safety, and how UHC, OIII, H-beta, and broadband filters affect selected deep-sky targets. It also clarifies why nebula filters usually do not improve galaxies, star clusters, or reflection nebulae. Readers receive a target-based comparison framework, an 8-inch Dobsonian example, visual-versus-imaging guidance, 1.25-inch and 2-inch compatibility checks, troubleshooting steps, solar-safety rules, and a detailed buying checklist. The central recommendation is to choose filters by target, transmission behavior, optical system, and intended use rather than by darkness, marketing name, or price

Do You Need a Barlow Lens? Benefits, Limits, and Buying Tips
Telescope eyepiece sizes describe two different specifications: focal length in millimeters and barrel diameter in inches. This guide explains both, then shows readers how to calculate magnification, exit pupil, and true field before purchasing an accessory. It compares common focal-length ranges from 3 mm to 40 mm, identifies practical uses for the Moon, planets, star clusters, nebulae, galaxies, double stars, and wide-field scanning, and clarifies when a 1.25-inch or 2-inch eyepiece is appropriate. Readers also receive focal-ratio and magnification tables, a worked 200 mm f/6 Dobsonian example, a three-eyepiece decision framework, fixed-versus-zoom and Barlow guidance, compatibility checks, troubleshooting steps, and a buying checklist. The central recommendation is to build a small set of distinct low-, medium-, and high-power options rather than purchasing overlapping focal lengths."
Explore More Topics
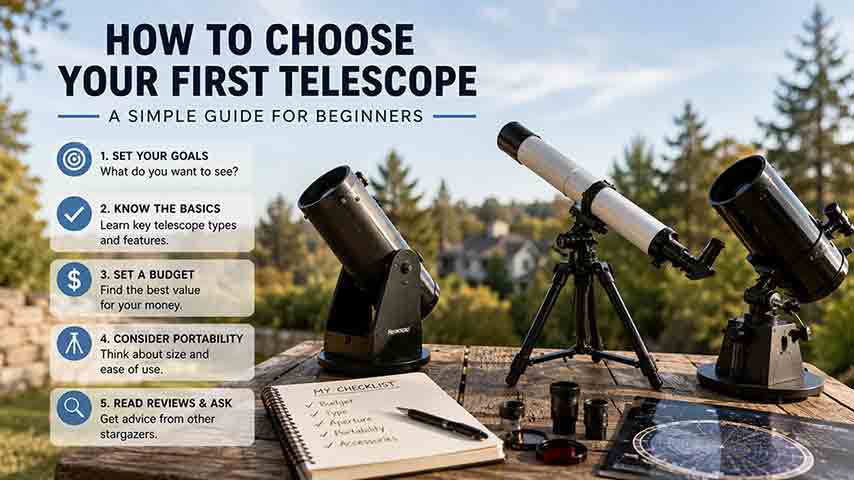
How to Choose Your First Telescope: A Beginner’s Buying Guide
Choosing a first telescope requires more than comparing aperture or advertised magnification. This practical beginner’s guide explains how to match a telescope to observing goals, light pollution, storage space, setup tolerance, and interest in visual observing or imaging. It compares refractors, Dobsonian reflectors, compound telescopes, and smart telescopes, then shows how aperture, focal length, focal ratio, magnification, and mount stability affect real use. Readers can use a quick-selection table, the original SPACE decision framework, a worked specification comparison, realistic household scenarios, new and used equipment checklists, and a troubleshooting chart. The guide also explains why a larger aperture cannot fully overcome bright urban skies, what to verify before buying a software-dependent smart telescope, and how to observe the Sun safely. Recommendations are based on authoritative guidance and published specifications rather than hands-on product testing or paid rankings
How Much Should You Spend on Your First Telescope?
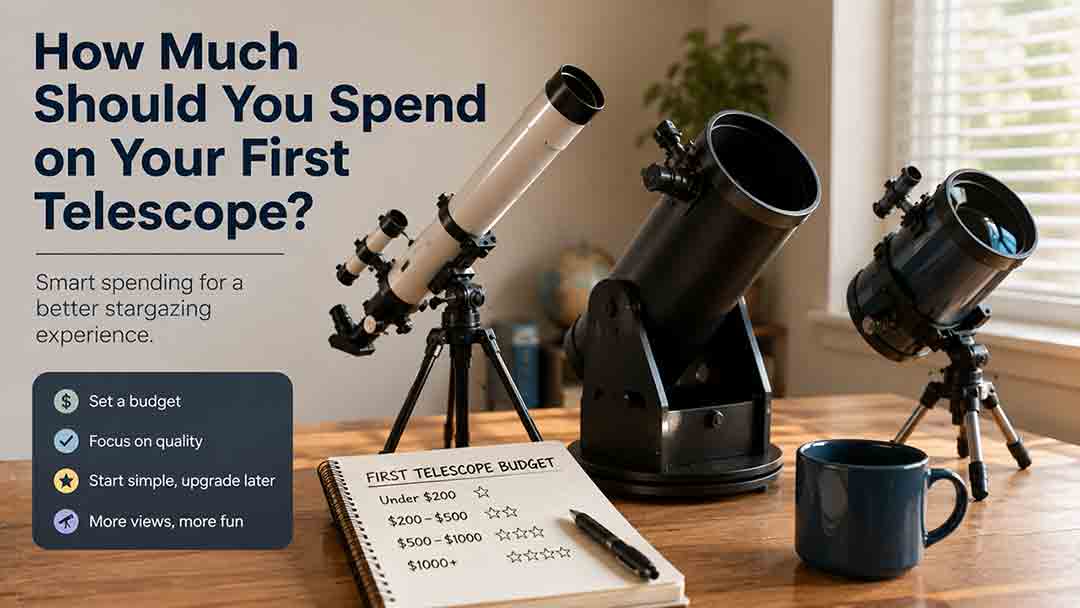
Most beginners should plan a complete first-telescope budget of roughly $350–$700, although the right amount depends on observing goals, portability, automation, and whether the buyer wants direct eyepiece viewing or screen-based imaging. This guide explains what different budget ranges can realistically provide, why very low-cost telescope packages require caution, and when spending more for aperture, GoTo control, smart imaging, or compact optics is justified. It also separates visual astronomy from modular astrophotography, calculates total ownership cost, and shows how accessories, power, storage, shipping, and software can change the real price. The original FIRST Budget Test helps readers evaluate favorite targets, included equipment, real-world portability, desired skills, and total cost. Practical scenarios, a buying checklist, common mistakes, troubleshooting guidance, safety information, and current US market examples help beginners choose a stable, complete setup they are likely to use regularly.
Are Smart Telescopes Worth It for Beginners?
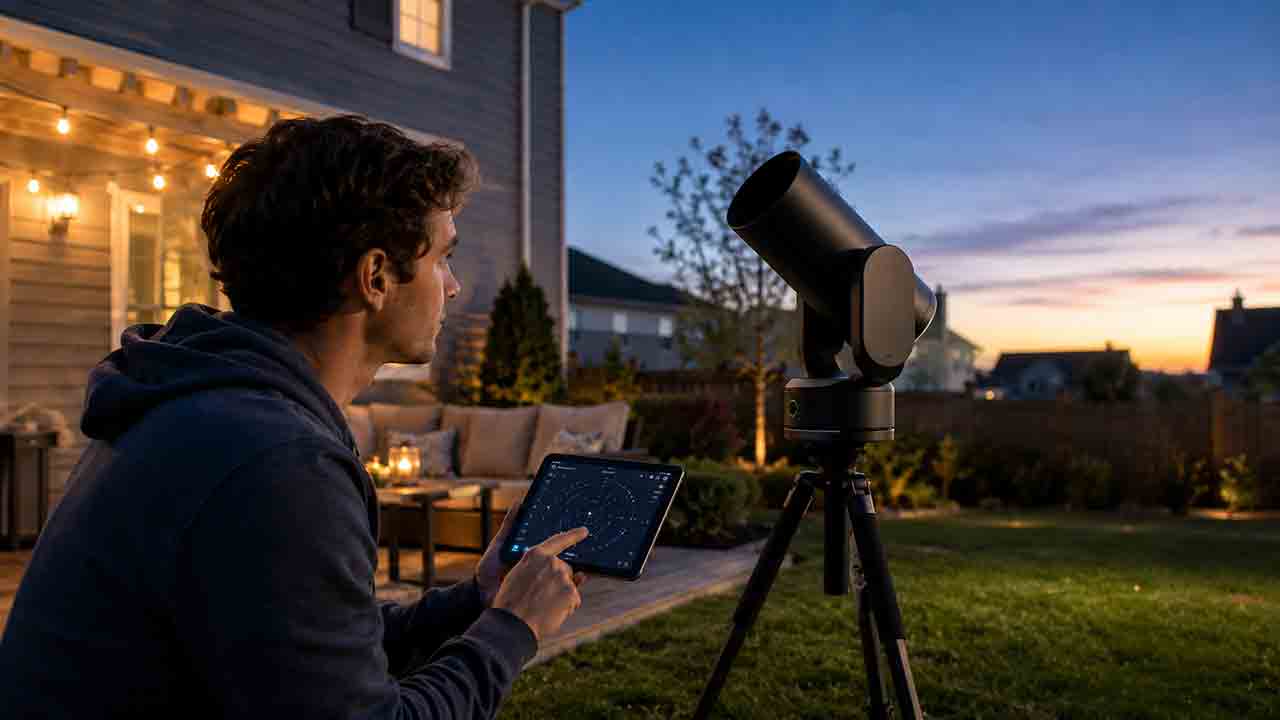
Smart telescopes can be worthwhile for beginners who want automated target finding, live-stacked deep-sky images, and a compact system controlled from a phone or tablet. However, they are not a universal replacement for traditional telescopes. Beginners who value direct eyepiece views, high-magnification planetary observing, manual sky navigation, or component-by-component upgrades may prefer a refractor, reflector, or catadioptric telescope. This guide explains how smart telescopes combine optics, cameras, motorized tracking, and image processing; compares them with traditional and modular imaging setups; and examines costs, software dependence, batteries, light pollution, target suitability, and long-term flexibility. It also provides the original WORTH decision framework, a hypothetical cost-per-session example, real-world beginner scenarios, a purchase checklist, common mistakes, and troubleshooting steps. The goal is to help readers choose based on their actual observing style rather than marketing claims or specifications alone